Showing posts with label dinner. Show all posts

9.11.2012

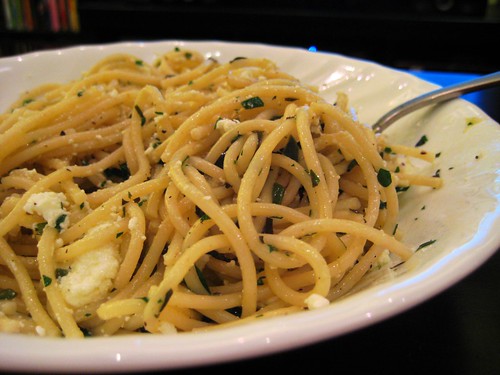
Spaghetti with Herbs and Chilis

I wish I had a clever name for this because it really was clever, you see...

Last Saturday night, Jordan and I decided to head out for dinner...  We had a destination and a plan in mind but when we got there, we found out they were closed for a private party...  

BOO...

One of the problems with having a specific plan in mind is that when things dont go right, its harder to rebound...  so we wandered around for a little while looking for alternatives and eventually ended up at Franny's.

The original plan was based on Jordan's desire to sit at a restaurant bar and eat a bowl of pasta (he has strange cravings, that one...)  So when we got to Franny's, there was little question - we were sitting at the bar and splitting a pizza and a pasta...

It worked out so well that we're frightened for our bank account when Franny's moves even closer to our apartment...  

but i digress...

The next night was our traditional pasta night, so we thought 'why not try to re-create last night's pasta???'  I'm never good at this game, but I figured why not?

IMG_0114

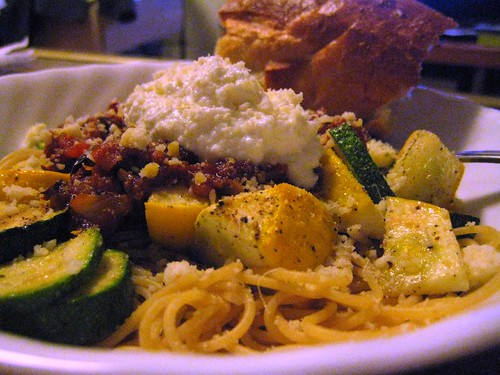
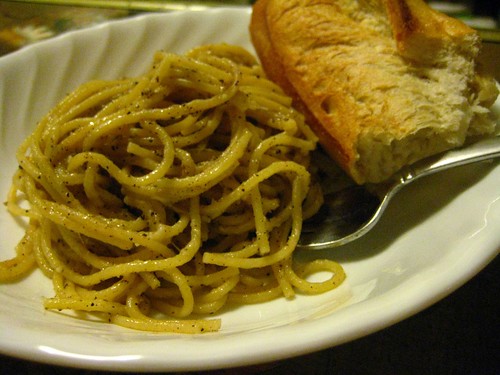
Turns out we hit the nail on the head...  Squarely on the head.  I have no idea if our ingredients or methods were the same, but i can tell you this - the similarity in taste was remarkable...  Another light and easy pasta, in the books.

Don't worry Franny's - we still fear for our bank account :)


Spaghetti with Herbs and Chilis
courtesy of us, inspired by Franny's


1/2 lb good quality spaghetti
2 tbsp butter
2 tbsp olive oil
3/4 of a small poblano pepper, minced
3 - 4 cloves of garlic, smashed and roughly chopped
~ 1 tbsp minced basil
~ 1.5 tbsp minced mint
~ 2 tbsp minced flat leaf parsley
generous 1/2 c fresh ricotta
salt & pepper (optional)

***

Cook spaghetti in accordance with directions on package for al dente spaghetti

While spaghetti is cooking, melt butter & heat olive oil in a large frying pan over low heat.

When butter is fully melted, stir in poblanos and garlic.

Saute for 2 - 3 minutes, stirring once or twice.

Add ~ 1/4 c pasta water to the pan and stir

Allow to saute another couple of minutes, again stirring once or twice.  

Add another ~ 1/4 of pasta water if desired.

Drain pasta and add to frying pan.

Toss together until spaghetti is well-coated with the oil/butter mixture.

Remove from heat.

Stir in herbs.  Toss again to combine.

Separate onto two plates and top each with half of the ricotta.  

Stir ricotta into pasta.

Salt & pepper to taste.

Serve with a baguette and a couple glasses of wine.

9.04.2012

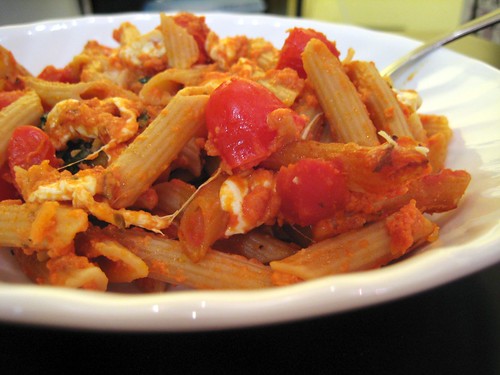
Creamy Caprese Pasta

Quick!  Before summer is actually gone, before the tomatoes turn anemically pink...

Make this!

I honestly don't have a ton to say about this one, but it's good!  And easy!  And doesn't make a ton of mess...

Really, what else is there in life?

Fresh basil and good tomatoes are about to become much more difficult to find, so you might as well go ahead and make this sooner rather than later, because good ingredients are key in something this simple.

IMG_0102

Seriously, stop reading.  Go cook.


Creamy Caprese Pasta 
courtesy of How Sweet Eats with only minor adaptation by me
click here to import directly into Pepperplate

1/2 lb whole wheat penne or other small noodle
1 c prepared pasta sauce (we used Newman's Own Roasted Garlic)
1/3 c light cream
1/3 c freshly grated Parmesan
4-5 oz fresh mozzarella, about 3 oz cut into cubes, the rest in thinly sliced rounds
3/4 pint grape tomatoes, halved
a small handful of basil, chiffonaded (no, i don't know if that's the proper way to use that word, but here's how to chiffonade - thanks to VeganYumYum!)

***

Preheat oven to 350° and lightly grease a baking dish.

Cook pasta about 2-3 minutes less than it says on the box.

Just before pasta is done, heat pasta sauce in a large pan over low heat.  Stir in the cream and Parmesan.  Allow to simmer for a few minutes.

Once pasta is ready, remove the sauce from the heat and stir in pasta.

Add mozzarella cubes (but not the rounds), the tomatoes and the basil and stir to combine.

Pour the mixture into the baking dish and top with mozzarella rounds.

Bake for ~25 minutes, until cheese is just a bit golden.

Allow to sit for a couple of minutes and then serve.

8.27.2012

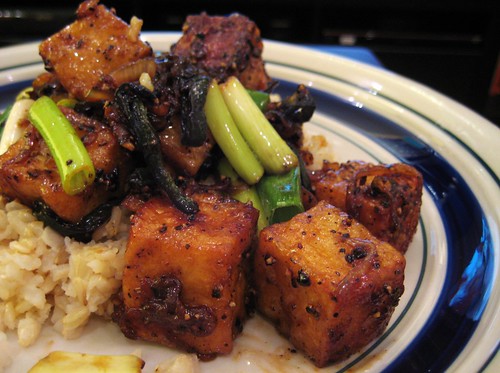
Black Pepper Tofu

A few weeks ago, a friend and I were having what could only be described as a riveting conversation about tofu.

What?  You don't find conversations about tofu riveting?  Pssshhh......

Anyway, during this riveting conversation, she mentioned that she no longer buys the widely available, pre-packaged processed stuff and that I should stop too... And I'm all like, 'and buy what instead? are you suggesting i make tofu now?  please...'

But no...  It turns out, you can buy fresh tofu... and apparently its better... so on my next coop visit, i looked into this fresh tofu thing and when i found some, i bought it. right away.

Now, the truth is, despite having eaten said tofu last night, i have no idea if it was actually any better... because isnt the point of tofu that it doesnt taste like anything?  but i digress...

So, we have this block of life-altering tofu in our fridge but no plans... I considered making my standby but, really, wanted something different... so, to really shake things up, we pulled out a real-life cookbook.  not a pinterest recipe... not a google search... a real life, hard cover cookbook... and that cookbook was Plenty. We've had Plenty for over a year now, (it was a birthday - or was it christmas? - present to me from Jordan), but we'd never made anything from it...

But this was our time... We found Black Pepper Tofu... Looked good, sounded interesting... contained ingredients we'd never heard of... so why not? And while it did take us over a week to getting around to finally making it, we did it. we finally used the cookbook! (there are even oil splatters all over the pages to prove it, too...)

related: do you have any idea how hard it is to find kecap manis (sweet soy sauce)? turns out, it's about a week's worth of hard... I suspect you could leave it out or just use a little molasses instead but we're nothing if not perfectionists... or ingredient-hoarders... eh, let's stick with perfectionists - it makes me feel better...

IMG_0092 


I'm thankful to all those who came before us - all of the reviews, etc we found online allowed us to tweak this recipe a bit and turn it into something we really, really enjoyed...

Oh, and a bonus? We FINALLY used our rice cooker... we've only had the silly thing for a year and 10 months now... Banner day in our household, huh?


Black Pepper Tofu
adapted by us from Plenty - Yotam Ottolenghi
Click here to import directly into Pepperplate

3 to 4 tbsp canola oil

15 oz. firm tofu, cut into 1″ cubes
cornstarch

4 tbsp (1/2 stick) unsalted butter
1.5 tbsp finely chopped ginger
4 shallots, thinly sliced
6 to 7 cloves garlic, smashed
1 poblano pepper, stemmed, deseeded and thinly sliced

2 tbsp coarsely ground black pepper
1.5 tbsp kecap manis (sweet soy sauce)
1.5 tbsp light soy sauce
2 tsp dark soy sauce
1 tbsp sugar

6 to 8 small scallions, cut into 1″ pieces

2 c cooked brown basmati rice

***

Heat vegetable oil in a large skillet over medium to medium-high heat. (no need to use non-stick, this doesn't stick anyway)

Toss tofu cubes in a bowl with cornstarch to coat.
Pan-fry tofu all over, until golden on all sides. (This will require turning frequently and you'll want to use a tong to avoid burns).
Place fried tofu on a paper towel to drain, cover with another paper towel and set aside.

Pour out excess oil and carefully wipe skillet with a paper towel.
Return skillet to medium heat and add butter. Allow butter to melt and then add ginger, shallots, garlic, and poblano. Cook until soft and shallots are beginning to caramelize, about 15-20 minutes.

Stir in black pepper, soy sauces, and sugar.
Return tofu to skillet and toss to coat.
Cook, stirring, until fully combined and warmed, 2 - 3 minutes.

Stir in scallions & serve over brown basmati rice.

7.31.2012

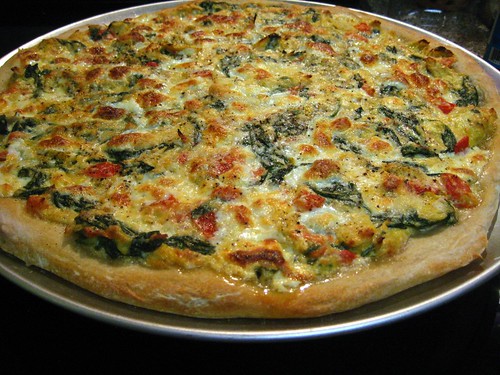
Spin Dip Pizza

Aaannnddd, I'm back!

Did you miss me???

Wanna hear a funny story?

About 3 months ago, we moved...  and I had this whole big blog dilemma - my blog's name is Kitchen Hell because cooking in my tiny kitchen was hell!  But the new apartment?  we pretty much bought it 50% for the kitchen, 30% for its proximity to the Greenmarket and 20% for the view...  Notice that means that 70% of why we bought this particular apartment is food related...  which means hell no more, right?

Yeah, that's what i thought...  Turns out, I was a bit too optimistic in that full elimination of hell...
because now we have a whole host of new problems to deal with...  Cabinet shelves that fall down, cabinet hinges that all need to be replaced (unless we enjoy having our cabinets held closed by packing tape), cabinets that were poorly designed...  (I mean, I love my huge pantry, but, um, if i put a box of pasta 21" back, i'm never seeing that pasta again...  why would someone build something that deep without roll-out shelves???)

And then there's the one that makes me want to smack myself in the face for even thinking it, but...  I've learned that i really, really liked having all of my pots & pans hanging on the wall behind me...  it was SO easy!!!  now with all of this cabinet space, things are buried and getting to that frying pan requires that i disassemble the entire cabinet...  which will need to be done again when we want to put it away...

first world problems, i know...

but those first world problems combined with a longer commute (and therefore a later getting-home-time) and not having the greatest grocery store on the planet just a block away (oh fairway, how i miss you!) means my motivation has been lacking, to say the least...

However, in the past week or two, the entirety of tumblr has been talking about this spinach artichoke pizza from How Sweet Eats...  And since last night was my shift at the co-op (oh yes, we ARE those people, thankyouverymuch!) I knew that i'd be motivated after seeing everyone else's purchases, plus I'd be right there at the best grocery option around and could pick up everything I needed...

And it didnt require too many pots & pans...

IMG_0063

Finally, the perfect storm of possibility...


Spin Dip Pizza
courtesy of me, as adapted from How Sweet Eats
Click here to import directly into Pepperplate

1 whole wheat pizza crust

1 (14 oz, pre-draining) can of artichoke hearts
2/3 c ricotta cheese
8 oz fresh mozzarella, chopped/crumbled, divided
4 oz grated parmesan cheese, divided

2 tbsp olive oil, divided
2 shallots, minced
3 to 4 plum tomatoes, diced
5 oz baby spinach

salt & pepper

***

Preheat oven to 450°.
Prepare pizza tray and set aside.
Toss/stretch crust to desired size/shape and place on pizza tray.

Place ricotta, 1/4 c parmesan and 1/2 c mozzarella in a medium mixing bowl.

Drain artichokes and roughly chop. Wrap in paper towels and squeeze to eliminate moisture.
Add artichokes to cheeses and stir to combine. Set aside.

Heat a large skillet w/ 1 tbsp olive oil over med-low heat.
Add in shallots with a pinch of salt and cook until soft and translucent, about 5 minutes.

Add in tomatoes and allow to cook for another minute or two.

Add spinach, tossing to coat and cook until spinach is wilted.

Remove from heat and add spinach mixture to the bowl with the cheese/artichoke mixture. Season with salt and pepper and stir to combine.

Drizzle pizza dough with 1 tbsp olive oil.

Spread cheese/spinach/artichoke mixture evenly over top.

Cover with remaining mozzarella and parmesan.

Bake for 25-30 minutes, or until cheese is golden and bubbly and crust is a bit crispy.

Allow to sit 5 mins before serving.

3.07.2012

Croque-Végétarien & Croque-Monsieur

So, you know how there really wasn't much winter this year?

Its been like, November (but without the rain), all winter long.

We're so spoiled by it...  Because this year, any time it goes below 35 or is rainy, we're all 'ew, gross!  couch!  comfort food!'

Since our honeymoon in Paris was quite rainy and chilly, one of the newer additions to our 'ew, gross! couch! comfort food!' repertoire is the Croque Monsieur.  While in Paris there was more than one night where the sightseeing got in the way of the marathon dinner events that we planned for many of the nights and, as a result, we ended up at Cafe Le Depart-St. Michel more than once...  While it wasnt much more than our equivalent of a 24 hour diner, it was open 24 hours (important to NYers who are used to such things) and close to our hotel(s) to boot, so it worked.  And this cafe's croque végétarien was one of the best I had while we were there...


This version is my favorite of all of the ones I've had since leaving paris (admittedly, there havent been that many, but this one is good, i promise!) and will probably become my new standard, not to mention a regular part of the 'ew, gross! couch! comfort food!' rotation.


Croque Végétarien & Croque-Monsieur
courtesy of me, as adapted from Ina Garten

6 slices good white bread

1 tablespoons unsalted butter
1.5 tablespoons all-purpose flour

1 c warm milk

1/2 tsp salt
1/4 tsp freshly ground black pepper
Pinch nutmeg

3 oz Gruyere, grated
3 oz Emmentaler, grated
1/4 c freshly grated Parmesan

Dijon mustard

2 plum tomatoes, sliced

For Croque-Monsieur:
1/4 lb jambon de Paris

***

Preheat the oven to 400°.

Toast your bread in the oven on a cookie sheet - 5 minutes on the first side, then 2 minutes on the opposite side. Set aside.

In a small saucepan set over low heat, melt the butter and then add the flour, stirring constantly with a wooden spoon for ~2 minutes.

Slowly pour the warm milk into the pan with the butter/flour mixture and cook, whisking constantly, until the sauce is thickened, about 3 - 5 minutes.

Remove from heat and add the salt, pepper, nutmeg and stir.

Add in 1/4 c of the Gruyere, 1/4 c of the Emmentaler and all of the Parmesan and stir until cheese has all melted. Set aside.

Spread dijon mustard on all of the bread.
On half of the bread, lay out tomatoes on a single layer.
If desired, add a couple of slices of ham on top of the tomatoes. (croque monsieur)
Top the same slices with the remaining Gruyere and Emmentaler, about 1/3 of the total cheese on each.
Top each 'loaded' slice with one of the dijon-only pieces of bread.

Top each sandwich with about 1/3 of the bechamel (cheese sauce)

Bake the sandwiches for 5 minutes.

Switch your oven to broiler and broil for 3 to 5 minutes (depending on how close your heating element is to your sandwiches) or until the topping is bubbly and lightly browned.

Serve hot.

10.12.2011

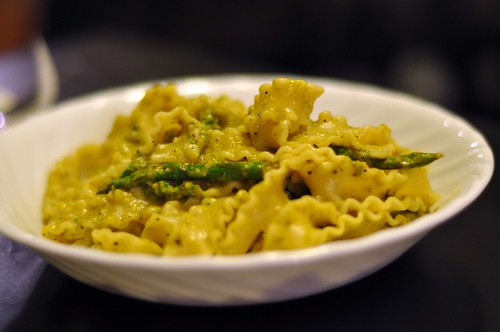
Malfadine with Lemon-Asparagus Sauce

When i started this blog - about 4 years ago - it was to not only share recipes, but also to share the stories behind them. I lost that somewhere along the way. i lost some of the story.

Keeping that in mind, you have to forgive me for posting this recipe at the absolute wrong time of the year. This is a spring dish if i ever tasted one. but i made it this week. When yes, it was warm, but its still october...

However. If you know me in real life, you know that i've seen more than my fair share of Better Than Ezra shows. You know that i have friends - real life friends - that i wouldnt even know if not for my hours on their messageboard and my travels to their shows. You know that when i start talking about someone you dont know, you have to ask 'is that a BTE person?' and you know that quite often, the answer will be yes.

So why is that relevant?  because a funny thing happened along the way. all of us BTE people? we grew up. some became real adults and had kids. some bought houses. some moved - many times. some got married. some broke up. but through the miracle of the internet, so many of us have stayed in touch. held eachothers hands through breakups. been to eachothers weddings. sent presents to those kids. and among it all, theres a number of us who emerged as being almost as obsessed with food as we were with that band - at least 3 of us have food blogs. so now, instead of trading live show tapes, we trade recipes. We send treats to those having a hard time. and not so long ago, i sent 1.5lbs of pasta all the way to california, because one of those friends mentioned that she couldnt find malfadine near her.

now, of course, if someone wants a specific shape pasta for a specific recipe that badly, you know i have to try it too, right?

So that 1.5lbs of malfadine has been sitting in my cabinet waiting for me to get around to this...

DSC_0778

I ended up altering the original recipe a bunch, some based on reviewers suggestions, some pulled from other recipes we've known and loved (Cacio e Pepe, i'm looking at you), but the gist is the same... these long skinny lasagna-style noodles finished in an asparagus lemon sauce that just screams SPRING! (even if its October) when you bite into it...

and if you cant find malfadine near you? drop me a line - i'm an expert at shipping it ;)


Malfadine with Lemon-Asparagus Sauce
courtesy of me, loosely adapted from Epicurious

1/2 lb fresh asparagus, tough ends discarded, tips and remaining stems separated
1/2 tbsp salt

1 tbsp extra-virgin olive oil
1 tbsp softened butter
1 tbsp minced garlic
1/2 tbsp dried parsley
1/2 tbsp lemon zest
Juice of 1/2 of a lemon
1 tsp fresh ground black pepper

1/2 lb malfadine or other pasta of choice

1/3 cup grated Parmigiano-Reggiano

***

Boil a generous amount of water (you will use this water 3 times). Once boiling, add the salt to the water. Watch the volcanic eruption. its fun.

Chop asparagus stems into 1-2" segments. Cook the segments in the boiling water for 6-7 minutes or until very tender. Transfer segments to a colander, reserving cooking water in pot (a slotted spoon or small strainer works well), and rinse under cold water. Set aside.

Cook asparagus tips in same boiling water until just tender, about 3 minutes. Transfer tips to a colander, again reserving cooking water in pot and rinse under cold water and set aside,

Purée asparagus stems with oil, butter, garlic, parsley, zest, lemon juice, black pepper and 1/4 cup asparagus cooking water. (be careful, that water is hot)

Cook pasta in boiling asparagus cooking water for about 3/4 the amount of time suggested for al dente pasta. Reserve 1 cup of the cooking water, drain pasta and remaining water out of the pan.

Return pasta to the dry pan. Add in the asparagus tips, the pureed sauce and the reserved water and cook over high heat, stirring frequently to prevent burning and to ensure the ingredients are combining well. Allow to cook ~ 3 minutes, or until pasta is al dente, and the sauce has thickened and coats pasta well. (it will still be too 'loose' at this point - thats ok, the cheese will help...)

Remove from the heat and stir in Parmigiano-Reggiano. Stir until cheese is meltedand well combined.

Serve immediately, adding salt to taste.

10.07.2011

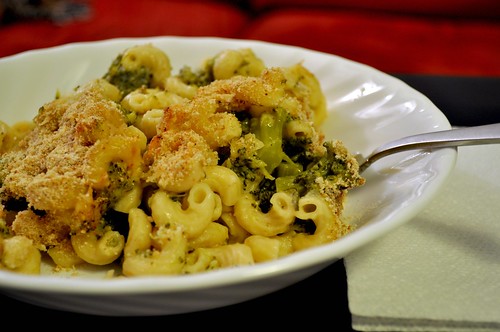
Broccoli Mac & Cheese

When the weather starts to cool off, everyone's thoughts (mine included) turn to apples and pumpkin and maple syrup. However, when mother nature decided to skip the whole cooling off period a week or so ago and go straight to RAINY & COLD, I couldn't help but skip the normal cravings and move straight to comfort food.

Most people will agree that there really is no better comfort food than mac & cheese but for those who arent looking to fatten up for their winter hibernation, the comfort we seek in mac & cheese can quickly turn to distress when trying to get dressed in the morning and finding out that none of your clothes fit anymore because you've been eating a little too much comfort...

This leaves you with a dilemma - stop eating the warm comforting hug that is mac & cheese and keep that slammin' body or eat all the comfort and embrace the fatness?

I'm here to give you a 3rd option - do both.  and do it without sacrificing the stuff that makes mac & cheese the yummy goodness that it is...

Now, this recipe makes me feel a little bit like a mom who's trying to sneak vegetables into her kid's meal but really, the broccoli is a bonus, not a secret we're hiding under a layer of cheese (though that's how my mom got me to eat it as a kid...) and actually adds to the dish.

And you don't have to be on a diet to like it.  It doesn't taste like diet food!  I promise you, this mac and cheese tastes just as good as many other versions out there.  The bonus is that the vegetables are already built in, so you don't feel like you have to make a side in order to have a complete meal.

DSC_0774

It's a pretty versatile dish.  While the recipe below uses high-fiber pasta and reduced fat cheese, that's not really the calorie-cutting key - its much more about the fact that there is equal weight of pasta and vegetable soaking up all of that cheesiness.  I highly recommend playing around with it and coming up with the version you like best.  I'm already planning its successor as we speak ;)


Broccoli Mac & Cheese
courtesy of skinnytaste.com, with modifications by me
Click here to import to Pepperplate.com

12 oz high fiber pasta (we used Barilla Plus elbows)
12 oz fresh broccoli florets, any large pieces roughly chopped

2 tbsp butter
1/4 cup diced onion
1 tbsp minced garlic (about 2 cloves if you aren't cheating and using the pre-minced stuff)

1/4 cup flour

1 cup vegetable broth
2 cups 1% milk
1 tbsp garlic chili cholula sauce

8 oz (2 cups) shredded reduced fat mexican cheese blend
salt and fresh pepper to taste

1/8 cup grated parmesan
1/4 cup bread crumbs

***

Lightly grease a large casserole dish and set aside

Preheat oven to 375°

Prepare pasta in accordance with package directions for al dente pasta.  Include the broccoli in the water with the pasta for about 7 minutes  (this was al dente cooking time for our pasta, so everything went in together.  If you are using a pasta with a longer cooking time, just throw the broccoli in when there is 7 minutes left...)

While pasta & broccoli are cooking, heat 2 tbsp of butter over medium heat.  Add onion & garlic and cook for about 2 minutes to soften.

Lower heat to medium-low and whisk in flour.  It will clump and get dry - dont panic.  Keep whisking for a minute or two until it is all incorporated and the mess looks golden.

Add broth, milk and cholula, whisking to incorporate.  Raise heat to medium-high and heat, whisking often, until mixture is bubbling and gets thick.  (This will take anywhere from about 5 - 10 minutes, depending on your definition of medium-high)

Remove from heat and stir in cheese, in batches, until it has melted and is well-incorporated.  Season with salt and pepper to taste.

Add the pasta & broccoli into the cheese sauce and mix well to combine.

Pour the whole thing into your prepared baking dish.  Top with parmesan and then breadcrumbs.

Bake ~ 20 minutes and then turn oven up to 500° and bake for an additional 3 minutes to get the top a bit golden and crispy.

Allow to sit for at least 5 minutes before serving.

9.07.2011

Halibut with Asparagus in Brown Butter Balsamic Vinaigrette

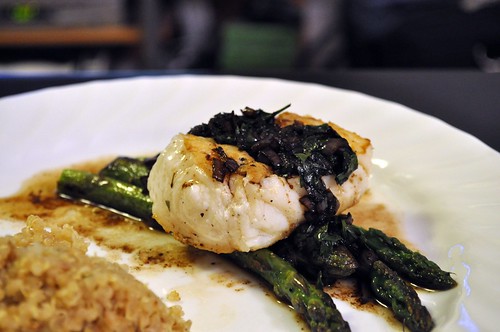
I've been holding on to this one for a while, trying to think of a little story to tell with it.  So I hopped over to the Top Chef page, hoping for some inspiration.  and when i went to look at the original recipe, i realized that maybe now is when we should talk photography...

Why now?  Well, because for one of the first times in my life, i think my picture is better than the supposed professional one...

About a year ago, Jordan and i decided to 'pre-spend' some wedding gifts and buy ourselves a fancy new camera...  Jordan wanted it for our honeymoon, I mostly just wanted it for this blog... We wavered back and forth between different cameras, eventually ending on the Nikon D5000. And, of course, it showed up and we both said "well now what?"

Neither of us had a clue what to do with the thing and sure, we took it to paris and played with it and have thousands of pictures to show for it, but we still didnt really understand it.  At all.

So for Jordan's birthday, i bought him a class on how to use that camera - Take Your Camera Off Program Mode, Part I with Okello Dunkley.  I sent him with very specific instructions...  find out how to take pictures of food and also how to make a cool picture with an out-of-focus background...

And that Jordan, he's a keeper - he came back with both pieces of information...  Since we are talking food here, lets focus on that (though, turns out the info was largely the same)  He said we needed to spend $ and get a Nikon 50mm lens, use our tripod and open the aperture way up to allow the background to 'fade away'...  While i dont think i can explain the science of it, i can tell you that the good pictures you've occasionally* seen around here recently are a result of what he learned.  Birthday present SUCCESS!

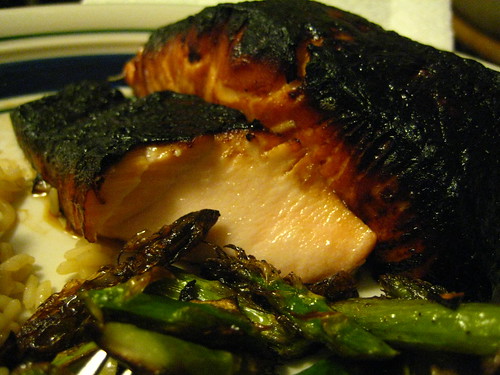
This halibut might be my most beautiful example of those lessons...  the original picture just isnt so pretty and i dont know that it ever would have piqued my curiosity...   Our picture?   I think it makes the halibut and asparagus both look yummy and intriguing...

DSC_0505

Something food-related worth noting - this was our first successful balsamic reduction.  Both Jordan and I have tried in the past and both of us have failed...  Traci used this for a quickfire challenge - explain how to cook something without seeing the other person - because it was simple and, by her accounts, one of the first sauces she teaches to anyone who comes to work for her...  I figured if she could explain it through a wall and taught it to everyone who walked through her kitchen doors, that maybe it would even be Kristen & Jordan-proof...  and it was - and if we could make it, i think its safe to say that pretty much anyone can! 

*sadly i'm sometimes too lazy to get out the good camera and tripod and well, then you get the regular old boring ugly pictures...  so sorry...


Halibut with Asparagus in Brown Butter Balsamic Vinaigrette
courtesy of Traci Des Jardin on Top Chef Masters
Click here to import recipe directly into Pepperplate

1-2 tbsp olive oil
8 spears of asparagus

2 halibut filets, skin removed

~2 tbsp butter
4 shallots, minced
1/4 c balsamic vinegar
salt & pepper, to taste
1/4 c fresh parsley, chopped

***

Heat ~ 1tbsp olive oil over medium-high heat and saute asparagus for 3-5 minutes, depending on thickness of asparagus - should still be a bit crisp.  Set aside

Add a bit more olive oil to the pan, give it a minute to come up to temperature and saute the fish for a couple of minutes on each side until cooked through.  (Traci said 1.5 mins per side, but i think it took us a bit longer...)  Set aside.

Remove pan from heat.  Lower heat to medium-low.  Add butter to the pan & return it to the heat.  Allow it to brown.  If you have never browned butter before the basic gist is this:  let it melt and let it sit in the pan.  dont stir it.  it will start to foam up.  this is a good thing.  Once that happens, start swirling the pan or stirring.  this will cause the foam to 'collapse' and little tiny brown bits will float to the bottom of the pan.  this will be wildly difficult to see if you are using a non-stick pan, so you'll have to rely on the foaming and the scent, which will be slightly nutty.  Just as the butter has begun to brown, add the shallots and allow them to soften a bit - about 3 minutes.

Raise heat slightly and add in the balsamic.  Stir to combine and bring to a boil.  Add a bit of water (start with a tablespoon or two) and whisk to emulsify.  Season with a bit of salt and pepper, in accordance with your personal taste (we like both!).  Add parsley and stir to incorporate.  Allow to cook for a few minutes.  Sauce will begin to thicken (aka reduce).  Once it has reduced a bit, remove from heat.

Place 4 stalks of asparagus on each plate, top with one piece of halibut and spoon the balsamic sauce over top and serve.

8.04.2011

Vegetarian Mexican Lasagna

what a shock, more mexican...

actually, please be impressed...  the glut of mexican food means we are, gasp, using up ingredients!!!  the idea for mexican lasagna came from a random comment on another blog regarding some sort of mexican casserole that her husband was going to eat while she juice fasted...  i read that one morning and thought - ooh - we have like, 3/4 of a bag of tortillas!  i can use them up!  woo hoo!

of course i had to complicate things - combining 3 recipes into one which, in the end, didnt resemble any one of them all that closely - but in the end, worth it...

also?  my first time working with TVP.  super easy, super cheap.  If you are sitting there going 'what the hell is TVP?', its ok, you could certainly make this with ground meat or more beans instead...

However, there is one MAJOR problem with this recipe...

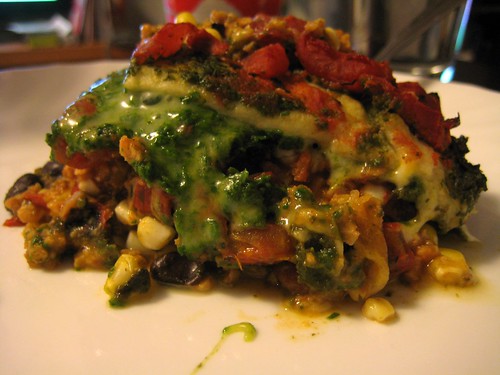
its UGLY.

IMG_4626

I know there is nothing appetizing about this picture - i'm fairly embarrassed to even be posting it because its SO ugly...  but it was either deal with the ugliness or not post it at all, and i liked this enough that my need to share outweighed said embarrassment.  So, ignore the picture and take my word for it...  its good.  it was actually so good that we ate the leftovers too (2.5 mins in the microwave was perfect) - which is something we so very rarely do - and honestly, the reheated version may have even surpassed the just-out-of-the-oven experience...

and, wait for it, this means we actually got 3 meals out of that one bag of tortillas.
watch out world, first using up tortillas, next extreme couponing!  woo!


Vegetarian Mexican Lasagna
courtesy of me - inspired by Funkinutt McFly's Vegan Food blogSee Jen Cook, and Rachel Ray

for the seasoned TVP: courtesy of Funkinutt with minor modifications:
(note:  we only used about 2/3 of this in our lasagna)
1.5 c textured vegetable protein
2 dried new mexico chilis
4-5 cloves garlic
1/4 of a vidallia onion
1 3/4 c water, divided

1 tbsp olive oil

2 tsp ground cumin
1/2 tsp dried oregano
1/2 tsp salt
1/4 tsp Tabasco
juice of 1 lime
1 tbsp tomato paste
1 3/4 c water, divided

Heat olive oil in sauce pan over medium-high heat.

Remove stems from chili peppers and then put peppers, garlic, onion and 1/4 c water into food processor and process until finely chopped.

Add chopped chili mixture to hot oil and mix around.  Add remaining ingredients to pan and cook over high heat for 2 minutes.

Reduce heat to medium and cook for another 8 minutes, stirring occasionally.

Set aside.


For remaining layers:
1 c cilantro
4 scallions, light green parts only
~5 c fresh baby spinach

corn kernels from 2 ears of corn
1 can black beans, drained and rinsed

6-7 6-in flour tortillas

1.5 cans diced fire roasted tomatoes

2 c shredded mexican cheese blend

salt & pepper to taste

***

Preheat oven to 425°
lightly grease bottom of casserole dish with olive oil and set aside

combine cilantro, scallions & spinach in a food processor and process until almost pesto-like (you will probably have to add the spinach in batches). Add a bit of salt & pepper if desired and set aside.

combine corn and black beans and set aside.

cut tortillas into strips.

layer tortilla strips in the bottom of the casserole, just slightly overlapping.
layer some of the seasoned TVP in
toss on some of the black beans & corn
add a layer of tomatoes, with their juices
add a layer of cilantro/spinach mix
add a layer of shredded cheese
place another layer of tortilla strips on top & push down slightly.

Starting with seasoned TVP, repeat all layers, being sure to leave a little bit of the spinach mixture and cheese for the top.

At this point, you should have a top layer of tortilla strips.  Spoon remaining spinach mixture over top and spread so that all tortilla is 'wet'.  Sprinkle remaining cheese over the top.

Cover and bake for 25 mins.

After 25 mins, remove cover and bake additional 20 minutes.

Allow to cool 5 or so minutes.  Cut into 6 pieces and serve with sour cream and hot sauce (both optional)

7.15.2011

Crispy Black Bean Tacos

I swear, i was born in the wrong country...  i think canadians are far more interesting than americans and all i eat is mexican food...

maybe its good that i was born half-way in between the two?

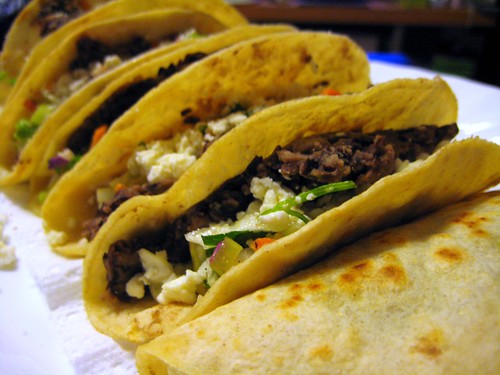
Regardless, its summer and for me, summer means a lot of things...  but for purposes of this blog?  it means mexican food.  it means how many different ways can i make tacos...

I saw this recipe posted over on tumblr (its like twitter, but bigger...)  and thought it looked interesting, and then someone else i follow on tumblr went ahead and made it like, 4 hours later...  and a girl can only take so much peer pressure before she gives in, you know...

IMG_4624

We served it with some kicked up rice and some cold beer.  i recommend you do the same...


Crispy Black Bean Tacos
courtesy of Bon Appetit with modifications by me

1 15-ounce can reduced sodium black beans, drained & rinsed
1/2 tsp ground cumin

2 tsp olive oil
juice from one lime
1/2 serrano pepper, minced
2 c coleslaw mix (no dressing, just the cabbage/carrots/etc.  You can buy it bagged...)
2 green onions, very bottom and dark green portions discarded, center sliced into small discs
1/3 c chopped fresh cilantro
1/2 avocado, diced
salt & pepper (to taste)

1 tbsp olive oil
6 corn tortillas

1/3 cup crumbled cotija cheese

hot sauce of your choice (chipotle works quite well)

***

In a small bowl, mash beans and cumin until beans are mostly mashed but still have some definable beans

In a medium bowl, mix 2 tsp olive oil, lime juice and serrano pepper together.  Then add coleslaw mix, green onion, cilantro and avocado and toss to coat.  Salt & pepper to taste.

Heat 1 tbsp olive oil on a large skillet over medium-high heat.
Fit as many tortillas as you can on.  Spoon approximately 1/6 of the bean mixture onto each, keeping it to one side and not too close to the edges.  (it won't seem like enough, but this allows for more room for the slaw & cheese...) Allow to cook for a minute.  

While they are still on the skillet, carefully fold tortillas in half.  Do not press down too hard, but make sure they are folded enough to stay folded.  Allow to cook on each side for a minute or two, until golden brown.

Remove from skillet and place on a paper towel to soak up any excess oil.

Top each with a generous amount of slaw and cotija - more than you see in the picture - after taking a few bites we realized we'd been skimpy on both - and top with hot sauce before serving...

3.04.2011

Quick & Easy Personalized Pizza

Lately, for some reason, dinner stresses me out.  I dont know if its the whole 'getting married and being someone's wife' thing or if its just the 'not on a diet anymore (though i should be) so there's no excuse for less than amazing-tasting food' thing or if its the 'i want more to post on the blog' thing or my competitive nature which makes me want to outdo myself every time, but every time Jordan asks if i have any idea what i want for dinner, i get immediately stressed...

The other morning, on the way to work, we were talking about this and were talking about how a rotation of themes would help...  for example, nearly every sunday, we have some sort of pasta.  I grew up that way and Jordan is more than happy to play along and that makes sunday night dinner the least stressful one of the whole week - because at least there is always a starting point...

So we started brainstorming themes - things that, like pasta, could be as easy or as complex as you allow them to be.  and we came up with pizza...  We've been on a pizza kick for months now, after discovering this awesome little place - Bodrum - not too far from our apartment that does flatbread pizzas.  In the summer they have a great little outdoor area and in the winter, the fiery pizza oven makes it super-cozy inside...  Its become our go-to when we want grown-up pizza (there's wine, you see...)

But i digress - i was talking pizza at home...  so, anyway...  after a few seconds of though, we realized that pizza can be incredibly easy if you choose to buy all pre-made parts and just assemble them or can be more complicated if you choose to make your own pizza dough & sauce or have to pre-cook any of your toppings.  Therefore, i'm calling it -

Pizza is the new Pasta!

(dont worry sunday nights, you'll always be pasta night...)

In addition to it being wherever you want on the difficulty meter, another great things about pizza night is everyone can have whatever they want.  As long as you can agree on a crust, you are golden!  This is imperative when you have people with differing tastes - vegetarian, meat-eating, pepper-adverse, whatever...

DSC_0229

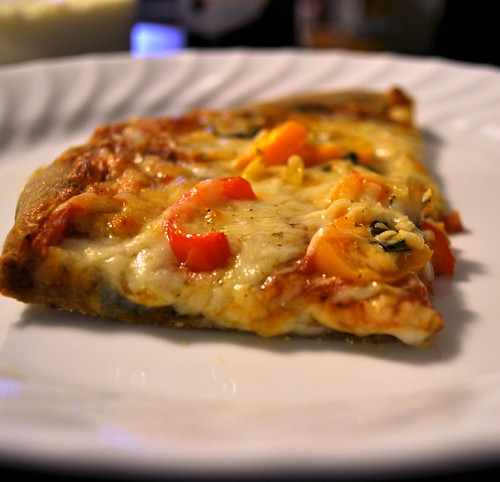
This particular take on pizza was fairly simple - store bought crust (TJs wheat crust - 99cents! woo!  though, i highly recommend stopping by your local pizzeria and asking to buy dough - did you know they sell it?  i never did until i read it on someone else's blog a while back), doctored up store-bought sauce and we stayed fairly basic with our cheeses & other toppings.  However, now that we've declared pizza as a new theme, you can be assured we'll be experimenting.  and, of course, since half of my stress is 'blog fodder' - sharing it here with you.


Quick & Easy Personalized Pizza
courtesy of me

Special tools used:  Pizza stone, pizza peel.  If you dont have these, just use baking sheets - one in the oven pre-heating and the back of another one for assembling the pizza

1/4 c cornmeal
1 trader joe's whole wheat pizza crust (feel free to buy one from a store or your pizzeria or make your own instead)

~ 1/2 jar trader joe's pizza sauce
1 tbsp garlic, minced
2 tbsp basil, chiffonaded (is that a word?  spell check wants to call it chickenfeed!  ha!)

~1 c shredded mozzarella
~1 c shredded asiago

1/4 of an onion, sliced thinly & layers separated into individual pieces
3 small sweet peppers, sliced (think slightly larger than jalepenos)
1 medium tomato, sliced & slices cut in half

crushed red pepper (optional)
oregano

***

Remove pizza dough from fridge and allow to come to room temperature (in its bag)
Place pizza stone in oven on middle rack and preheat to 450°

turn pizza dough out onto lightly floured surface to suck up any lingering stickiness

once dough is no longer wet, start shaping it into a circle.  Try to imitate the local pizza dudes and use your fists to turn & stretch it out until it is about 10" around.

spread a fairly generous amount of cornmeal onto your pizza peel (this is IMPORTANT) and place stretched dough on top of it.  Continue to stretch and shape until its about 12" diameter.  Dont worry if its not a perfect circle - mine tend to end up oblong -as long as its fairly consistent in thickness (with a little extra thickness at the edge) and fits on your stone, its all good.

mix 1/2 of a jar of TJs pizza sauce with the minced garlic & 1 tbsp of the basil

spread that mix evenly over the pizza, leaving about 1/2" - 1" around all edges

sprinkle half of the asiago and half of the mozzarella over the sauce

Now for the customization - here's how we made ours:
onion pieces on entire pizza
pepper slices on half of pizza
tomato slices on the other half of pizza
crushed red pepper on the side with tomato slices (warning - it will bake in and get REALLY hot.  be very sparing...) 
Back to the whole pizza:
To finish it off, sprinkle remaining basil over toppings, sprinkle remaining cheese over that and sprinkle oregano over the whole thing.

Slide off of pizza peel (this is why the cornmeal is SO important - thats what allows it to slide) onto the hot pizza stone and cook ~ 7 - 8 minutes.

Allow to cool for 3-4 minutes prior to serving to allow cheese to 'set'

8.03.2010

Tofu and Orzo with Kale, Carrots and Leeks

oh kale...  how i've mocked you so.
publicly declared my hatred, time and time again.

but i was nothing if not determined to conquer that hatred.  figure out what the redeeming factor was.  how other people could actually love this awful stuff.

(Yes, i am pretty sure that's a pig you see flying by your window, why do you ask?)

kale - consider yourself pwned.

IMG_3879

We've had this twice in 1 week - the equivalent number of times that i'd eaten kale the rest of my entire life.  I dont know what was wrong with those first two batches i tried to make because i totally do not hate kale!  not even a little bit!

While i'm sad to give up my identity as the kale-hater, i am totally intrigued by all the doors this opens up...


Tofu and Orzo with Kale, Carrots and Leeks
courtesy of On a Lobster Placemat with modifications by me

3/4 cup dry orzo

1/2 package of extra firm tofu, pressed to remove water
1/2 tbsp hot sesame oil
1/2 tbsp olive oil
1.5 tbsp tamari (or soy sauce)
1 tsp siracha sauce (optional)
Salt
Pepper

1 tbsp olive oil
1 tsp siracha sauce (optional)
3 cloves minced garlic
3 medium carrots, sliced into disks
1 leek, sliced into disks
1 bunch fresh kale, destemmed and torn into small pieces
1 tsp sesame seeds (optional)
1 - 2 tbsp tamari
hot sesame oil

***

Prepare orzo according to package directions (for al dente pasta)

Heat 1/2 tbsp sesame oil, 1/2 tbsp olive oil & 1 tsp siracha in a non-stick pan over medium-low heat.

Add 1.5 tbsp tamari and swish around to mix

Place sliced tofu in pan, adding salt & pepper to taste. (we went for a little salt and a lot of pepper)

While that is cooking, heat remaining olive oil and garlic in another frying pan over medium-low heat..

Let garlic brown a bit and then add the carrots.

Saute for a minute, then add the leeks.

Saute for another minute and then add the kale..

Saute all vegetables until the kale is wilted, tossing often.

Add sesame seeds in and toss some more.

Add orzo in with the vegetables.

Add a 1 - 2 tbsp tamari & a drop more hot sesame oil, if desired, and toss.

Once well combined, remove from heat.

Plate orzo and vegetables and top with tofu.
Sprinkle with sesame seeds, if desired.

Serves 2.

7.26.2010

Linguine, roasted squash & spicy garlic tomatoes

This summer i've been all about the thin pastas...  historically, i really couldnt stand spaghetti, linguine, vermicelli or anything else like it.  Angel hair had its place cause it was so quick, but aside from that, i was all about the shapes.

for some reason, this summer, all i want is the long, thin stuff...

After a weekend at the beach (a weekend in which i failed to repair tan lines and instead just shifted to new ones...) and a long ride home, we were tempted to order in, but i was thinking of the 3lbs of squash sitting in the crisper and it just seemed silly to not use it...  and since sunday is pasta night in this jewish-italian household, the squash & pasta fallback was a natural fit.

In addition to the thin spaghettis, we've also been all about oil & butter-based sauces instead of traditional red sauces this summer - another natural fit for the squash, as i see no need to drown the taste in a ton of traditional red sauce.

IMG_3812

This meal was about 10-15 minutes hands on - exactly what we needed on a hot, lazy sunday night.


Linguine, Roasted Squash & Spicy Garlic Tomatoes
courtesy of me & the meat-eater
Click here to import directly into Pepperplate

~1lb assorted squash (we used zucchini & patty pan)
1 tbsp olive oil
salt
garlic powder
black pepper

1/3 box thin pasta of your choice

3/4 tbsp olive oil
3/4 tbsp butter
3-4 cloves of garlic
1/2 can of zesty diced tomatoes
pinch of crushed red pepper flakes

ricotta (optional)
parmesan (optional)

***

Preheat oven to 375

Cut squash into bite size pieces.  Place on cookie sheet & toss with a bit of olive oil, salt, garlic powder & a generous amount of black pepper.

Roast for ~20 minutes, tossing again once.

Just after the squash goes into the oven, begin the water boiling for the pasta.
Cook pasta al dente, according to directions on box.

Just as you throw the pasta in to cook, put olive oil & butter in a pan over medium heat.  While its heating, chop the garlic into small pieces.

Once butter is melted, throw garlic into the pan & cook until a bit browned.
Lower the heat slightly and stir in tomatoes.
Simmer for about 5 minutes or until most of the liquid has cooked down, but just before you turn it off, shake in a little bit of crushed red pepper, mix it around and then turn it off.

Just as the sauce is finishing, the squash should be roasted and the pasta should be drained and waiting.

Plate pasta, put squash over top of pasta and top with tomatoes.

Add a spoonful of ricotta, a sprinkling of parmesan, a hunk of crusty baguette & a glass of white wine and you've got yourself a sunday night :)

(serves 2)

5.14.2010

Braised Chickpeas & Spinach

(formerly known as miss congeniality)

A couple of weeks ago, I attended the bachelorette party of a friend from work.  She'd decided to take a slightly different route with the party plans - no penis straws, strippers or pole dancing classes - instead we'd be heading to Rustico cooking for a hands-on cooking class, lots of wine & a 3 course meal.

Kim (the bachelorette) got to set the menu and in a group of 16, you can imagine that meat wins out as the main course.  I was fine with this - i've made a meal of 'sides' more times than i care to think about - but the lovely ladies at Rustico asked if anyone was vegetarian and since i was the only one, i figured they'd just make sure that i got extra butternut squash raviolis or something...  However, when the ravioli came out and i got the same portion as everyone else, i just figured i was in for extra broccoli and potatoes.  No biggie, but when another friend offered up her leftover ravioli, i said sure...  When they came to clear the plates, they mentioned that they'd made something else for me as a main meal...  Cool!  what was it?  Chickpeas.  oh...

I'm not always a chickpea fan - sure, i like hummus as much as the next guy, but plain chickpeas had never really been my thing, so i held onto those extra ravioli anyway...  figured i'd choke down a few chickpeas but that would be it.

never did i imagine i'd end up not only finishing every last one, but then, two days later, emailing them to get the recipe...

IMG_3594

this dish - while not particularly attractive - is incredibly healthy and wildly yummy.  it accomplishes all of those things a good vegetarian dish should - its not trying to be something its not (meat) and it uses spices to bring out the flavors in an otherwise bland main ingredient.  it went so well with the broccoli and potatoes (at the class) that the meat-eater and i decided to leave well-enough alone and make similar sides at home...  in the end, this is one of those super-easy, super-yummy, super-healthy dishes that is sure to find a permanent place in our rotation.


Braised Chickpeas & Spinach
Courtesy Rustico Cooking with slight modifications by me

2 tablespoons extra-virgin olive oil, divided
pinch crushed red pepper flakes
2 garlic cloves, minced
2/3 medium yellow onion, minced
2 tsp chopped Italian parsley
2 tsp chopped oregano

7 grape tomatoes, halved
2 15-ounce cans chickpeas, drained and rinsed
1/4 teaspoon salt
pinch freshly ground black pepper

3 cups slightly packed baby spinach
2/3 cup vegetable broth

***

Heat 1 tablespoon of the olive oil in a heavy 2-quart pot over a medium flame. Add the chili flakes, garlic, onion, parsley, and oregano, and cook 5 minutes, or until soft.

Stir in the tomatoes, chickpeas, salt, and pepper, and cook for 5 minutes.
Add the spinach and the broth and cover; lower the heat to medium-low.

Simmer 1 hour, or until very tender, stirring once in a while and checking to make sure there is always a bit of liquid in the pot.

If the sauce is too liquid when the chickpeas are ready to serve, uncover and reduce over medium-high heat.

Serve hot, drizzled with the remaining tablespoon of olive oil. <- super important step!!!

4.08.2010

Soy and Ginger Teriyaki Salmon

(formerly titled 'delivery on a promise')

a month or two ago I waxed poetic about Mad Hungry: Feeding Men & Boys and how useful that little cookbook really was...  and I promised the salmon recipe...  a recipe we've made more times than i can count since then - most recently as Easter-eve dinner this past Saturday...

We were not slated to cook dinner the night before easter, but my family and I sat there thinking about what we should have (eat in? go out?) and couldnt come up with a good answer.  The meat-eater suggested maybe we could make the salmon.  salmon he'd already eaten twice that week but was up for again...

Now, because we were in North Carolina with no prior plans to cook said meal and because i'm a bad foodblogger and hadnt already posted the recipe, we had to spend 20 minutes driving to the nearest B&N to find the book and take an iphone pictureof the recipe.  (which, in my book, is not wrong when you own the book already...)

IMG_3438

Turned out to be totally worth it. My mother - who NEVER cooks actually asked for the recipe...  That, my friends, is a ringing endorsement...


Soy & Ginger Teriyaki Salmon
courtesy of Mad Hungry: Feeding Men & Boys

1 cup soy sauce
1/4 cup honey
2 tablespoons lemon juice

1 inch fresh ginger, peeled & sliced into disks
3 garlic cloves, smashed

2 pounds boneless salmon fillet, pin bones removed
(note - when its just 2 of us, we halve the marinade and buy just under a pound of salmon...)

***

Whisk the soy sauce, honey, and lemon juice together in a large enough dish to fit the salmon.

Stir in the ginger and garlic.

Place the salmon, skin side up, in the sauce and marinate for at least 10 or up to 30 minutes.

Preheat a broiler.

Remove the salmon from the marinade, pat it dry with paper towels, and place it skin side down on an oiled roasting pan. (we use the disposable ones because the glaze just BURNS on. if you dont want to be so wasteful, just line yours with aluminum foil...)

Cook until it is slightly firm to the touch, 10 to 15 minutes, depending on thickness. While the salmon is cooking, brush it a couple of times with the marinade. (note - we do this about every 3 minutes or so for the first couple of times and then every 1-2 minutes or so when we are nearing the end)
You'll know its done when the glaze starts to get crispy and crunchy and burn onto the roasting pan.

Immediately remove the skin while the fish is hot.

3.12.2010

Just as impressive as fried.

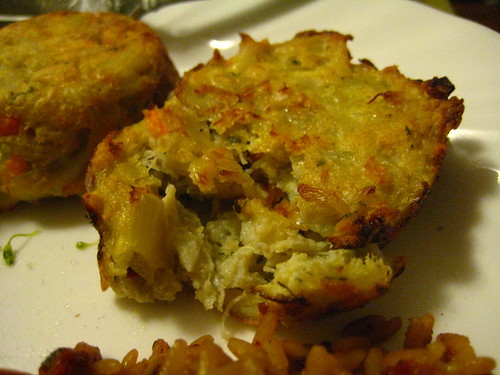
Many moons ago, i declared that everyone should have a meal that they make that impresses people.  Mine was crab cakes.  If you asked me today, i'd still say it was crab cakes.  However, just a few weeks ago, the meat-eater and i realized that despite our 1.5 year relationship, i'd never made him my famously impressive crabcakes.

and yet he still proposed 8 months ago.  shocking, i know.

Last weekend seemed like a good time to remedy the situation, but with both of us on pre-wedding diets, fried crab cakes just were not in calorie budget.  So i took that old tried & true recipe and started looking around to figure out how i could convert it to a baked dish to save on the oil used in frying calories...
it actually wasnt that hard and by the time i was done cobbling recipes together, i ended up with some super yummy, super easy and super low cal crab cakes!  score!

IMG_3474


Now that i think about it, if you wanted to save a few more calories, you could probably just use egg whites, but at 70 calories per crab cake, do you really need to?


Baked Crab Cakes
courtesy of me


5 tbsp panko (or plain bread crumbs)
1 tsp baking powder
1 tsp parsley (dried)
1/2 tsp garlic powder
1/8 tsp pepper
1/8 tsp crushed red pepper
1/2 tsp mustard powder
1/4 tsp cayenne


1/4 cup light mayo (not miracle whip!)
1 tbsp melted butter
2 eggs
1/4 cup carrot (minced)
1/4 cup onion (minced)
1/2 tsp worcestershire


1 lb crab


***


Preheat oven to 350°
Line baking sheet with parchment (if desired - makes for easier cleanup!)


Mix first 8 items (dry items)
Mix next 6 items separately
Combine dry and wet mixes
Add in crab meat and mix


Form into 12 patties
Place in oven at 350 for 15 minutes
Flip
Place back in oven for another 15 minutes


Note:  i saw a suggestion to make them in a muffin pan, so i did.  While it did work well to make them even, they stuck.  A LOT. even with a huge saturation of olive oil cooking spray.  So you can take that route, but i think that, in the future, i'll just form patties and use the cookie sheet instead.

11.02.2009

Cacio e Pepe

(formerly titled "making up for past transgressions")

a while back, while perusing tumblr, i came across a recipe; basically pasta with pepper but if you want it to sound fancy, call it Cacio e Pepe.

it sounded different, cheesy and easy so we decided to make it one night..  However, being rule-breakers, we basically did everything that the original recipe said not to do - we didnt buy superfresh black pepper - we just used the little 4 pepper grinder that was up in the cabinet.  we didnt use two kinds of cheese - we used whatever it was that we had in the fridge...  and that month or two ago?  it was ok but WAY too hot (um, thats why the recipe didnt call for 4-color pepper, i suppose?).  and not good enough to be worth it.  i dont think i even finished mine.  and dude, i like to eat, so thats saying something.

i never criticized though - didnt post it as a recipe-gone-wrong - because really, i hate those people on recipezaar who are like "this recipe SUCKS - i made 435 substitutions of the ingredients and it didnt cook right and tasted NOTHING like cheesecake!"

however, even though it may have been our fault the first time, you can understand why i was a bit skeptical to try again...  but we agreed to follow the recipe as written this time and - ooh boy - its amazing how different something comes out when you actually FOLLOW the recipe...   made the right way with the right ingredients - this one is a winner.

someone should remind the recipezaar folks of that...

IMG_3214


Cacio e Pepe
courtesy of We Are Never Full - barely any modifications by me
Click here to import recipe directly into Pepperplate

3/4 pound of spaghetti
2 tablespoons unsalted butter
2 tablespoons extra virgin olive oil
1.5 tablespoons freshly ground pepper 
a bit of the pasta cooking liquid (about 1/4 cup)
1/2 cup of freshly ground pecorino romano
1/2 cup freshly ground parmigiano reggiano

***

Prepare spagetti according to directions on package.  Reserve some of the liquid (about 1/4 cup)

When pasta only has a few minutes left, begin preparing the sauce.

In a separate pan, on low-medium heat, add your butter, oil and 3/4 tbps pepper.
Allow the butter to melt, swirling the pan around to help it move a bit.

When spaghetti is done, add the reserved cooking liquid to your melted butter/pepper/olive oil sauce and swirl the pot again.

Turn heat down to low. Add your spaghetti and toss once.
Add your cheeses and the rest of the pepper (3/4 tbsp) and toss the spaghetti again in the pan to combine all ingredients.

Top with a sprinkle more of pepper and cheese, if desired.
Serve with warm baguette and wine, of course

10.30.2009

so nice we made it twice

Green tomatoes are not something that i'd traditionally buy on my own, given the fact that it seems as though the only way to use them is in fried green tomatoes.  (seriously, google green tomato recipe - i'll wait - they'repretty much ALL variations on fried green tomatoes...)

so why in the world am i talking about them?

because i live with a boy.  and he likes different things from me. 
see, our CSA has a swap-box.  meaning, if i dont want my pac choi (no offense to pac choi), i can bag it up and walk it over to the swap box.  If there is nothing in the box, i simply leave my pac choi.  If there is something else in there, i can grab it in exchange for my pac choi. 

so, last week when the boy went to csa to do the pickup, (which included 1 lb of green tomatoes per person) he noticed a lb of green tomatoes in the swap box.  so he bagged up our pac choi (there's a reason it was my example) and took the tomatoes.  He then proceeded to have a conversation with a fellow CSAer and found out that they didnt want their green tomatoes either.  so he bagged up our mixed greens (not babies - more like chard & kale.  i like neither of those) and took a what was now our 3rd lb of green tomatoes.  and he calls me, all excited about said tomatoes. 

and all i can think is, what in the hell are we going to do with 3lbs of green tomatoes?
and i thought that all week - every time i saw them in the fridge.

and then this week?  the share included ANOTHER lb of green tomatoes.  thats 4lbs of green tomatoes in our fridge, just in case you are keeping track.

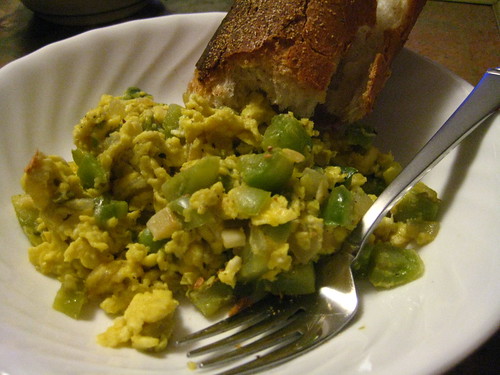
thank god for carrie from our CSA mailing list...   she sent out a recipe of sorts for green tomatoes with eggs.  and i wanted breakfast-for-dinner anyway, so this appeared to fit the bill AND used some of those tomatoes!  (not to mention the csa eggs that have been stockpiling in the fridge)

Frankly, my hopes were not super-high - it just sounded like a tomato scramble which is solid, but not earth shattering, you know?  But i was tired.  and wanted quick and easy.  and breakfast-y.

IMG_3209

The boy thought to add a baguette to the mix (confession:  we add baguettes to just about every mix...  also, wine.) and it made ALL of the difference.  The eggs are pretty good on their own but a forkful of eggs piled high on a tiny bit of baguette?  TO DIE FOR.

interestingly enough, this is not a breakfast meal.  the green tomatoes have some sort of bite to them that really takes the eggs from breakfast staple and transforms them into satisfying dinner.

a dinner so satisfying that we made it two nights in a row.


Green Tomatoes & Eggs
courtesy of the Merchants' Gate CSA Mailing list, adapted by me


serves 2

1 tbsp butter
1/3 of a sweet onion (i suspect any kind of onion would work), diced
3 cloves of garlic, smashed and minced
3 medium/large green tomatoes, cut into small pieces
salt & pepper
5 eggs
splash of milk


Heat the butter in a large skillet over medium-low until melted.

Throw in the onions & garlic and stir around with a wooden spoon to coat.
Allow to fry for a minute or two.

Throw in green tomatoes, some salt & some pepper (based on your typical tastes). stir around to integrate with the onions & garlic and allow to cook for ~ 6 - 8 minutes, stirring occasionally.

In the meantime, in a seperate bowl, scramble your 5 eggs and pour in that splash of milk

Once the onions, garlic and tomatoes have started to get a little crispy at the edges and even brown up a little, pour the eggs over them and allow it to sit for 30 seconds before stirring.

continue to cook eggs in a scrambled egg style (i've tried to go with a slow scramble while making this meal - it seems to work best with the ingredients) to the consistency you like best and then turn off the heat.

Spoon egg mixture onto plates & serve with fresh baguette.

6.16.2009

he said, she said

you know whats really fun? being a pseudo-vegetarian and dating someone who isnt..

of course, i'm one of those weird 'vegetarians' who thinks that boy vegetarians are a bit... well, not for me. i dont know why - i dont subscribe to traditional gender roles, i dont think, but somehow i truly think that there's a whole 'me man, me eat meat' thing that should be going on with a guy... therefore, as antiquated as my otherwise evolved brain may be, while its not always the easiest way to eat, it is pretty much been the standard in my life... and i'm fairly sure the current meat-eater is sticking around for, well, forever, so its going to stay the standard.


IMG_2810

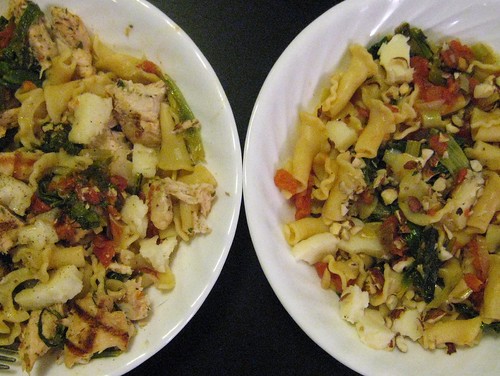
there should be some sort of guide as to how to exist in this kind of relationship without it being a case of one person eats meat and a side and the other just eats a big portion of side... (oh, sure, steal my idea...) because really, as the potential sides-only eater? not so appealing to me... so i'm always looking for another way - a way to take a meal and turn one into something that satisfies the meat eater without leaving the vegetarian with something bland...

so, changing topics, CSA started again this week... summer shares began a week earlier than expected due to the abundance of crops ready for harvesting, but, as is usual, the first week was still fairly greens-heavy while being overall light... bok choi, cooking greens, baby turnips, radishes, spring garlic and scallions. all cool, but save for the garlic and scallions (which, due to a mixup were all but gone by the time i arrived for pickup) not things i use all that much... however, i am bound and determined to not let so much go to waste this season (winter was kindof a bust for me) and wanted to get started on my reformed, non-wasting ways right away...

a number of people posted recipes for the greens and all had a similar take. the meat-eater and i discussed those recipies and modified and came up with our own idea of how to cook the greens into something we'd both like and even went so far as to figure out how to make one meat-eater-friendly while maintaing the fact that the vegetarian version was not lacking. I hope you'll find one or both versions to work for you.


Garlic Greens & Pasta
recipe courtesy of me & the meat-eater

3/4 lb pasta, any kind
1/2 lb mixed cooking greens, leaves torn into small pieces and stems seperated and chopped into 1-inch segments
4 spring garlics - bulbs and 2 inches of stems - diced
1 scallion - bulb and 2 inches of stem - diced
3 tbsp olive oil
3/4 c vegetable broth
1 16 oz can diced tomatoes
salt & pepper
3 oz asiago cheese, cubed

veg:
2 tbsp hazelnuts, chopped

meat eater:
1 pre-grilled chicken breast, cut up into pieces


Prepare pasta according to directions

meanwhile, heat olive oil in frying pan over med heat

add garlic & scallions and cook ~ 5 minutes, until soft

add greens stems and a splash of the broth and cook until stems have softened a bit

add the remainder of the broth and all of the greens

cover and allow to cook ~ 5 minutes

remove cover, stir greens and check for doneness. If you would like them wiltier, cook longer.

drain excess liquid & add tomatoes

stir ~ 1 minute to heat & combine

add drained pasta to the mixture and stir to combine (& reheat the pasta if it had finished too quickly)

***
seperate into 4 serving bowls

add 1/4 of the asiago to each bowl

add 1/2 of the hazelnuts to the vegetarian bowls (above amount assumes 2)

add 1/2 of the cut up chicken breast to each of the meat-eater bowls (above amount assumes 2)

3.10.2009

because quiche is totally easier than grilled cheese

Last October i spent a considerable amount of time down with the family in Charlotte, NC... one of the days i was there, we headed out to a cute little cafe down in Davidson for lunch... a couple of us ordered sandwiches and two ordered quiche... when lunch seemed to be taking forever, someone remarked that someone 'had to go and order the quiche...' which caused me to comment back - 'quiche is easier than grilled cheese'...

hilarity ensued, as my family in no way believed that quiche was easier than grilled cheese... my take? sure, it may take longer to cook but i honestly believe that, if made using the simple ingredients found in the quiche they had ordered, it was less hands-on time-intensive... their take? "you think everything is easy..."

of course i was HELL BENT on proving them wrong and proving just how easy quiche could be... and i did. sure, we went the easy route - premade pie crust & pre-shredded cheese, but my claim of no more than 10 minutes hands on time proved to be pretty much on target - i think i had it in the oven in 7...

all that said? this isnt that quiche... this is typical 'me' food - meaning i take what starts off as an easy dinner and complicate it slightly... but i still maintain that quiche is easy to make - and hard to mess up...


IMG_2668


I invented this combination last night due to the fact that, as a result of an insane schedule, the boyfriend (soon to be guest blogger) has been cooking for me nearly every single night and i really wanted to cook something good for him for once... but needed it to be fairly quick as that insane schedule will be raging on for at least another few weeks...

given that i had no idea what i was really putting together, i was pleasantly surprised by the results... and glad that i have this blog as a place to record the process as otherwise i never would be able to replicate it again...


Confetti Quiche
Courtesy of me

1 par baked pie crust (~10 mins on 350° should suffice)
2 c shredded emmenthaler, divided

2 tbsp butter
2 shallots, diced

3 c loosely packed baby spinach

1 tbsp flour
2 plum tomatoes, insides removed and diced
1 small can no-salt corn (drained)

4 eggs
1 c half & half

salt, pepper, nutmeg

***

Preheat oven to 350°

Line pie crust with 1 c of the shredded emmenthaler and set aside

over medium heat, saute shallots in butter for about 4 minutes
add spinach and continue cooking until wilted.
turn off heat and stir in flour, tomatoes & corn

Spread mixture onto the emmentaler-lined pie crust. Sprinkle with nutmeg, if desired

In a separate bowl, mix eggs and half & half with a couple dashes of salt & pepper
Pour egg mixture into the pie crust (over the vegetable mixture)
top with remaining emmenthaler
top that with a couple dashes of salt, pepper and nutmeg, if desired

Bake at 350° for ~35 minutes
Allow to sit for 5 minutes and then serve
Related Posts Plugin for WordPress, Blogger...