Showing posts with label dessert. Show all posts

3.02.2012

Chocolate-Raspberry-Marshmallow Cupcakes

That's a mouthful, huh?

Nothing pains me more than a birthday without cupcakes...  so this year, I asked Jordan what he wanted me to make for his birthday party/100th unique beer at Pony Bar celebration...  I got a lot of vague, 'um, i dont know...'s so I just went ahead and picked something.

(ladies, if you are ever dealing with an indecisive man, just make a decision...  He'll immediately tell you what he really wants when you tell him what he's about to get if he doesnt say otherwise...)

That something that i picked never got made but what did eventually get made is the cake and frosting components that will now be my official standards...  Jordan's final request was raspberry chocolate cake...  and then somewhere along the way, he decided it needed marshmallow frosting...  So we set out.  I was hell-bent on keeping it as simple as possible so i decided i wanted to start with a boxed cake mix and just doctor it up a bit...  In googling, i stumbled upon "Too Much Chocolate Cake" and decided that, with a few slight modifications, that was going to be the base...

I knew that adding a raspberry jam filling would be simple (and i wasnt making my own jam or anything crazy like that), so next up was frosting.  We knew that the chocolate and raspberries were going to create a really sweet cake, so we wanted a frosting that was a little less-so...  In searching, we found Smitten Kitchen's post on making homemade devil dogs which included a recipe for Marshmallow/Seven Minute frosting...  seemed easy enough and like it might be a bit less sweet than the versions made with fluff, so we figured why not?


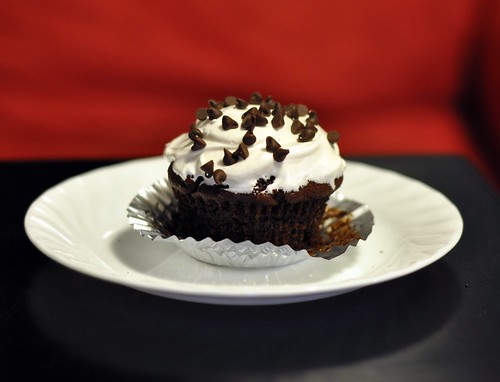
In the end, it all came together like one huge pile of YUM.  The sum much greater than the parts and the cupcakes a HUGE hit among friends, bartenders and other patrons alike...


Chocolate-Raspberry-Marshmallow Cupcakes
courtesy of me, with component parts from Denise on Allrecipes.com and Smitten Kitchen
Click here to import recipe directly into Pepperplate

For the cake:
1 package devil's food cake mix
5.9 oz instant chocolate pudding mix (this is one large package or about 1 1/2 small packages)
1 c sour cream
3/4 c vegetable oil
4 eggs, slightly beaten
1/2 c warm water
2 c mini chocolate chips

For the filling:
1 jar of your favorite raspberry jam

For the frosting:
2 large egg whites
1/2 c sugar
1/4 c light corn syrup
2 tbsp water
1 1/2 tsp vanilla extract
pinch of salt

***

For the cake:
Preheat oven to 350°

Line muffin tray with foil liners

In a large bowl, mix the first 6 ingredients together.  
Once they are all well-combined, stir in the mini chips.

Pour into cupcake liners, filling each about 2/3 full.

Bake 20 - 24 minutes or until toothpick comes out mostly clean.


To add the filling:
Once the cake is done baking and cooled, use a butter knife to cut a little divot out of the top of each.  (Each divot should be about 3/4 of an inch circle with about the same depth.)  

Pop out the divot, plop in a teaspoon or so of jam and then pop the divot back in.


For the frosting:
Set a saucepan on the stove and bring a couple of cups of water to a simmer.

Combine all ingredients in a metal bowl and set the bowl over the simmering water. 
Beat at high speed until frosting is thick and fluffy, 5 to 7 minutes. 

Remove bowl from heat, place on a heat-proof surface, and continue to beat until frosting has slightly cooled. 


Final Assembly:
Once frosting has cooled down, frost cupcakes, taking care to not knock the filling divot out.
If you have any mini-chips left over, sprinkle on top for decoration.

NOTE: Frosting will harden slightly as time goes on, so it is best to do any decorating while the frosting is still 'fresh'.

10.05.2011

Grandma P's MandelBread

We were not going to be able to celebrate Rosh Hashana with Jordan's family this year, but i knew it was important to him that we do something to mark the holiday.  Because Hallmark really doesnt have a 'high holidays' line in their stores, and no mythical characters show up with presents or chocolate,  the only marker i was left with was food.  (oh, darn.)  So I went on an elaborate recipe search all over the internets trying to figure out what to make.

The interesting thing i learned about Rosh Hashana is that the general gist of it is to eat sweet things, as a wish for a sweet new year.  This was a good thing to learn as holiday cooking is generally made more 'interesting' (and by interesting, i mean difficult) by my pescatarian lifestyle, but sweet is generally associated with desserts and such and desserts generally dont have meat in them.  This i could do.

After a bit of digging, i came up with a basic menu, which included honey cake.  When i ran it past Jordan, he was like, 'wtf is honey cake?' and i was like, 'its only what you are supposed to eat on rosh hashana, duh...' and he was all 'if you say so...'  So then we had one of those super-fun discussions that go 'ok if you dont want honey cake, what do you want?'  'i dont know...  no, its fine, i've just never had it before'  at which point i declared myself more jewish than him - which went over about as well as you can imagine...

so in the interest of saving the holiday (and maybe my marriage), i did more research.  and in that research, i saw that some people were making apple cake or mandelbread for dessert...  Now, i didnt know what mandelbread was, but when i mentioned it to Jordan, he was all 'i've been craving that!' and just like that, the world was now right in jordan's eyes.  so we called up his mom (ok, texted) and asked for his grandmother's recipe.*

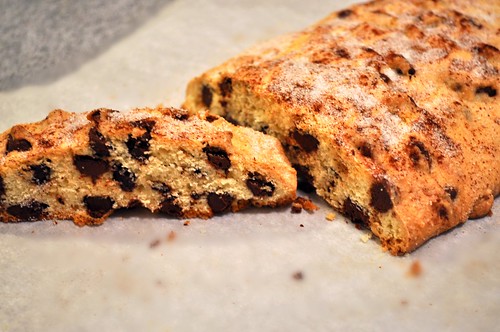
Turns out mandelbread is basically biscotti. Except not always baked the second time the way biscotti is - and never baked the second time by Jordan's family.


DSC_0748

Now, you may wonder why I'm posting this now, after Rosh Hashana.  You may be saying 'um, maybe i could have used this if you'd only TOLD ME SOONER...'  well, Yom Kippur is this weekend and i'm pretty sure that this mandelbread would be a welcome addition to ANY break fast table...

*turns out that Grandma P used Mom S's recipe - something Jordan only learned a couple of days ago...  but i like the title Grandma P's, so i'm going to take that liberty, ok?


Grandma P's MandelBread
courtesy of Mom S.
click here to import recipe directly into Pepperplate

This is the full recipe.  We actually cut it down and only made 1/3 of the recipe (therefore one loaf) because there are only two of us and we're already fat enough...

1/3 c butter
1 c sugar
3 eggs
1 tsp vanilla
1 drop lemon juice
2 1/2 c flour
2 tsp bsking powder
1 bag chocoloate chips

sugar & cinnamon for top

***

Preheat oven to 350°

Prepare a cookie sheet with a piece of parchment.

Using an electric mixer, cream the butter and the sugar.

Add the eggs 1 at a time and mix well after each.

Add the vanilla, lemon and mix well.

Combine the flour and the baking powder in a separate bowl and add the flour mixture in batches, mixing well after each addition.  (I was able to keep using the electric mixer the whole time but it does get sticky at the end...)

Add the chocolate chips and mix to combine.

Flour your hands well and divide the very wet, very sticky dough into 3 pieces.  Shape each piece into a narrow loaf and place on the parchment.

Sprinkle each loaf with cinnamon and sugar. 

Bake for 30 minutes.

Allow to cool a bit and then slice as you would biscotti and serve.  

Note: Its a dry 'cake' - i'm told its best dipped in either milk or coffee, but i liked it just fine plain :)

3.17.2011

Irish Kiss Cookies

This morning, Jordan informed me that he doesnt 'theme dress'...  He nearly wore a green shirt to work today but then realized it was St Pats and changed into a purple one.

BAH HUMBUG.

I find it slightly ironic that a guy who loves Guinness and found his future wife (me) by searching the internet dating world for redheads would decline to openly participate in the holiday that celebrates both beer and those who gave us redheads, but i digress...

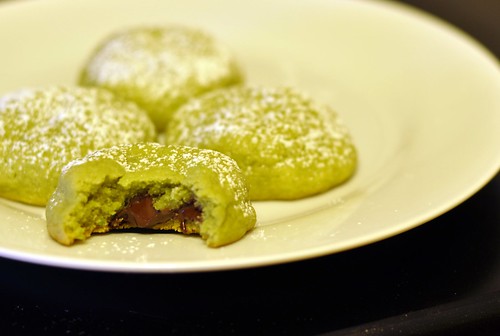
I'm making up for his non-participatory nature by wearing a green shirt, green eyeliner and giving you boozy green cookies.

DSC_0293


Happy St Patrick's Day!!!


Irish Kiss Cookies
courtesy of The Runaway Spoon with modifications by me

2 ¼ cups all-purpose flour
½ teaspoon baking soda
½ teaspoon salt

½ cup (1 stick) butter, softened
½ cup sugar
½ cup light brown sugar

1 egg
1 teaspoon vanilla extract

¼ c + 1 tbsp Bailey's Irish cream
green food coloring gel

32 Dark Hershey’s Kisses, unwrapped

Powdered Sugar

***

Preheat the oven to 350 degrees. Line 2 cookie sheets with parchment paper.

Combine flour, baking soda & salt and set aside.

Using a mixer, cream the butter and sugars until light and fluffy. 

Add the egg and vanilla, beating until combined. 

Add the Irish Cream, beating well.

Add half of the flour mixture & mix to combine.  Add the remaining flour mixture & mix to combine.

Continue to mix while you add green food coloring until you get your desired shade of green.

Push a kiss into ~ 1 tsp of dough and form a ball around the kiss.  Place on baking sheet, leaving 1.5 inches or more between each ball.

Bake ~9 minutes.  Cookies will flatten some and the color will change slightly.

Cool on the cookie sheets for a minute or two, then carefully slide parchment paper onto a wire rack to finish cooling.  

Dust with powdered sugar.

2.17.2011

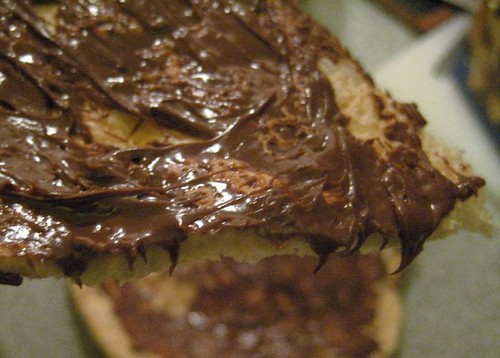
Homemade Nutella (Chocolate-Hazelnut Spread)

I needed a win.

I dont take well to failure (real or perceived) and its been a week or so of failure on some level.  And while i dont back down and hide, i do tend to try to turn things around.  When i used to do taxes, this amounted to walking into my boss' office and asking for the easiest return they had.  because when failure is all around me, i just want something that works.

This is the culinary equivalent of that easy tax return.

The internet has been buzzing about homemade nutella.  The LA Times published their recipe about two years ago but recently, it seems that everyone is all aflutter about it...  It seemed to hit a fever pitch somewhere around the holidays and then slowed a bit for some of January and then bam, right back just in time for World Nutella Day - a week and a half or so ago...

So when the universe seemed intent on telling me that i was a failure, i thought, what could be better than homemade nutella?  it appears easy enough and, hello, you get nutella in the end.  WIN-WIN.

When setting out to choose a recipe, i read a whole bunch.  some used cocoa powder, some melted chocolate.  some hazelnut oil, some vegetable oil, some no oil.  some milk, some powdered milk.  I poured through countless versions of this recipe until i came up with a game plan...  hazelnuts, cocoa powder, confectioners sugar, & vanilla.  Milk & vegetable oil on standby incase i needed them.

it was all going fine, too, right up until i was nearing the end...  i felt that i needed a bit more creaminess so i thought, ok self, lets go for a tablespoon of milk...and thats where the unraveling began...

the chocolate?  she seized.

if you've never experienced seized chocolate, well, its not pretty...  the chocolate gets grainy and unusable.  now, i'm still not totally sure why this happened as many bloggers before me had used milk without reporting adverse effects and the fats present from the liquified hazelnuts should have prevented the moisture from the milk (which also had fat in it!) from creating such a disaster, but there it was, in the food processor - a big mess.

but, again, i dont back down so easily so i was all 'its ok - thats what the vegetable oil is for!'

and then bad went to worse...

because while i did manage to make the mixture a bit smoother (though not as creamy & smooth as it should have been) my next taste was pretty much disgust.

my nutella tasted more like wesson oil than it did like anything else.

and thats when i finally gave up.  for that night, at least...

The next night, i was hell-bent determined to succeed.  So i stopped and picked up another $8.50 worth of hazelnuts and some powdered milk (ha!  i'll show that chocolate!) and while i was there, grabbed some hazelnut oil because i did not want Wessonutella again.  Hazelnut oil is not cheap, but have you heard the saying 'throw money at the problem'?  well, thats what i was doing.  I figured i could pay my way into success and frankly, I was ok with that...

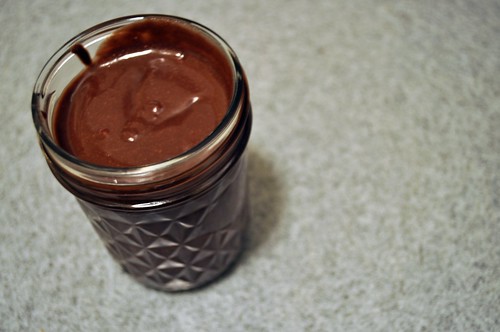
DSC_0146

(It turns out that Jordan, being the husband extraordinare that he is - not to mention a fan of all things nutella, especially since our honeymoon in paris - also stopped at our beloved fairway for more hazelnuts and powdered milk...  he's good like that.  no, you cant have him...  and yes, that means we have more ingredients for MORE nutella!)

Thankfully, things went much, much better this time.  I'd managed to get my cocoa & sugar proportions sorted out the night before, so this time was a cinch...  of course, my blood pressure was most likely about 345/150 the whole time, waiting for something to go wrong, but FINALLY, FINALLY - SUCCESS.

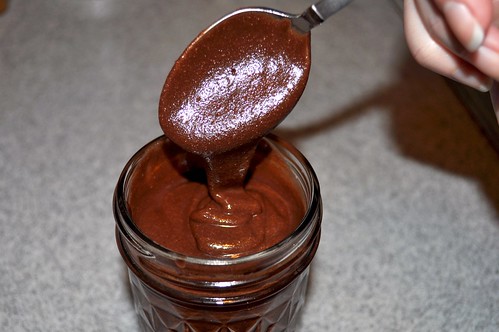
DSC_0156

So next time you need a win?  This is your answer.


Homemade Nutella
courtesy of the LA Times, modifications by me


2 cups raw hazelnuts (if you can find pre-peeled ones, get them.  If not, i'll give you instructions on how to peel them below)

1/3 c cocoa powder
2/3 c powdered sugar
2 tbsp powdered milk

~1/2 tsp vanilla
~2 tbsp hazelnut oil


***

Preheat oven to 375°

Spread hazelnuts out on a baking sheet and place in oven to toast for ~ 8 minutes.  They will be fragrant and, if pre-peeled, 'shiny' when they are ready.

If your nuts are not pre-peeled:
Place warm nuts (be careful) in a clean dishtowel and rub, rub, rub.  The skins will rub off of the hazelnuts and into the towel.  You may find that you want to shake the towel out a few times and re-rub the hazelnuts.  You want to get as much skin off as you possibly can.

Once your nuts are peeled (or, right after they come out of the oven if they were pre-peeled) throw them into a food processor fitted with the basic, all purpose blade.

Pulse a few times until the nuts start to break down, then turn the processor on and let it whirl for about 5 - 6 minutes.  During that time, you will want to pause it and open it up and scrape down the sides, but you wont have to do this much after the first couple of minutes...

during those 5 - 6 minutes, your hazelnuts will first turn to a meal, then to a dust, then to a peanut butter-like substance, then will congeal and then, finally, into something that can only be described as really runny peanut butter consistency.

Once that has happened, add the cocoa powder, powdered sugar and powdered milk in and turn the food processor back on.  You'll end up letting it run another minute or so, but you will have to scrape it down at least once during that time as the cocoa and powdered sugar will have, inevitably, gone everywhere...

This is now the point where you have some decisions to make.  Taste the chocolaty-hazelnutty goodness and figure out how its working for you.  Some people will add a bit more sugar or a bit more cocoa.  some will think this consistency is good.  some will think they want it smoother or creamier...

At this point, i turned the food processor back on and used the little streaming hole to add first ~ 1/4 tsp of vanilla and ~ 1/2 tbsp of hazelnut oil.  then another 1/2 tbsp hazelnut oil.  then i tried it again and basically added those same ingredients - another 1/4 tsp vanilla and probably about another 1 tbsp of hazelnut oil until i got a taste and a consistency that worked for me.  note:  its going to thicken in the fridge, so at this point, you will want it to be a bit looser than you'll actually want the final product to be...


Once you've got something you like, find your best adorable mason jars (or other resealable, airtight container) and fill them up.  I found that i got about 2 small mason jars worth of nutella out of mine.

Use as you would regular nutella.


Notes from me & the internet: 

  • Homemade nutella is more expensive (by a lot) than jarred nutella.  This is much more for fun & for avoidance of weird ingredients than it is for saving $.
  • The internet claims this will last anywhere from a week to a month in your fridge.  I've only had it for a day, so i dont know.
  • The internet also tells me that i should let the nutella warm a bit before spreading.  good luck with that.
  • My brain tells me that, if i owned coconut extract, i would have used that instead of vanilla.  I've always thought nutella tasted vaguely coconutty and i think it would be good.
  • Just as i was writing that sentence, my brain thought that maybe a half-cup of macadamia nuts in place of one of the half-cups of hazelnuts would make this tropically delicious.
  • My brain also tells me that i think, if you were to leave out the powdered milk, you wouldnt need much oil.  In this case, you could save yourself $10 and just use wesson, cause you'd probably only use a tsp to a tbsp or so of it and it probably wouldnt affect the flavor much.

1.19.2011

Skillet-Baked Chocolate Chip Cookie Pie

If i wasnt all into using the actual recipe names as titles, this one would be called "this is why we're fat"...

a week and a half ago, i was having a cranky (read: PMSy) day and wanted a cupcake.  then, in true gemini fashion (no, i dont believe i'm a taurus now...), changed my mind like, 12 minutes later.

However, Jordan being the good (read: fan of non-crankyness) husband that he is, he brought home a brownie.  and announced that he'd be making me a brownie sundae.

he had no idea.

that was 2 weekends ago.  do you have any idea how many brownie sundaes have been consumed since then?

its not pretty, thats all i'm going to admit...

so, i was dreaming of brownie sundaes when i was suddenly reminded about the blondie sundaes i used to make when i was going into my junior year of college...  they were awful - wanna know why?  cause i was dieting.  and they consisted of fat-free blondies with fat free froyo and sugar free caramel sauce or hot fudge.  and reduced fat whipped cream, or something equally chemically and disgusting.  I think the whole thing clocked in around 180 calories or something.  there is nothing natural about a blondie sundae that is under 200 calories.  Nothing.

so anyway, i'm thinking of this and then THIS pops into my inbox.  because that martha, she sends me these recipes - every day!  (yes, i could unsubscribe, but what would be the fun in that???)  and i'm thinking, that looks WAY better than the 180 calorie blondie sundaes of yore...

and, wait for it (sorry, we've been watching past seasons of How I Met Your Mother, so its all 'wait for it' these days..), we got a new cast iron skillet at my bridal shower and we havent used it yet because i kept telling J he couldnt cook meat in it until i cooked something else in it as i was scared that if meat was the first thing, that it would always taste like meat forever and ever...  and this cookie - this was something that was not meat that i could make!  i could break in the skillet!  woo-hoo!

when telling J, i'd be making this, he made fat faces at me (cause we're gross, you see) and i promised that i'd bring the leftovers to work to get them out of our house.

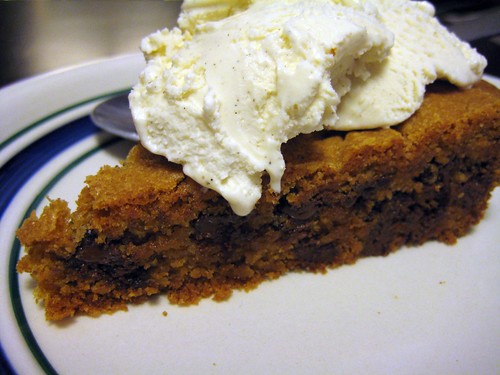
IMG_4381

those leftovers most certainly did NOT come to work today as there was NO way we were sharing with anyone...  if this cookie is what makes me fat, then bring on the fat clothes!


Skillet-Baked Chocolate Chip Cookie Pie
courtesy of Martha, slight modifications by me


2 cups all-purpose flour
1 teaspoon baking soda
1/2 teaspoon salt

3/4 cup unsalted butter, softened
1/2 cup sugar
3/4 cup packed light-brown sugar

1 large egg
2 teaspoons pure vanilla extract
1 1/2 cups semisweet chocolate chips

***

Preheat oven to 350 degrees.

If your skillet requires seasoning, lightly grease and set aside.

In a medium bowl, whisk together flour, baking soda, and salt.

In another bowl, cream butter and both sugars until mixture is light and fluffy. (taste it to make sure.  or at least tell people thats why you are tasting it...)

Add egg and vanilla; mix until they are fully incorporated. 

Add flour mixture, and beat until just combined. 

Stir in chocolate chips.

Transfer dough to your prepared ovenproof skillet, and press to flatten, covering bottom of pan. 

Bake until edges are brown and top is golden ~ 40 minutes. (Don't overbake; it will continue to cook a few minutes out of the oven.)

Transfer from skillet to a wire rack to cool ~ 15 minutes. 

Cut into wedges and serve with your favorite vanilla ice cream, caramel sauce, hot fudge, whipped cream or anything else you like on your blondie sundaes.  Just make sure none of it is low fat or fat free :)

1.03.2011

Apple Oatmeal Crisp

so i'm on the phone with Jordan, and we're discussing how much butter we consumed this weekend.

its not pretty...

but i'm going to share this with you anyway.  because you arent the one who consumed an amount of butter that breaks every single piece of nutrition advice ever given in the history of nutrition.

New Year's eve was quiet this year - we'd been down in North Carolina visiting the family (my side) and got snowed in.  and having nothing to do with us being snowed in, i caught a cold from my nephew...  but between the sick & the snowed in (which really, was irrelevant, but makes the story sound more legit, maybe?  no?  oh well, then whatever...) there was just no way i was going out on NYE...  so we opted for a night in - figured we'd cook yummy food instead of spending our time with hundreds of drunk strangers...

our menu consisted of all things tasty without any regard for nutrition, clogged arteries or anything else...

so, i know you are reading and are all 'but i thought this was going to be a recipe for apple crisp?!  apples!  fruit!  healthy!'

and if you want to delude yourself into thinking that anything that contains 1.5 sticks of butter could be healthy, then knock yourself out...  but the rest of us, we all know better...

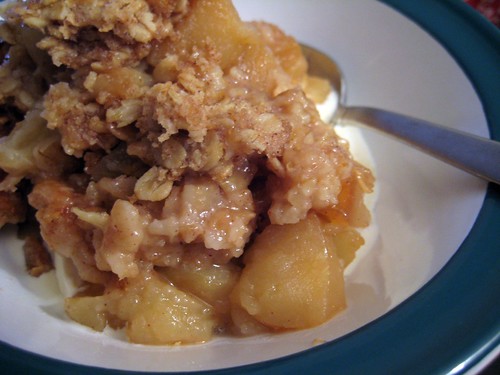
IMG_4320

This apple crisp isnt the crispiest of crisps...  I actually think a bit less butter - or maybe less incorporation of the crumb topping ingredients - may have made it a bit crispier...  but frankly, i didnt care.  Warm apple crisp, regardless of crispyness, over vanilla ice cream?

worth all the butter.


Apple Oatmeal Crisp
heavily adapted from Apple Crisp IV - Allrecipes by me


2/3 c flour
1 1/3 c rolled oats
3/4 tsp ground cinnamon
1/3 tsp ground nutmeg
1/3 tsp allspice
splash of vanilla
3/4 c packed brown sugar
3/4 c butter (1.5 sticks)
5 medium sized macintosh apples (or your favorite baking apple), cut in chunks

***

Preheat oven to 350°

In a large bowl, combine flour, oatmeal, cinnamon, nutmeg, allspice & brown sugar.

Splash in a little vanilla.

Using a pastry blender, 2 knives or your fingers, cut the butter into the mixture until crumbly.

Pat half of the oatmeal mixture into the bottom of a pie plate or other similarly-sized baking dish
(note - i botched this step.  Forgot to add the brown sugar and didnt realize until i'd already put half of the mix into the dish.  So i just crumbled 1/2 of the brown sugar over top of the oatmeal mix for the bottom layer.  I combined the other half in with the rest of the mixture for the top layer (2 steps ahead))

Put all of the apple on top of the oatmeal mixture and gently press apples down.

Sprinkle the rest of the topping over the apples

Bake for ~ 45 - 50 minutes until topping is golden and apples are tender.

Top with additional cinnamon (if desired) and serve with vanilla ice cream.

May be refrigerated & reheated.  (I actually may have liked it a bit better after it spend a day in the fridge...)

4.30.2010

2 point microwave cake for one

(formerly titled 'SSB for two*')

I seriously hate hate hate to quote sex and the city - so cliche! - yet sometimes, its the only way to express my thoughts on something...  but this truly is one of those things that should probably fall into the category of Secret Single Behaviour...

(this could also be called 'science experiment' or 'myth busters' or whatever other terms one could use for testing something found on the internet that seems too good to be true...)

somewhere along the way, i stumbled upon this recipe for '2 pt cake for 1'...  (the internet tells me its originally from http://www.skinnytaste.com/, but i cannot find it on that site, so i'm not sure...)
first we see the tell-tale points in the title meaning we're dealing with weight watchers (i'm a lifetime failure member, so know these things immediately...) which, um, the reason i left WW?  to eat real food instead of packaged chemicals and to avoid things like splenda being in everything i ate...  so i'm already skeptical.

then i read said recipe.  and now i'm REALLY skeptical...  i figure that, at best, this is going to fall somewhere between easy-bake oven cake and that crappy experiment that was microwave cake a number of years back.  neither of which is promising.

however, thats why i'm here and why i'm blogging - to tell you that this far exceeded my expectations.  that this actually isnt half bad!  i had the recipe sitting on our table long enough to intrigue the meat eater enough that he went out and purchased the ingredients so that we could try it sooner rather than later...

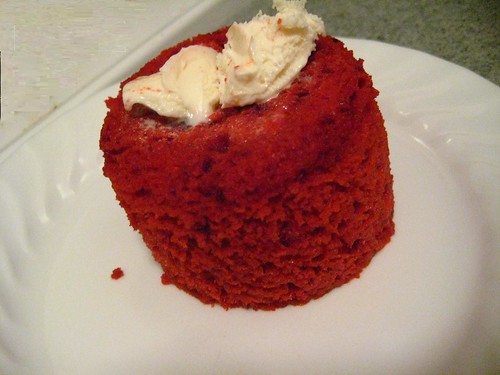
IMG_3577a

i know enough WW-math to know that 2 points of something like this cake is somewhere in the vicinity of 100 calories which is something that even I can fit into my diet most days...  and on a good day, it even leaves a bit of wiggle room to add a tablespoon of cream cheese frosting to it...

our low expectations caused us to only make one serving of it (making this '2 pt cake for 2') but we didnt end up throwing away the rest of the mix as i had guessed that we might (which would have made this a $6.00 shitty cupcake) but i'd love to figure out how long to microwave two of them at one time, cause i can assure you this will be made again.

*this isnt a relationship blog, but you have to admit, the best ones are when you get to share your secret single behaviours, dont you think?


2 point microwave cake for one
courtesy of the internet, possibly originating from skinnytable.com

For the mix:
1 box red velvet (or any other flavor) cake mix
1 box angel food cake

***

Combine thoroughly in a ziplock bag or other seal-able container


To make the cake:
1/4 cup of the mix (above)
2 tbsp water
frosting (optional - this adds another point or two, if you are counting)

***

Combine mix and water into a microwave safe mug (one of the ones that are glazed inside work best)
Stir until well combined to avoid cake-mix lumps
Microwave 1 minute on high.
Gently run a butterknife around the edges of the cake to loosen it from the sides then invert mug over to release cake onto a plate

Add a tablespoon of cream cheese (or other) frosting, if desired (the meat eater prefers it plain)

6.10.2009

Happy Birthday to me!

Generally speaking, when its your birthday, someone else brings the cupcakes... however, when you are the one with the food blog (however defunct it may be) it just makes more sense that you'd do it yourself...


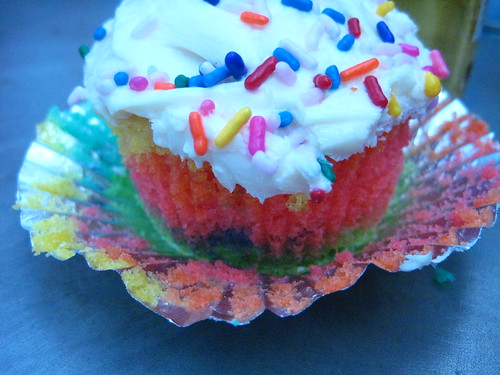
IMG_2784


The boy had gotten guiness cupcakes on his birthday because I decided that if i was going to bring cupcakes to a boy-birthday, that they had to be 'manly' cupcakes...

but for my birthday? no need to be manly. or overly-flavor complex as we'd be paring them with limey-corona goodness... but I stuck with the 'match the cupcakes to the personality' thing and went with the side of me that thinks that birkenstocks are appropriate footwear almost anywhere you go...


IMG_2782


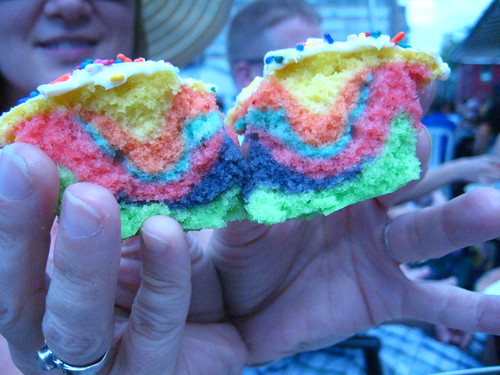
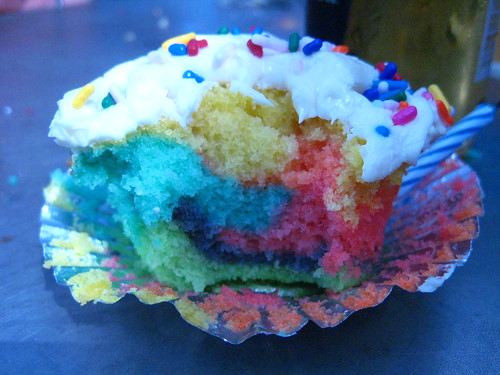
Hippy Dippy Tie-Dye Cupcakes
cake courtesy of Magnolia Bakery with modifications by me, rainbow effect courtesy of the internet

1 cup unsalted butter, softened
1 3/4 cups sugar
4 large eggs, at room temperature
1 3/4 cups all-purpose flour

1 tsp baking powder
1 cup milk
1 teaspoon vanilla

food coloring gel

1 container cream cheese frosting
sprinkles


Preheat oven to 350°

Line cupcake tray with cupcake liners

Cream butter and sugar (with electric mixer) until light and fluffy

add eggs to the sugar/butter mixture one egg at a time, beating after each

in a seperate bowl, combine flour and baking powder and whisk to ensure that its all combined

in another bowl, combine milk & vanilla

in small batches, add flour mixture and milk mixture (alternate) and continue to beat the entire time

divide into 6 small batches.

add food coloring to each of the small batches to achieve desired colors

spoon a small amount of each color into each cupcake

repeat with each color until cupcakes are about 3/4 full

bake for ~ 20 minutes, checking after 18 for done-ness

transfer to cooling rack & allow to cool

frost with cream cheese frosting & sprinkle liberally with sprinkles


IMG_2785

3.31.2009

the simple life

once upon a time i found making pasta to be significant. because it meant boiling actual water (no pasta-prontas here!) and - omg - heating up sauce... i thought myself a gourmet when i'd add a little ricotta & shredded mozzarella because, i mean, thats like almost baked ziti.

then one day i decided that anything that didnt involve either some level of difficulty, creativity, or odd ingredient found only at fairway was just too basic for me...

that snobbery did not served me well. it caused me to miss out on so many things just because they werent 'different' enough... (sure, it also served me very well in that i ended up eating things i may never have eaten otherwise, but we're focusing on simple here today, ok?????)

IMG_2706

today isnt really so much about what i made as it is about that notion of dropping the snobbery at the door. not always going for new-different-wow. instead, sometimes just sticking with the tried-and-true...


Rice Krispie Treats, microwave style
courtesy of Kellogg's, i think...

4 tbsp butter

4 c mini marshmallows

6 c rice krispies


Heat butter in microwave safe bowl for ~ 45 seconds or until melted

stir in mini-marshmallows, coating all with the melted butter

microwave entire mess for 45 seconds, stir and put back in microwave for another 45 seconds

Line a 9x13 pan with waxed paper

When microwave dings, mix rice krispies in with buttery marshmallowy goodness until well combined (*note - could also add a variety of other things now - chocolate chips, peanut butter, whatever... or could make this with a different kind of cereal... go crazy...)

scoop into wax-papered pan

cover with another sheet of waxed paper and press down

Allow to cool (could be in the fridge to speed it up) and then cut into 24 squares


try not to eat them all at once...

6.10.2008

speaking of the french...

you know those people who claim to like rice cakes?

you totally thought they were liars too, right? all "oh, rice cakes are good! i really think they totally make a great snack! i mean the chocolate flavored ones are almost like eating cake!!!"

i've always just looked at those people and wondered what chemicals, exactly, were in those rice cakes and was the government aware of the hallucinogens being transported via rice cake?

well kids - i've figured out the secret... its the perfect-storm combination of the american diet of rice cakes and water combined with all of the decadance of the french diet.


i owe Carolyn a debt of gratitude (did i get that saying right? if not, you know what i mean anyway...) for mentioning her 'altercation' with a jar of nutella... it reminded me that i, too, had nutella!

oh, my intentions were good... the supermarket had these awesome 'homemade rice crackers' - i dont know what they are, exactly, but they are bigger than a full sized pita bread and have 18 calories each and dont taste like ass, so they seemed suitable for scooping some tuna salad...

tuna salad got old and then my brain played rewind and thought - NUTELLA...

thanking god for my good fortune at having a jar and thanking the makers of nutella for making it fairly un-perishable (and therefore not an expired jar in my cabinet) i spread some of that chocolately hazelnutty goodness on that 18 calorie rice cracker and fatted & caloried the whole thing right up :)

IMG_1732

the only problem i'm having? that whole 'portion control' thing that the french have down pat...


The Perfect Storm
courtesy of me

rice cakes or crackers (preferably fresh & 'homemade')
nutella

spread approximately 1 tbsp of nutella on an ~8in rice cracker.
Keep the layer fairly thin.

break into smaller pieces and eat while watching lightening dancing outside of your window.


signs of summer, pt 1

a bit late as the 90° + weather pretty much screams "its not a sign of summer, it IS summer"... but i'm behind - shocker. me, late?

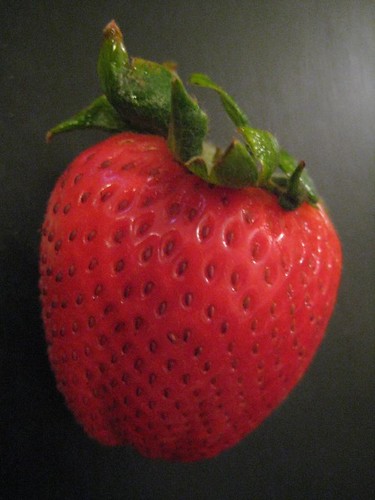
anyway... first up, strawberries.

IMG_1662

could that be prettier?

could you even try to resist that?

not me.

First i copied Roopa's ricotta (omg, so easy and SO good!) and then her idea.

IMG_1665


Fresh Ricotta with Berries & Honey
Courtesy of Roopa, via random boring workday-type emails

Prepare fresh ricotta

cut berries into quarters and place on top of and around cheese

drizzle honey over combination

sprinkle with a bit of fresh pepper, if desired.

12.03.2007

are we there yet? thanksgiving - the finale...

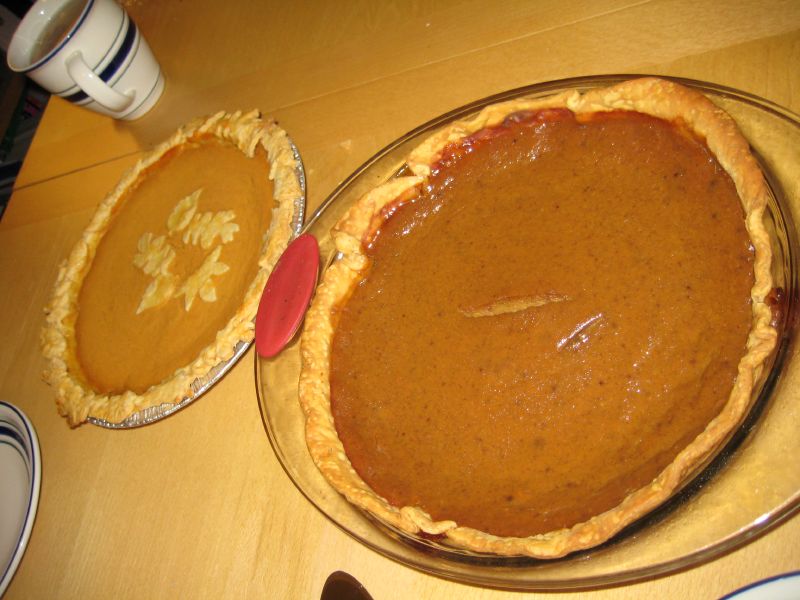
this part is quick. short and sweet. i had all these delusions of making cookies, individual cheesecakes (i'll post them one day) and pumpkin pie... susan's neighbor gave her a 100% homemade sweet potato pie... complete with cute leaf crust... she brought it with her.

once i realized that it was 3 am on wednesday night/thursday morning and i was still up preparing food, and then after drinking that awesome hot chocolate the next morning, and further realizing that there would only be two of us left by the time that dessert rolled around, cookies and cheesecake went by the wayside.

i still insisted on making the pumpkin pie because its my favorite. and susan said sweet potato was very similar, but i'd never had sweet potato and what if i didnt like it???? thanksgiving would have been ruined! thats what.

IMG_0971

i'm nothing if not dramatic afterall...

ok, so see that pie on the right? i made that one. kinda. but i didnt make my own crust... i'd hang my head in shame and all that but whatever...
because there is NOTHING better in the world than that pie on the left. NOTHING.

susan's neighbor wont give up the recipe, but i fully intend to spend the rest of my life making that pie... anyone have any kick ass sweet potato pie recipes????? i'm thinking there was coconut milk or something in it, but i could be wrong... it was just so freaking good - i fully intend to gain 3 sizes worth of weight if thats what it takes to figure it out...

11.12.2007

mint chocolate crack

a few weeks back, when i made my crabcake feast, i intended to make dessert as well. However, wine took over that night and dessert fell by the wayside.

but i'm nothing if not determined. or is it stubborn? no matter, either way, there would be chocolate mint bars...

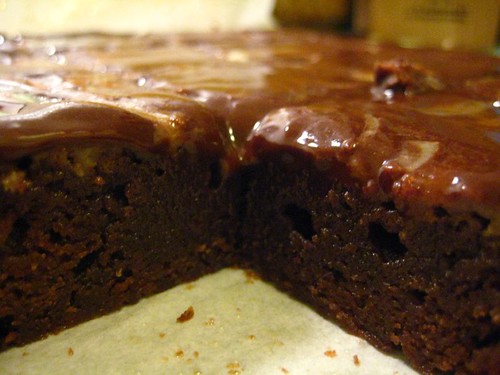
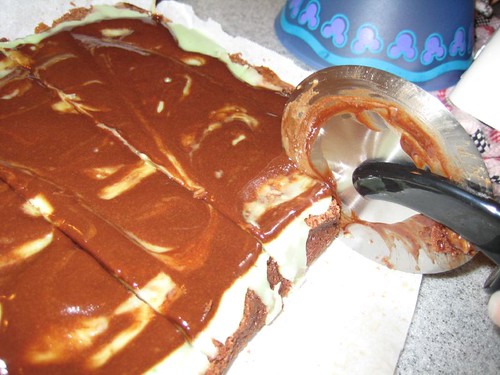
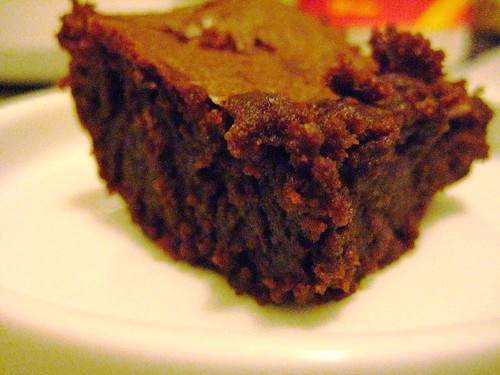
the pictures are kind of lacking as is the story, but these may be the perfect fudgy minty chocolately crackness...

IMG_0838


perhaps the only thing i can teach you, oh lovely internet, is that a pizza cutter makes an awesome brownie cutter :)

IMG_0835


Chocolate Mint Bars
courtesty of southernfood.about.com / Diana Rattray (with minor changes by me)

Brownies:
2 eggs, beaten
1/2 cup melted butter or margarine
1 cup sugar

1 ounce unsweetened melted chocolate
1 ounce semisweet melted chocolate
1/2 teaspoon peppermint flavoring

1/2 cup all-purpose flour

Frosting:
2 tablespoons softened butter or margarine
1 tablespoon cream

1 cup confectioners' sugar, sifted
1 teaspoon peppermint flavoring
few drops green food coloring

Topping:
1 ounce semisweet chocolate, melted with 1 tablespoon butter


Preheat oven to 350°. *
Prepare 8x8 baking dish by lining with parchment and spray with cooking spray for baking (butter/flour)

Combine eggs, 1/2 cup melted butter, and granulated sugar; beat well. Add the 2 ounces of melted chocolate and 1/2 teaspoon peppermint flavoring; stir until well blended. Stir in the flour; blend well.

Pour into a baking pan. Bake for 25 to 35 minutes. (tester should come out fairly clean) Cool on wire rack.

Thoroughly blend the 2 tablespoons butter and the cream; add confectioners' sugar and 1 teaspoon peppermint flavoring, along with the food coloring. Spread over the cooled chocolate peppermint bars.

When frosting is firm, spread chocolate and melted butter mixture over the top and swirl, if desired. Refrigerate until topping is firm.

Cut into small pieces, as the bars are pretty rich.
IMG_0837


*note... my oven may have been closer to 335° or 340°... i didnt notice this until the brownies were taking forever to cook... but they were kinda awesome, so you may want to do the same and leave them in for 35 - 40 minutes instead... just a thought.

10.03.2007

loyal reader contest!

guess what? you already lost...

cause the thing is, there's this guy at work - we'll call him Junior - and he checks this blog every morning. without being reminded. and it makes me happy :)

in honor of his loyal readership, i decided to make him something for his birthday... since he was the one who got nervous that someone else was going to take the brownies, i figured that brownies were the way to go...

that sounds like a good story, right? whatever, i was totally selfish in my choice. (shh, dont tell him...)

see, i was reading smitten kitchen and i saw her peanut butter brownies... and here's what i read:

"Beat together butter and sugar with an electric mixer at medium-high speed
until mixture is light and fluffy, then add peanut butter and beat until
incorporated. "

Um, so let's get this straight - you want me to first make the irresistable butter/sugar combo and then i add peanut butter?????

IMG_0593


typically, i say that my version of heaven is a big Target with a Starbucks attached to it... I'd like to add an addendum to that and say that i'm fairly certain that it also has a big fluffy pool of butter/sugar/peanut butter right outside... (i used to think that butter/sugar/cream cheese was the holy grail... i was sorely mistaken. )

its a really good thing that baking is NOT an exact science, because i dont even want to tell you how much of that i ate before cooking it... both at that stage, then after i had added the flour and everything else... (I'm fairly sure i went thru half of a bottle of hand soap cause i kept licking my fingers and figured my co-workers and i arent really close enough for me to not wash each time...) even with raw egg... it was worth salmonella...

of course, this wouldnt be a post from me without a mistake, right?


see how nice that all looks going into the baking dish? all lovely and fluffy and tan. solid tan. evenly colored tan.

5 minutes after i put it into the oven, i realized that i was supposed to mix chocolate chips in there...


d'oh.

I contemplated leaving them out - who would know? however, in a moment of true perseverance, i pulled it back out of the oven and proceeded to mix those chips in... right there in the baking dish...
you know what happened next, right? yeah, half the chips melted... (which is why i really hope you didnt click on that other link earlier, cause this is one of the reasons that her pictures are WAY prettier than mine...)
but whatever... i figured that, while the asthetics may be off, the taste probably wouldnt be...

plus, the whole thing was going to be covered in ganache anyway...
(i was accused of using chocolate frosting-from-a-can on these. i can assure you that is honest to goodness ganache... made from callebaut bittersweet & semisweet chips)


and honestly, is ANYONE ever going to complain about peanut butter chocolate brownies??? regardless of what they look like??? seriously???

IMG_0617


last night i found them to be a bit too sweet - the kind of too sweet that makes you feel a little sick and wish for a big huge glass of milk and a banana cause your system cant take all of the sugar...

tonight, i found them to be pretty much perfect... i guess that banana i ate earlier made all the difference... or maybe it was the fact that i hadnt eaten half of a bowl of sugar/butter/peanut butter earlier tonight...


Peanut Butter Brownies
Courtesy of Butterwood Desserts, West Falls, New York via Gourmet, October 2007, via smittenkitchen.com (with adaptations along the way)

Peanut butter 'brownie' layer:
2 sticks (½ pound) unsalted butter, softened
1¾ cups sugar

1 cup creamy peanut butter (good ol' jif or other normal brand. Nothing fancy needed)

2 large eggs plus 1 large yolk
2 teaspoons pure vanilla extract

2 cups all-purpose flour
1 ½ cups bittersweet chocolate chips (9 ounces)

preheat oven to 350° Line the bottom of a 13 x 9 baking dish with parchment paper and spray the bottom and sides with cooking spray for baking (or do the standard butter/flour prep)

beat butter and sugar together with an electric mixer until light and fluffy
add peanut butter and beat until you cant resist sticking your fingers in and trying it

beat in whole eggs, egg yolk, and vanilla

add flour and beat on low until just combined

Mix in chocolate chips (by hand)

spread batter evenly in baking pan

bake until brownies are deep golden - 40 to 45 minutes. A cake tester (fork, toothpick, etc) may still have a few crumbs attached... as long as they are crumbs, thats ok.

leave in the pan and cool completely. (may take a couple hours. may take a few minutes in the fridge if its late and you just want to be done already.)

ganache layer:
½ cup heavy cream

1½ cups chocolate chips (9 ounces) - half semi-sweet, half bittersweet

1 tablespoon unsalted butter, softened

put chocolate chips (1½ cups) in a heatproof bowl

bring cream to a boil in a small saucepan, then pour over chocolate chips and let stand for a minute or so.

add butter to the mix and whisk until all is incorporated (chocolate is melted and there are no lumps of butter or chocolate)

spread ganache on cooled brownies and let stand until set. Throwing it in the fridge may speed this process up... (i'm impatient. sue me.)

then cut and enjoy. makes anywhere from 8 to 40 brownies, depending on how gluttonous you are.

9.28.2007

directionally stupid

if i was politically correct, i'd call my self 'directionally challenged'. but the fact of the matter is, thats not strong enough. i'm honestly, truly, directionally stupid... i used to think it was just in relation to driving but i think i'm finally realizing that its pretty much every aspect of my life. if there are directions, i'll screw them up.

last weekend, my mom and i went to Target (sigh. i'm in love with target, so there's always a sigh after a visit...) and since i'm 100% impressionable, i picked up this little 'fall baking' recipe book. its the opposite of fancy - i believe it was created by betty crocker - but when i flipped it open, i saw something that i NEED to make... so i bought it.

after flipping through it to see if i had, infact, just spent 6.99 for one cookie recipe, i noticed that there were actually a number of things that looked really good. some easy, some more challenging...

tonight was one of those nights where i wanted something on the 'easy' side.

i guess the problem is that i dont really pay attention to something i have deemed 'easy'. it happens at work, and apparently, it happens in the kitchen.

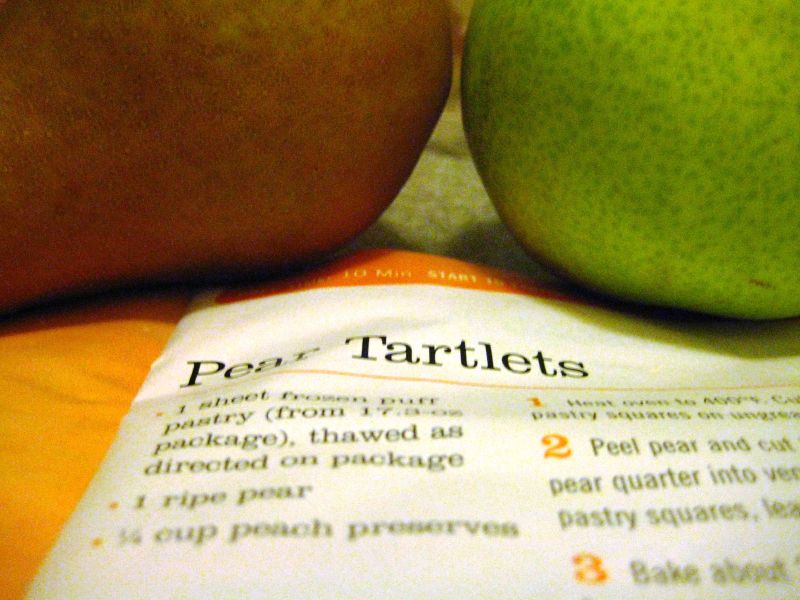
these pear tartlets had exactly 3 ingredients. 3.


i managed to get 2 things wrong.

what i was supposed to get was puff pastry, pears and peach preserves...


what i came home with was pears, filo sheets and apricot preserves...


i sat there, in whole foods, looking at a pack of puff pastry. and then i saw the filo sheets next to it. and for whatever reason, my really scattered brain ceased to remember that they are not, in fact, the same thing. so mistake #1, i bought filo. for two reasons. one, it was 1/3 of the price of the prize winning puff pastry (it really said that it was prize winning, i just dont remember what prize) and two, the actual puff pastry was in a tub whereas the filo was in something that looked more like a roll of aluminum foil. and i couldnt wait to see how something rolled up like that was going to work...

hi, if it looks impossible, it probably is.

the apricot preserves was just a big brain fart. or a bit bout of laziness, really, cause the recipe was IN MY BAG. god forbid i had pulled it out and looked at it before buying the wrong thing...


but, whatever. because i get this weird, sick, stubborn determination when things are going utterly and completely wrong, i figured i'd still make tartlets...


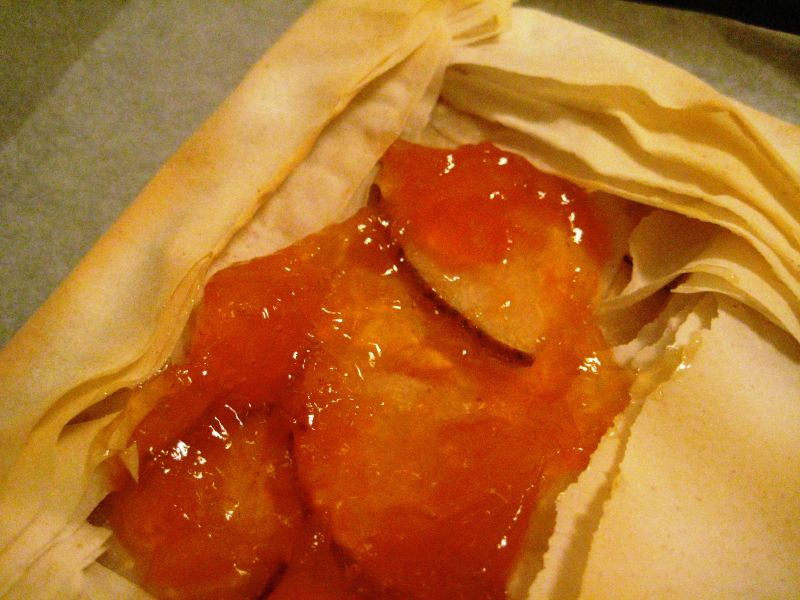
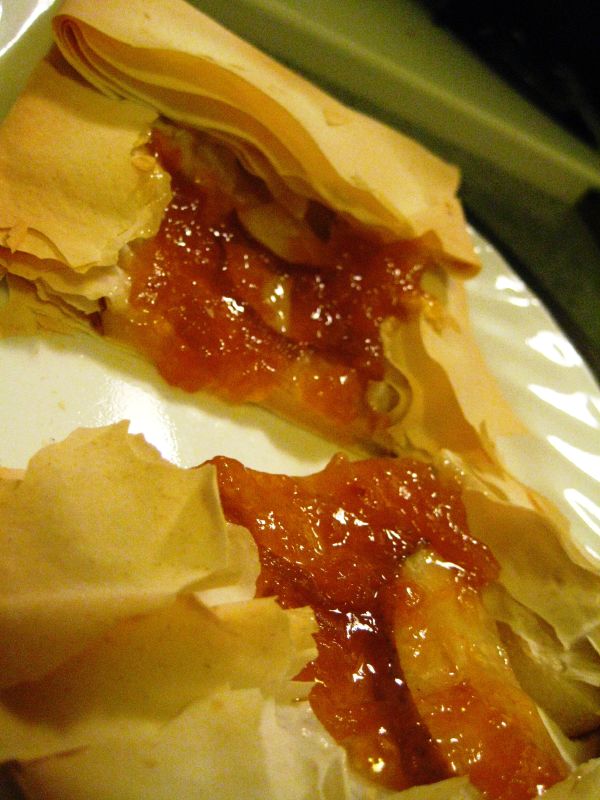
my final product really doesnt look anything like the one in the magazine and my guess is that it doesnt taste anything like the one in the magazine.

but you know, it wasnt half bad... so 'not half bad' that i ate 4 of them.

what? i dont think 4 is excessive when its your entire dinner...


Pear Thingies
courtesy of my big, fat mistake

4 sheets filo dough
2 pears - 1 bosc, 1 d'anjou
apricot preserves

preheat oven to 400°
stack filo sheets and cut into 4 quarters
arrange filo quarters on cookie sheet, lined with parchment
chop pears into quarters and then into small slices.
put pears on each quarter, leaving about 1 inch around the edges (i used about 2/3 of my pears...)
fold edges over - they'll cover the pears a little bit, but wont make a full 'pocket'
bake for 10 mins.
lower oven to 350°, rotate cookie sheet and bake for another 5 mins or so, until filo is brown around the edges.

while still warm, top each with a spoonful of preserves, covering all of the pears.

allow to sit for 5 - 10 minutes and then eat, while still a little warm.

9.24.2007

renters insurance rocks!

sometimes i get this crazy idea to try something i've never had before... luckily for you, i know that one of the elements of a good food blog is to post the disasters along with the rest of it...

anyway, 'things i've never had before' is pretty much half of any grocery store, cause, you see, i grew up with a mom who didnt know that people ate anything other than grape jelly. no joke, i sent her out for strawberry jelly (i'm not a spoiled brat - my leg was broken, so she was shopping) and she looked at me as if i had asked her to first grow the strawberries and then make the jelly herself...

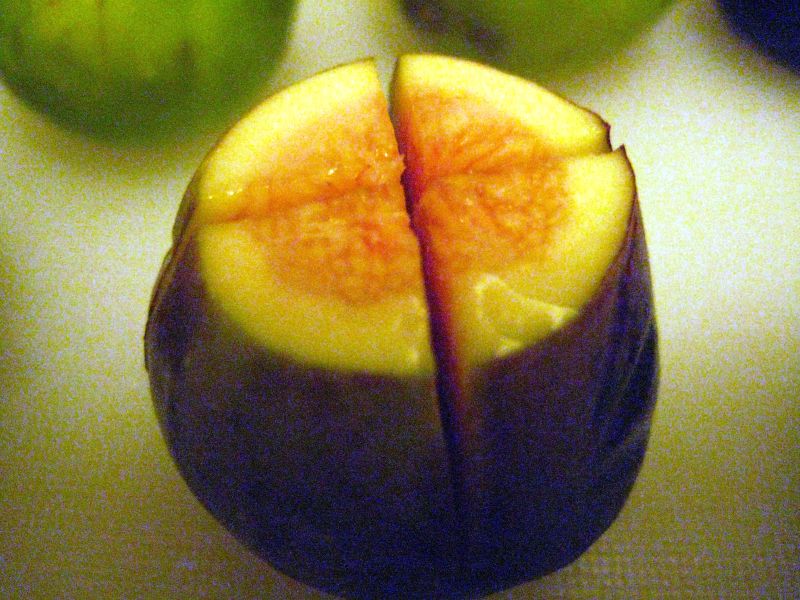
the latest in my new food adventures nearly turned out to be my last... i kept seeing figs at the store and realized that, save for fig newtons, i had NO idea what a fig tasted like... so i picked up two containers - one white and one traditional and brought them home and then thought - ok, now what?

turns out a lot of people were into figs, cause i saw a number of recipes on the web but none that caught my eye as much as the Butter Braised Figs with Parmigiano-Reggiano & Toasted Almonds over at jenniferjeffry.com


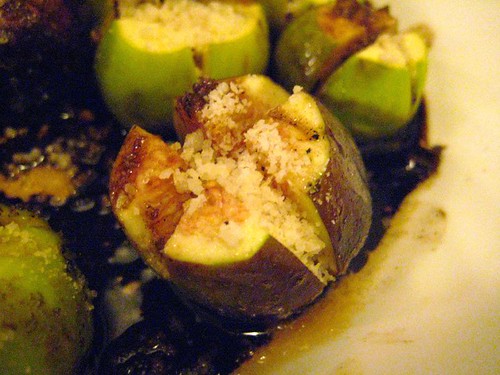
it all started out ok - preparing the figs was fairly simple. I was sure that i was going to have one of those great, simple-yet-impressive dishes on my hand.


after all, how could something so pretty go wrong?


yes, you recognized them correctly. those would be 'famous last words'...


it totally faked me out - i put the butter in the pan and set out to braise. (i dont know that i'd ever braised before. it was quite exciting!) I found that the figs behaved exactly as promised and wow - this is going to be SO easy!


i really was feeling quite proud of myself at this point and you can almost picture me, chest puffed out, shit-eating grin on my face measuring out the balsamic vinegar... with no care as to the fact that i'd never made balsamic reduction before... i mean, how hard could *that* possibly be?

and i ask you, have i not learned my lesson yet? because from the moment that vinegar hit that butter, it was O.V.E.R.
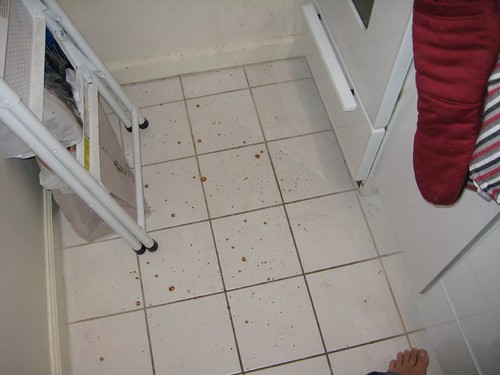
things started going wrong. vinegar was splattering as if i'd put a gallon of water into a deep fryer.
i thought that it was, perhaps, just an immediate reaction and would quickly remedy itself...

oh hell no.

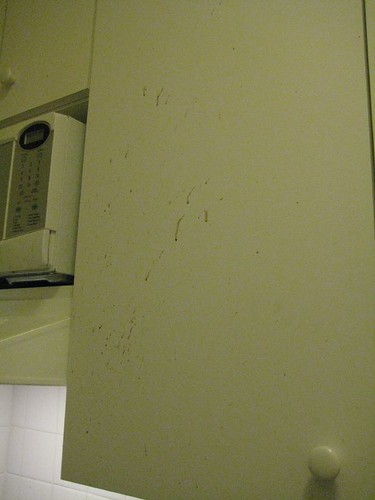
i finally decided that the best course of action was probably to remove the mess from the heat - #1, open flames and spewing liquid strikes me as dangerous and #2, most of the vinegar was on the stovetop at this point anyway... so i turned off the flame and attempted to remove the pan from the burner.

BANG.


(yes, that's my bedroom reflected in this last picture. yes, its a mess. this blog is not called 'bedroom hell', so can we ignore that? focus on the vinegar on my face instead. i'm even making it easy and pointing to the biggest spatter.)

......

apparently a bubble of some sort had formed. and the moment it cooled, it exploded. now, its been a long time since i took a chem class, but since when does vinegar or butter create golfball sized bubbles and explode???? is it possible that i have discovered a new scientific phenomenon? i highly doubt it, but you never know...

once i realized that i wasnt hurt and that the kitchen was not on fire, i found the whole thing to be wildly entertaining. toby wanted to 'clean up' for me, but i dont know if dogs should be eating such things, so really, my biggest challenge (after photographing the mess) was keeping the dog away while i cleaned up the slimy floor.

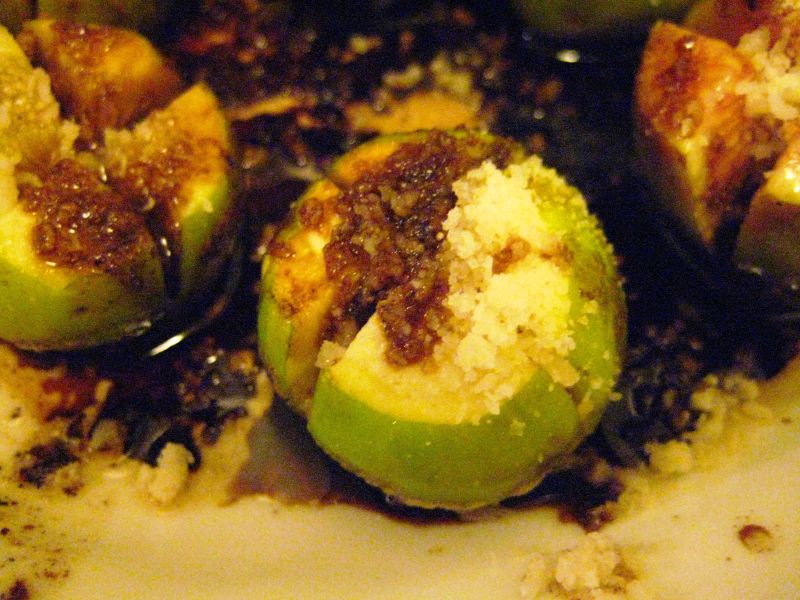
funny enough, there was still some stuff in the pan. i decided to pretend it was proper reduction and call it a day...


honestly, they werent as good as i would have hoped. perhaps the almonds (from the original recipe - which i had but forgot to use in the melee) would have helped or maybe i could have picked better figs. or maybe, just maybe, actually preparing a proper balsamic reduction would have been the difference...


Butter Braised Figs with Parmigiano-Reggiano
adapted courtesy of jenniferjeffrey.com

1 pint ripe figs - half white, half traditional

2 tablespoons butter

3 tablespoons balsamic vinegar

2 tablespoons finely grated Parmigiano-Reggiano

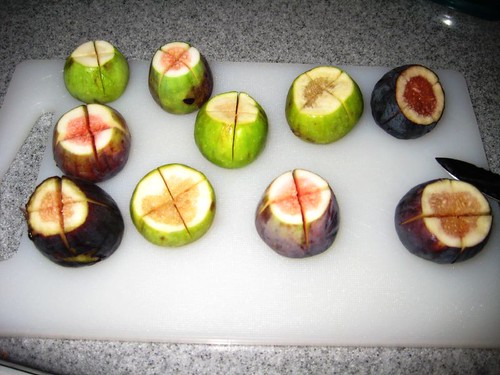
Rinse the figs and dry. Slice off the pointed tops from the figs and make a cross-shaped cut about halfway deep into each fig. Melt the butter in a saucepan over medium heat and sauté the figs for 2 to 3 minutes, or until they start to 'bloom'.

Remove the figs to a plate. Sprinkle a little grated cheese into the now-bloomed cross cuts.

make sure the fire extinguisher is nearby.

Add the balsamic vinegar to the remaining butter in the saucepan, and reduce into a syrup. (good luck. seriously, good luck.)

Drizzle the syrup over the figs.

eat while still warm.

9.15.2007

i'll make a great mom someday...

last weekend was Kim's birthday... however, kim is one of those people who has a birthday countdown, a birthday week and then days of post-mortem discussion of the birthday festivities...

therefore, i knew she'd appreciate cupcakes at work the day after her actual birthday...

i dont know if i'd ever made a regular, old, yellow cake from scratch before - i know there was a mexican chocolate cake, but i think that, when it comes to regular cake, i generally deferred to a box.

have you ever looked back at something and wondered why?

cause making a cake from scratch isnt hard and really, isnt even that many more steps!


i mean, first of all, you get to do that thing that is so gross and yet SO good all at the same time... cream the butter & sugar...
i know, i know, its totally gross when you think about it, but i'm sorry, there are few things better than that mixture. and yes, i mean that i 'sample' it to ensure that it is thoroughly blended...


aside from all of that, the only part that is even remotely more difficult is the whole sifting of the flour thing... and to be quite honest, i had bought a sifter a year or so ago and hadnt used it yet, so this was a fairly good excuse.

since i couldnt decide between vanilla and chocolate, i split the batter and made both. cause i'm crazy like that, yo.

(i call this 'radioactive cupcakes'. which was a close second for the title of this blog...)


of course, if i'm going to make cake, i might as well make the frosting as well, right??? kim can be a little picky, but i knew that she loved the cupcakes we got at magnolia a couple weeks back,


so i figured i was fairly safe with buttercream...


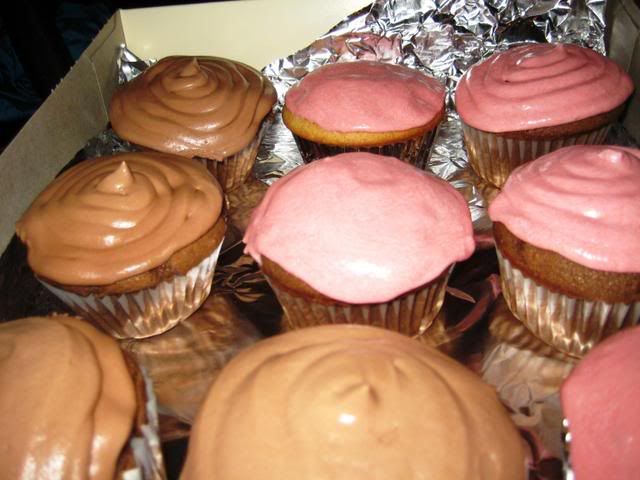
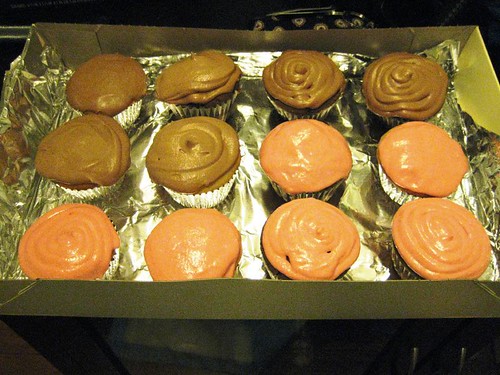
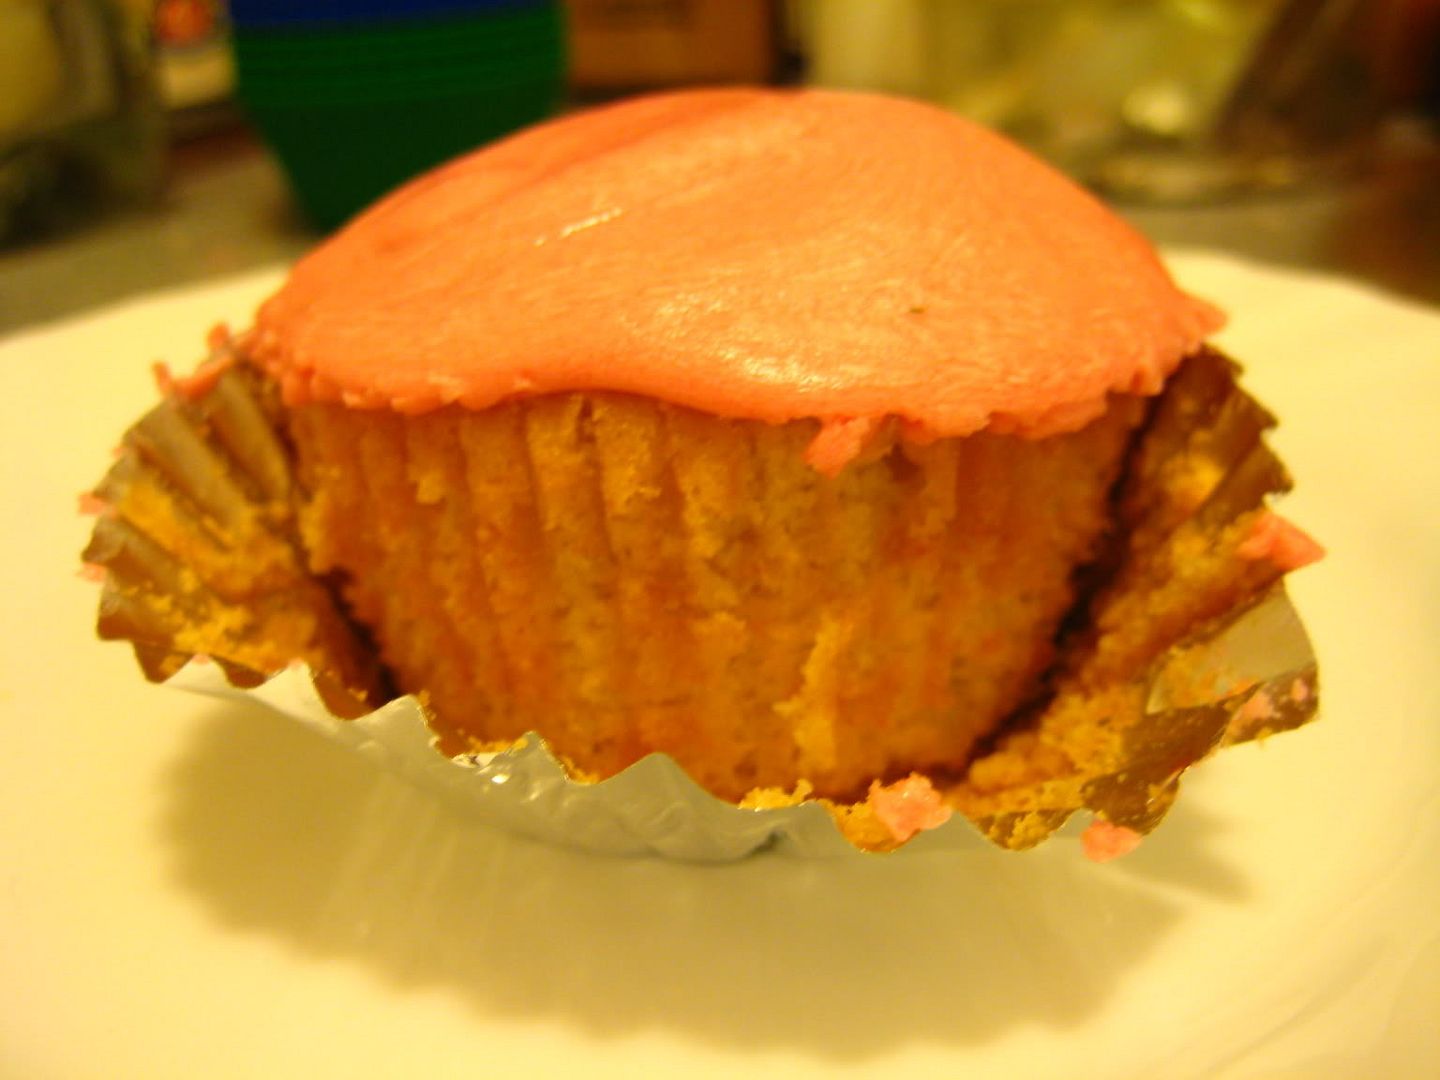
of course, my problem was in not being able to leave well enough alone... not to be outdone by the overrated, in my opinion, cupcakes of sex and the city fame, i needed color... and if you know kim like i know kim, there was only one choice... pink. but i also needed choices. so the frosting was split into 2 and made 1/2 chocolate and 1/2 vanilla, which would be the stuff of pink dreams...


i tried to get fancy with the frosting - grabbed a ziplock and made my own makeshift pastry bag, and made a few all swirly, but they (the ziplocks) kept exploding on me... and, it turned out that the frosting wasnt quite as thick as i thought and sorta wanted to slide around some anyway... a few minutes in the fridge took care of that, but by then, i just wanted to frost them and be done.


and to put them in a box, just like a mom...


i'd say they went over fairly well. Kim walked around like a kid in 2nd grade handing them out to the people she deemed worthy...


but was sure to keep one or two for herself...


Everyday Cake
courtesy of southernfood.about.com

2 cups cake flour
1 tablespoon baking powder
1/4 teaspoon salt

1/2 cup butter
1 cup granulated sugar

2 eggs, separated

2/3 cup milk
1 teaspoon vanilla

preheat oven to 375°. Prepare your baking pans. If cupcakes, just line, if pans, lightly grease and flour.

Sift together the flour, baking powder, and salt; sift once more. Cream butter with sugar, beating until light and fluffy. Beat in egg yolks then beat in beat in sifted dry ingredients, alternating with the milk and vanilla.

to make chocolate:
for the whole batch - add 3 tablespoons cocoa powder. you may also want to add a tiny bit more moisture if you do this, as my chocolate cakes came out with cracks on top... (i made half of mine chocolate).

In another bowl, beat egg whites until stiff; fold into the batter. (obviously, if you are making yours half and half like i did, only beat one egg white at a time and put one in each... i know its kindof 'duh', but some people need explicit directions...)

Pour batter into 2 8-inch round cake pans. Bake at 375° for 20 to 25 minutes, or until a wooden pick or cake tester inserted in center comes out clean.
Conversely, pour into cupcake pan, filling each about 2/3 to 3/4 full. Bake for about 15 - 18 mins. Makes about 16 cupcakes.

Buttercream frosting
courtesy of
Cooksrecipes.com


3 cups powdered sugar
1/3 cup butter or margarine
1 1/2 teaspoons vanilla extract
About 2 tablespoons milk

With an electric mixer at low speed, mix the powdered sugar and butter together. Once combined, add vanilla and milk. Increase speed of mixer to medium and beat for 1 to 2 minutes or until smooth and of spreading consistency.

my variation on making it chocolate:
I made half of the batch chocolate by adding a little more milk (maybe a tablespoon or two) and about 1/3 c cocoa powder.

my variation on making it pink:
add 4 drops red foodcoloring to start. slowly add more to get the color you want. I think i added a total of 6 or 7 drops to half of the batch.

9.13.2007

i have a reputation to uphold, afterall...

oh my god, the pressure...

what will my first post be? something old? something that i just hadnt had time to cover before now? something 'borrowed'? something original?

all those questions went out the window when i saw rk's brownies...

originally, i was just going to copy hers and embrace my role as a direction-follower instead of an innovator... but then i realized that i had no dark brown sugar. no bittersweet chocolate. and that i dont like walnuts in my brownies.


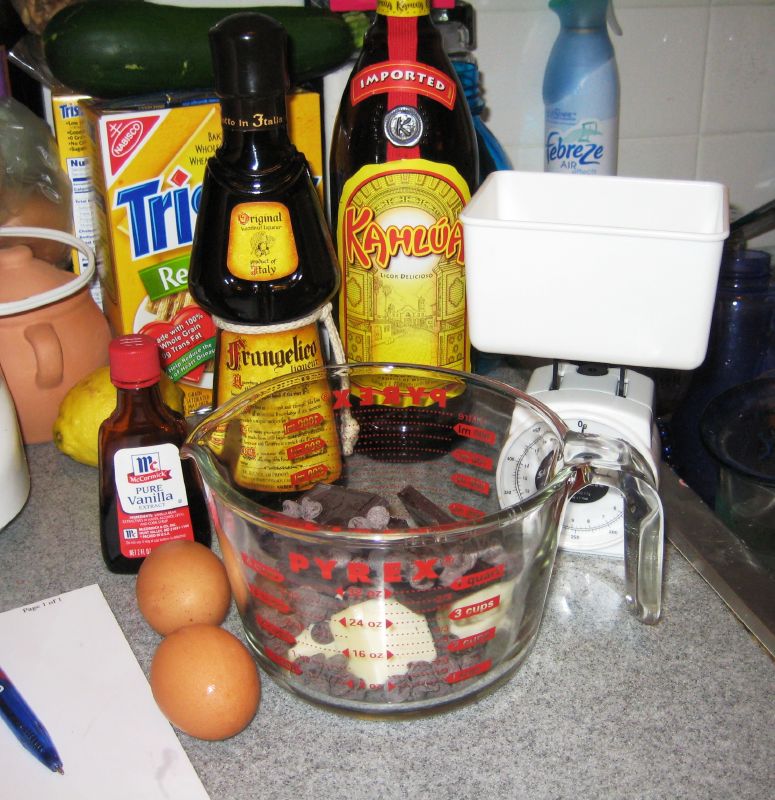
so i started looking through the apartment, looking at other recipes and then, most importantly, looking at my liquor cabinet...
(ignore the triscuits, zucchini and febreeze. none of them made the final cut...)


the part of this that i'm most proud of??? not the kahlua, not the frangelico... but the sugar...

(that would be white sugar mixed with frangelico and kahlua and then swirled in with some brown sugar... how good does that look? ok... fine... so i guess it sorta was the liquor that i liked best ;) )


but it gets better...


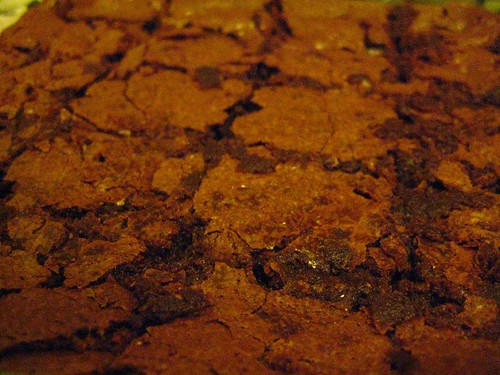
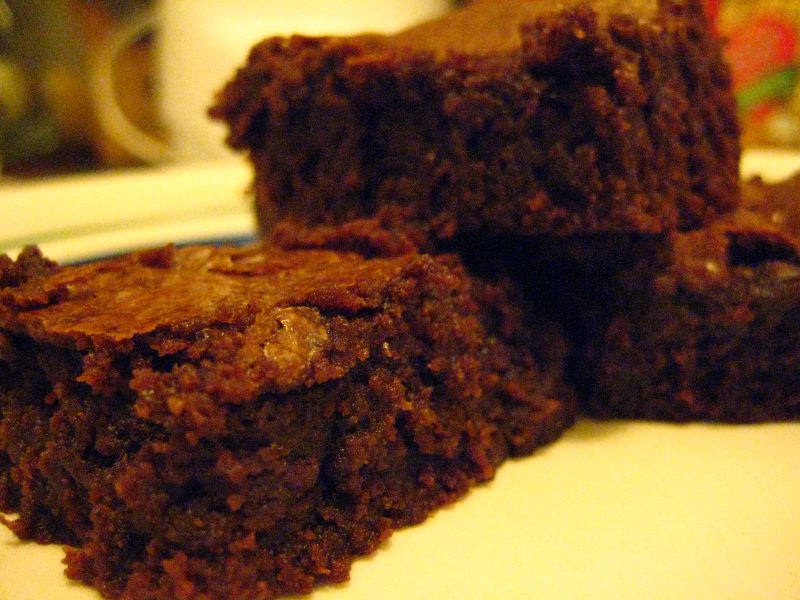
i took them into work, as 20 rich, chocolately brownies in my apartment would be highly dangerous... (fine, fine, i only took 11 of them to work...)


the commentary by my cubemate?


to another cubemate:
"you should eat one of these brownies. It will make you smile even more than you already are"


and, upon recognizing that there was only one brownie left as another coworker approached and wondering if we should offer it up (ultimately, the other coworker left sans brownie):


"i'm just going to eat it cause i got really nervous when he came in here..."


i'd say thats a pretty good review, right?


Boozy Brownies

1 stick unsalted butter
2 oz unsweetened chocolate
2 oz semisweet chocolate

1/2 c white sugar
1/4 c kahlua
1/8 c frangelico
1/2 c light brown sugar

2 eggs
1/4 tsp salt
1 tsp vanilla

1/2 c + 1 1/2 tbsp pastry flour


heat oven to 350°. Line a square baking dish with parchment paper & spray with the cooking spray for baking.

cut butter into cubes. if not using chips, break up chocolate. put all into a microwave safe container & microwave on 50% for 2 minutes. remove and stir. if you are using chips, it may all be melty. if there are still some lumps after some stirring, put it back in the microwave (still at 50%) in 30 second intervals, stirring in between until all lumps are gone.

while the chocolate is melting, grab another bowl and mix the white sugar with the kahlua and frangelico. when those are well blended, mix in the brown sugar.

in your main mixing bowl, whisk together eggs, salt and vanilla until they are fairly light and airy. add the sugar and whisk some more. add the buttery chocolate mess and whisk some more.

put the whisk in the sink and grab a wooden spoon and then mix in the flour until fairly well blended.

pour into the parchment paper-lined pan and throw it in the oven for about 40 minutes. you know its done when the top is a little shiny and you can stick your fancy cake tester in it (or a fork) and it comes out crummy or clean, but not wet.

cool and cut in the pan, then transfer out of the pan (using the parchment paper as a handle) to a flat surface. this will make it super easy to get nice, square brownies instead of having to spoon out the first one ;)

makes 20 mini brownies or 4 really really big ones.
Related Posts Plugin for WordPress, Blogger...