8.27.2010
Heirloom Tomato Salad
ok, maybe hate is a strong word but, aside from salsa and pasta sauce, if asked whether i'd like tomatoes or not, i generally vote for not.
But its tomato season. and tomato season + CSA share means it doesnt matter if you like tomatoes or not, you're getting them. Two years ago, i learned to accept grape tomatoes in my life. Last year, i learned to like green tomatoes in eggs (and recently had some fried green tomatoes prepared by ms. raspberry eggplant which were outstanding) but the regular old tomatoes and i still were not friends.
However, this year, the tomatoes are different. Our farm is putting out so many heirlooms that one cannot keep up. In the past, i would have maybe broken them down into sauce or given them away but this year, after reading that our farm's heirlooms were named 2nd best by New York magazine, i wanted to try to take advantage. Now, a couple of weeks ago, the tomatoes we were getting were less than perfect and the meat eater and i were mostly opting to take some green ones to use in the aforementioned eggs. however, this week - this week our tomatoes were so gorgeous that even i, the tomato hater, was impressed.
but you know, 4 lbs of tomatoes is kind of a lot... so i took to twitter to ask the masses - what should i do with these beauties?
my friend Shari was the only one to reply:
my first thought was "cant eat so much cheese! wedding diet!"
my next thought was, "hmm... what if i can learn to like tomatoes so that i can up the tomato-to-cheese ratio?"
and then i went to the gym, just in case i couldnt...
but I also did a bit of reading on tomatoes and learned that i could avoid one of my chief issues with tomatoes by simply slicing & salting them to dry out some of the ick... i figured that would help my cause and give me a much better shot.
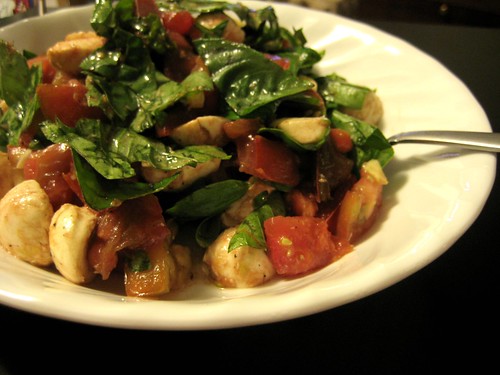
i dont know if it was that these tomatoes are just THAT good, or if it was the salting or what, but i seriously LOVED last night's dinner. it was so fresh and just yummy that i'd make it again and again.
which is good, because we still have another 2lbs of tomatoes...
Heirloom Tomato Salad
courtesy of me, though i'm sure you can find this over and over again on the internet
6 cloves garlic, still in their casing
6 medium sized heirloom tomatoes
1/2 bunch fresh basil (leaves only) ~ 1 packed cup
8 oz fresh mozzarella
salt
pepper
~ 1 tbsp olive oil
~ 1 tbsp balsamic vinegar
***
Preheat oven to 375°
Place garlic cloves on a piece of aluminum foil (or a baking sheet), drizzle with a teeny bit of olive oil, and roast for ~ 15-20 minutes.
Meanwhile, slice tomatoes ~ 1/4 inch thick. Place slices on a doubled piece of paper towel. Salt & pepper the tomatoes (you can be fairly generous with your salt & pepper here) and place another doubled paper towel on top of the tomatoes and press down slightly. Leave aside. (note: i'm very tomato liquid adverse - i actually did this twice with a new set of paper towels and a bit more salt & pepper)
Tear or roughly chop basil leaves & set aside.
Once garlic has cooled, remove from casing and chop up a bit.
Cut mozzarella into small bites. (I used cherry sized balls and cut them in half.) Set aside.
Once tomatoes have dried out a bit, cut into smaller, bite sized pieces (i got six pieces out of an average slice) and place in large bowl.
Add mozzarella and toss.
Add basil & roasted garlic to the bowl and toss.
Add olive oil & balsamic vinegar. Toss again.
Salt & pepper to taste.
Serve with crusty baguette.
Note: you may want to mix the roasted garlic, olive oil and balsamic together before incorporating them into the basil & tomatoes as you might find that this helps the garlic incorporate better. our version had some very garlicy bits and other bits that were not as garlicy. totally up to you which you prefer...
8.16.2010
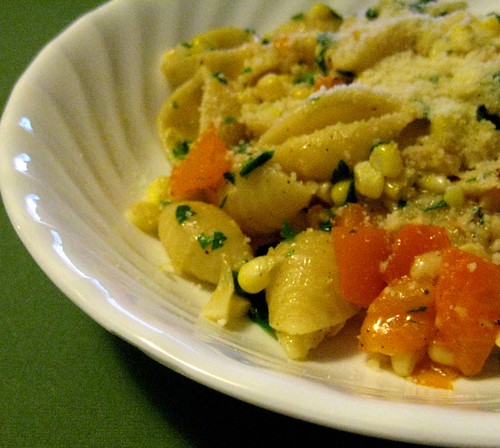
Roasted Corn, Tomato & Garlic Pasta
When i saw a post on markbittman.com for Pasta with Grilled Corn & Roasted Garlic, i thought to myself - 'ok, fine, more pasta... but hey, we're getting corn from csa this week...' (in case you couldnt tell, i've wholly embraced pasta-as-a-vehicle-for-veggies this year...) and this looks different - we've had the spicy tomato squash pasta about 5854 weeks in a row and as good as it is, i needed a break...
In the past, the corn from our CSA hasnt been their best output... i'd always blamed it on the fact that i grew up on jersey corn (probably the only thing we ever got from farm stands when i was a kid) and there just was no way that the upstate stuff could compete... That meant that using the corn as a secondary ingredient was generally a decent way to go...
however, this year proved different... we had 3 ears of corn this week so friday night, we busted one open to use in fish tacos (our official beach meal) and realized that it was some seriously excellent corn... which made me even more excited for the roasted corn pasta... which was good, because the meat-eater needed a bit of convincing...
We made a couple of slight changes - added some roasted tomatoes (as we feared they wouldnt last much longer in our overly-warm apartment) and cut a bit of the butter down (wedding dress diets and all...) and ended up with something awesome... This wasnt a savory pasta - the sweetness of the corn and the roasted garlic were fairly awesome with the butter & oil and the parsley - as a general rule, i dont even like parsley but it totally finished this dish off perfectly...
Can you believe we ever doubted Mark Bittman???
Roasted Corn, Tomato & Garlic Pasta
2 ears corn, husks and silks removed, washed
5 garlic cloves, skins on
1 generous tablespoon sweet butter, divided
1/2 box (or pound) pasta
1 cup pasta water
1/2 cup Italian parsley, leaves only, washed, finely chopped
Freshly grated Parmesan or Romano cheese
***
Preheat the oven to 350°
Prepare pasta in accordance with directions for al dente pasta.
In a large pan over medium heat, melt together the remaining 1/2 tbsp of sweet butter with 1 tablespoon olive oil. Add the roasted garlic to the butter-olive oil mixture. Add 1/2 cup pasta water. Stir well to combine. Simmer 5 minutes, stirring occasionally..
Add the corn kernels to the garlic, butter & oil. Stir to combine.
8.03.2010
Tofu and Orzo with Kale, Carrots and Leeks
publicly declared my hatred, time and time again.
but i was nothing if not determined to conquer that hatred. figure out what the redeeming factor was. how other people could actually love this awful stuff.
(Yes, i am pretty sure that's a pig you see flying by your window, why do you ask?)
kale - consider yourself pwned.
We've had this twice in 1 week - the equivalent number of times that i'd eaten kale the rest of my entire life. I dont know what was wrong with those first two batches i tried to make because i totally do not hate kale! not even a little bit!
While i'm sad to give up my identity as the kale-hater, i am totally intrigued by all the doors this opens up...
Tofu and Orzo with Kale, Carrots and Leeks
courtesy of On a Lobster Placemat with modifications by me
3/4 cup dry orzo
1/2 package of extra firm tofu, pressed to remove water
1/2 tbsp hot sesame oil
1/2 tbsp olive oil
1.5 tbsp tamari (or soy sauce)
1 tsp siracha sauce (optional)
Salt
Pepper
1 tbsp olive oil
1 tsp siracha sauce (optional)
3 cloves minced garlic
3 medium carrots, sliced into disks
1 leek, sliced into disks
1 bunch fresh kale, destemmed and torn into small pieces
1 tsp sesame seeds (optional)
1 - 2 tbsp tamari
hot sesame oil
***
Prepare orzo according to package directions (for al dente pasta)
Heat 1/2 tbsp sesame oil, 1/2 tbsp olive oil & 1 tsp siracha in a non-stick pan over medium-low heat.
Add 1.5 tbsp tamari and swish around to mix
Place sliced tofu in pan, adding salt & pepper to taste. (we went for a little salt and a lot of pepper)
While that is cooking, heat remaining olive oil and garlic in another frying pan over medium-low heat..
Let garlic brown a bit and then add the carrots.
Saute for a minute, then add the leeks.
Saute for another minute and then add the kale..
Saute all vegetables until the kale is wilted, tossing often.
Add sesame seeds in and toss some more.
Add orzo in with the vegetables.
Add a 1 - 2 tbsp tamari & a drop more hot sesame oil, if desired, and toss.
Once well combined, remove from heat.
Plate orzo and vegetables and top with tofu.
Sprinkle with sesame seeds, if desired.
Serves 2.
7.28.2010
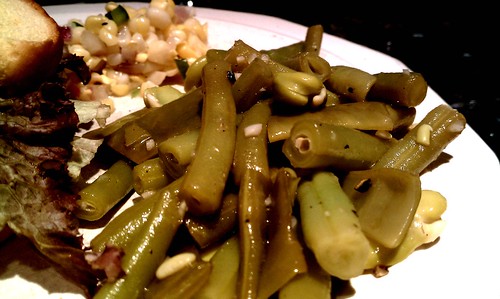
Three Bean Salad
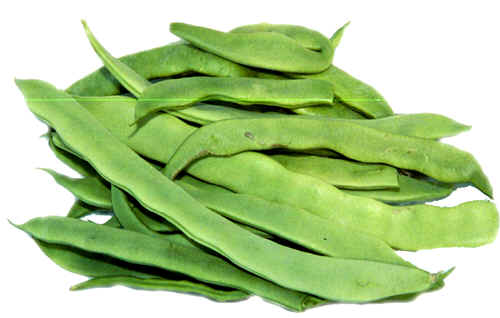
(image courtesy of www.fooduniversity.com)
I was a bit surprised.
And had no idea what to do with them... then i googled and was totally unexcited about using them, as most of the links i read told me that they were fiberous and needed a lot of cooking to be edible. (spoiler alert: those links were WRONG! the pole beans were my favorite part of this salad...)
that didnt really sound fun, so i put them aside and hoped for a miracle use to fall into my lap... (given my 'use it all resolve'...)
Then this past week, we got some string beans and some more favas. and frankly, i was sick of favas with pasta so i started asking around... and found out that fellow core member michelle had a great idea - bean salad...
So i asked her more about this bean salad... she had taken her favas (last week featured favas as well) and her pole beans and some other beans she had at home and made a 3 bean salad...
I was intruiged and, frankly, pretty excited to use 3 CSA ingredients all at once! So i looked it up - and had no idea what to do...
a quick email and she gave up her grandma's recipe for bean salad... i didnt even have to bribe her...
We made a few adaptations based on her recommendations and the ingredients we had on hand and, oh, would you look at that? Miracle use for pole beans AND 4 csa ingredients in one dish.
hell yeah.
Three Bean Salad
courtesy of Michelle's grandma with adaptations by me
1 lb fava beans, shelled & blanched
3/4 lbs string beans, cut into 1-2" segments
1/2 lb pole beans, cut into 1-2" segments
1/4 c sugar
1/4 c olive oil
1/3 c red wine vinegar
1 head spring garlic, minced super-fine
salt
pepper
***
Boil a pot of salted water
Once boiling, throw pole beans in.
Allow to cook ~ 3 minutes.
Then throw string beans in with them.
Cook ~ 5 minutes
Then throw prepared favas in with them
Cook ~ 1 more minute.
Drain & run under cold water to stop the beans from cooking.
Whisk sugar, vinegar, olive oil and garlic together.
Once beans are cool, toss dressing with beans, add salt & pepper to taste and serve
*Or*
Refrigerate and allow to 'marinate' for an hour or more & serve cold.
7.26.2010
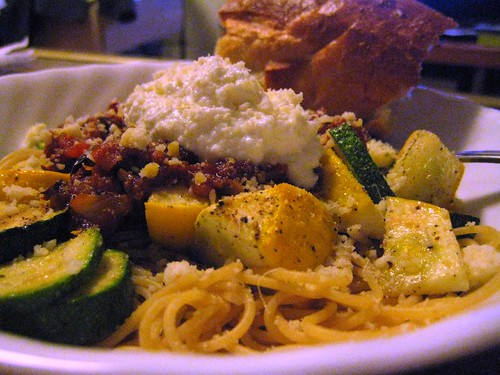
Linguine, roasted squash & spicy garlic tomatoes
for some reason, this summer, all i want is the long, thin stuff...
After a weekend at the beach (a weekend in which i failed to repair tan lines and instead just shifted to new ones...) and a long ride home, we were tempted to order in, but i was thinking of the 3lbs of squash sitting in the crisper and it just seemed silly to not use it... and since sunday is pasta night in this jewish-italian household, the squash & pasta fallback was a natural fit.
In addition to the thin spaghettis, we've also been all about oil & butter-based sauces instead of traditional red sauces this summer - another natural fit for the squash, as i see no need to drown the taste in a ton of traditional red sauce.
Linguine, Roasted Squash & Spicy Garlic Tomatoes
courtesy of me & the meat-eater
Click here to import directly into Pepperplate
~1lb assorted squash (we used zucchini & patty pan)
1 tbsp olive oil
salt
garlic powder
black pepper
1/3 box thin pasta of your choice
3/4 tbsp olive oil
3/4 tbsp butter
3-4 cloves of garlic
1/2 can of zesty diced tomatoes
pinch of crushed red pepper flakes
ricotta (optional)
parmesan (optional)
***
Preheat oven to 375
Cut squash into bite size pieces. Place on cookie sheet & toss with a bit of olive oil, salt, garlic powder & a generous amount of black pepper.
Roast for ~20 minutes, tossing again once.
Just after the squash goes into the oven, begin the water boiling for the pasta.
Cook pasta al dente, according to directions on box.
Just as you throw the pasta in to cook, put olive oil & butter in a pan over medium heat. While its heating, chop the garlic into small pieces.
Once butter is melted, throw garlic into the pan & cook until a bit browned.
Lower the heat slightly and stir in tomatoes.
Simmer for about 5 minutes or until most of the liquid has cooked down, but just before you turn it off, shake in a little bit of crushed red pepper, mix it around and then turn it off.
Just as the sauce is finishing, the squash should be roasted and the pasta should be drained and waiting.
Plate pasta, put squash over top of pasta and top with tomatoes.
Add a spoonful of ricotta, a sprinkling of parmesan, a hunk of crusty baguette & a glass of white wine and you've got yourself a sunday night :)
(serves 2)
7.20.2010
Tuna Salad Lettuce Wraps
If she's reading this, she's rolling her eyes at me and wondering why in the world i would post any of her recipes...
but thats the funny thing about Grandma J - she hated to cook but she always did a pretty good job of it... which was a good thing, because she had this theory - if she bothered to cook it, you better bother to eat it.
Also as a result of her hatred of all things cooking, she was a devout recipe-follower... she didnt want to think, didnt want to experiment - just wanted to spend as little time and thought as possible on getting food that people would eat onto the table.
I was never reminded of this so much as i was when we would spend a week at the beach with her... we'd get these little bungalows and spend our days on the beach & evenings in the arcade. Nowadays, vacations (for me) include eating as a big part of them. But back then, eating was an afterthough... but it apparently made an impression none-the-less...
You see, a few weeks ago, the meat eater and i had good fortune combine and there was an available weekend coupled with an available beachfront condo... the only thing we didnt have was an actual fortune, so we accepted the condo and figured we'd cook all weekend...
i immediately wanted tuna with celery & lettuce on toasted wheat bread for lunch.
because thats what we always ate for lunch at the beach.
My typical tuna needs are much easier - no celery chopping, no lettuce garnish - hell, half of the time there isnt even bread... but the beach calls for something much more specific.
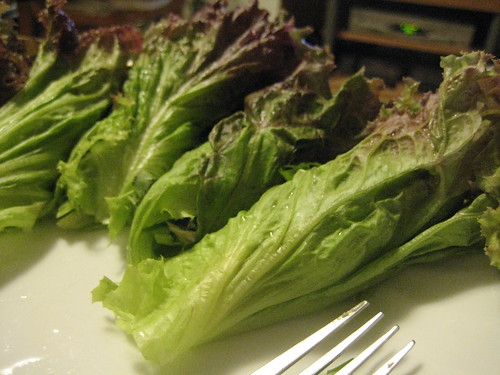
Since we've returned from the beach, i've held onto my need to have celery in my tuna salad (something which makes the meat eater gag - good thing he wasnt around grandma - she would have made him eat it!!!) and last week, combined my version of the beach tuna salad with lettuce leaves as wraps. because good god have we gotten a lot of lettuce from the CSA and really, there are only SO MANY dinner salads a girl can have...
see what i did there?
More CSA usage, FTW!
Tuna Salad in Lettuce Wraps
Inspired by Grandma J
1 can albacore tuna in water, drained
2 tbsp light mayo
1 tsp spicy brown mustard
1 celery rib, diced
salt, pepper, garlic powder, onion powder (to taste)
6 large leaves red or green romaine lettuce
***
Combine first 4 ingredients
Taste and then season with more mayo, more mustard, salt, pepper, garlic and/or onion poweder, to taste (i generally do a shake of each one)
divide tuna between lettuce leaves and roll up
Pat yourself on the back for using CSA ingredients in non-obvious way.
7.13.2010
Garlic Soba Noodles
I hate chard. i hate kale. i hate these items so much that i've become legendary among some of the CSA members (ok, the core group cause we all talk. a lot.) in my hatred.
Last season, i even had a standing deal with another girl - i'd always leave behind my greens and she could always have them.
this, my friends, is the best example i can give you to show how dedicated we are to using as much of the CSA produce as possible...
DED-I-CAT-ED.
this is the year i'm going to learn to like kale, chard and all that other crap that i cannot stand...
(and yes, i've tried to make kale chips and no, i dont like them. and yes, i've tried to saute with butter, oil, garlic, whatever and no, i dont like it...)
Its kind of amazing, this 'we're using it ALL, dammit' initiative... i mean, our fridge is only 3/4 of the way full today. and CSA isnt even until tomorrow... i cant tell you the last time that happened...
anyway, moving on...
someone posted this to our google distribution list (i think...) and i figured well, no time like the present...
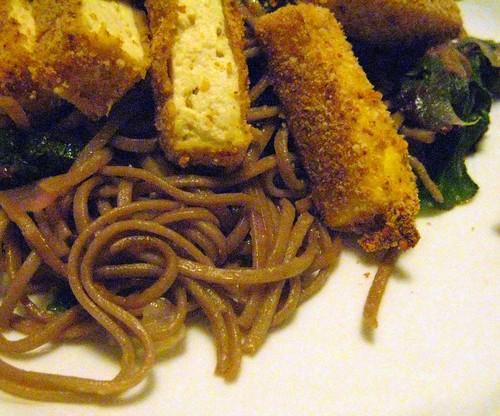
the miracle of it? i actually liked it. as in, 'would make it again, i'm sorry that we didnt get chard last week'... as in, my only complaint about the dish wasnt "ick, chard!" rather was - 'hmm, i think that tofu needs some more flavor next time...' (suggestions welcome, by the way...)
Garlic Soba Noodles
courtesy of 101 Cookbooks, minor mods by me
8 ounces dried soba noodles
3/4 cup bread crumbs
1/4 cup grated Parmesan
big pinch of salt
pepper
12 ounces extra firm organic tofu, cut into 6 rectangular slabs
2 eggs, lightly beaten
a generous splash of olive oil
a few spring onions, greens trimmed, thinly sliced
1 head spring garlic, minced
4 big handfuls of swiss chard - destemmed and cut into bite-sized pieces
1/2 cup grated Parmesan, divided
a few baby radishes, sliced thin
***
Preheat oven to 375°
Combine the bread crumbs, 1/3 c of the parmesan, salt & some pepper in a shallow dish.
Dunk pieces of tofu in the egg and then press into the bread crumb mixture, making sure each piece is thoroughly coated with crumbs.
Place pieces on parchment-lined baking sheet.
Bake in oven, flipping once. Baking will take 30 - 45 minutes, depending on the thickness of your tofu and your personal tofu texture issues. At a minimum, breading should be golden. (I like mine cooked longer than some others as i cannot stand mushy tofu...)
Slice into strips and set aside.
Cook soba noodles according to instructions or until just tender. Drain and set aside.
Add the olive oil and bit of salt (if desired) to a large skillet over med-high heat.
Stir in the green onions, chard and garlic and cook for a minute until the chard begins to wilt.
Stir in the cooked soba noodles. Stir in the remaining parmesan. Remove from heat.
Sprinkle with sliced radishes.
Serve noodles with slices of tofu over top.
7.09.2010
Orecchiette with Scallops, Favas & Spring Peas
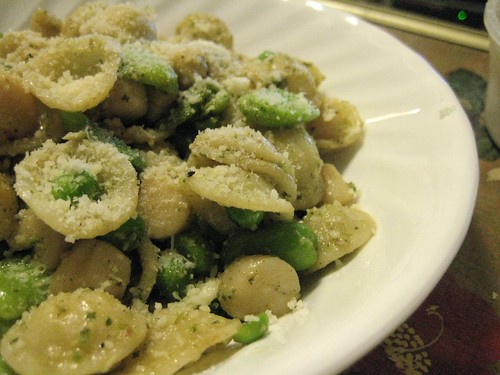
Its been HOTTER than hell in NYC this week, so when i polled my twitter friends to see what i should eat for dinner on tuesday, my friend roopa mentioned that she was making orecchiette, favas & peas from her own CSA share.
do you know how excellent it is to have a friend who is a good cook AND is one day ahead of you on CSA pickup?
I highly recommend it.
Anyway, wednesday comes around and i'm still thinking of Roopa's idea and then i see that Mark Bittman's personal site has a guest post from someone also using pasta, favas & peas...
If both of my go-to sources are pimping out similar recipes, it must be the thing to make, right?
So i called up the meat-eater and asked him to take a quick inventory of our cabinets/fridge/freezer. turned out that we could make up our own version of this with minimal purchases... I'm not always so brave when it comes to that but, as the meat eater always reminds me, worst case scenario? we just order in.
In all the times he's said that, we havent had to do it yet...

Orecchiette with Scallops, Favas & Spring Peas
courtesy of me (inspired by Raspberry Eggplant & Mark Bittman)
Note: Many, many modifications could me made to this recipe based on what you have at home (see the inspiration links above) and i think you'd still end up with something excellent! Not the least of those being that you could eliminate the scallops and be totally vegetarian friendly... Not to mention that, if you were cooking for a veg & a non-veg, it would be super-simple to prepare it half & half...
2 c dry orecchiette
1 tbsp butter
1 tbsp olive oil
1lb bay scallops
1.5 tbsp mint pesto
1.5 tbsp garlic scape pesto
1lb shelled favas (shelling tutorial)
1/2lb shelled peas (shelling tutorial)
salt
pepper
Parmesan cheese
***
Shell the favas & peas & set aside.
Prepare orecchiette according to directions on the box, leaving just slightly al dente. Reserve 1/4 c of the pasta water
Heat a olive oil in a non-stick pan over medium heat
Add the scallops & add pepper to taste.
Cook scallops until just about 3/4 done (cooked scallops are completely opaque, so make sure you dont let them get that far yet).
Carefully drain the liquid out of the pan so that the pan is mostly dry. (you will need to do this as the scallops will have released water and you will have more liquid in the pan than will allow for any browning)
Turn the heat up to medium-high, add the butter, and saute the scallops until you just see a tiny bit of browning on the edges. be careful to not over-cook.
Remove scallops from pan and set aside.
Lower heat to just shy of medium and add the peas & favas. Add a bit of olive oil if you dont think the pan has enough liquid left over from the scallops to prevent the favas & peas from sticking.
saute for ~2 - 3 minutes.
Lower heat to medium and put orecchiette, scallops & both kinds of pesto in the pan & toss until combined.
Add a bit of the reserved pasta water if your pesto is on the thick side (optional)
Plate & top with parmesan & more pepper, if desired.
6.22.2010
Shrimp with Mint Pesto & Quinoa
I know i've said this before, but this year, i'm dedicated to trying to be a better CSA participant...
No, really. stop laughing. i mean it!
this is the first blog installment of 'things i was skeptical of but made anyway just cause otherwise the ____ was going to go bad and big nicks is only a phone call away if it sucks'
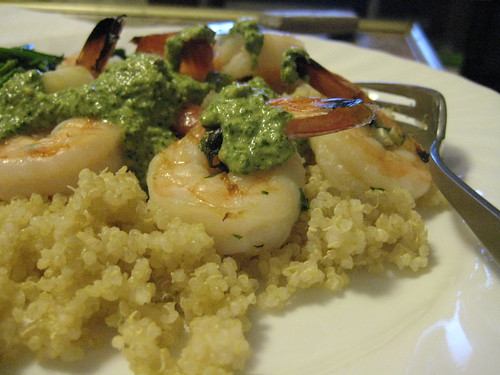
lucky for us, it didnt suck. in fact, i think that we might even buy mint one day, just to make it again. easy, fresh, fairly healthy... what could be better?

Shrimp with Mint Pesto & Quinoa
courtesy of Bon Appétit, via Epicurious, modifications by me
(The original recipe was written to be an appetizer, but after a tiny bit of tweaking, was super-easy to turn into a meal.)
3/4 c quinoa, rinsed
1 1/2 c water
1/4 cup pine nuts, toasted
1 head spring garlic, roughly chopped
2 tablespoons (packed) Parmesan cheese
1/2 tablespoon coarsely chopped jalapeño chile
1/4 teaspoon salt
1/4 teaspoon ground black pepper
1 cups (packed) fresh mint leaves
1 tablespoons fresh lemon juice
1/6 cup extra-virgin olive oil
12 large uncooked shrimp (about 1 pound), peeled, deveined, tails left intact (note: our lb of shrimp had about 20 shrimps in it!)
1 tablespoons olive oil
1 head spring garlic, minced
1 tablespoon chopped fresh parsley
1 1/2 tablespoons fresh lemon juice
***
For quinoa:
Bring water to a boil
Add quinoa, reduce heat to simmer.
Cover & cook for 20 mins, stirring occasionally to ensure it is not burning to the bottom of the pan
For mint pesto:
Combine first 6 ingredients in processor. Using on/off turns, process until mixture is smooth.
Add mint leaves and lemon juice; process until smooth, stopping occasionally to scrape down sides of bowl.
Add oil and process until mint pesto is smooth and creamy.
(Can be made 1 day ahead; cover and refrigerate.)
For shrimp:
Preheat broiler.
Sprinkle shrimp with salt and pepper.
Whisk oil, garlic, and parsley in medium bowl to blend.
Add shrimp; toss to coat. Let stand at room temperature 15 minutes.
Arrange shrimp in single layer on broiler pan.
Broil until opaque in center, about 2 minutes per side. (note: we left ours in for about 5-6 minutes. but i'm also the person who, despite knowing better, orders tuna cooked well... so, yeah...)
5.12.2010
Heirloom Tomato Sauce
in less than 6 months (crap, only a few days longer than 5 months!), i'll be married. that is not so shocking to me as i think that i already feel married to the meat-eater... however, what is shocking to me is that, assuming i change my name (which is the current plan), i'll be losing a huge chunk of my identity. the identity that, despite being 1/4 irish and 1/4 english, has always been italian.
this one was created from a fairly innocent place though - no sopranos wannabe moments or anything - just the fact that winter CSA included lots and lots of farm-jarred items, the best of them being heirloom tomato puree. which is way too good to just throw over angel hair and too delicate to poach eggs in. This recipe seems to really highlight the awesomeness that is that puree.
Heirloom Tomato Sauce
3.29.2010
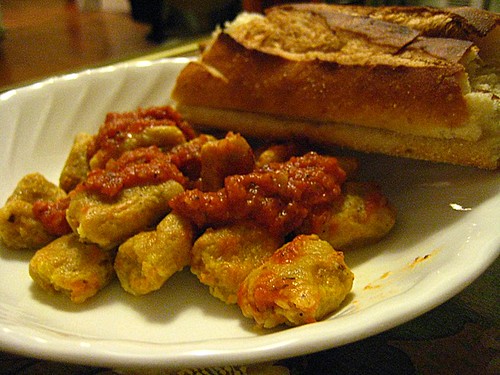
vegetables without even trying

Note: you're going to have doubts while making this. we did. right up until the part where we roll the gnocchi out and cut them up and realized we had about 32 pieces. Which isnt a ton but is enough for a light dinner for two if served with enough bread, wine and maybe a salad - you know, to make sure you get more veggies...
3/4 pound carrots, peeled and chopped into pieces
4 tablespoons butter, divided in half
2-3 tablespoons onion, minced
5 tablespoons flour + a bit more on reserve
1 egg
1/4 cup freshly grated Parmesan cheese + a bit more on reserve
Pinch of nutmeg
Fresh black pepper
10.30.2009
so nice we made it twice
so why in the world am i talking about them?
because i live with a boy. and he likes different things from me.
see, our CSA has a swap-box. meaning, if i dont want my pac choi (no offense to pac choi), i can bag it up and walk it over to the swap box. If there is nothing in the box, i simply leave my pac choi. If there is something else in there, i can grab it in exchange for my pac choi.
so, last week when the boy went to csa to do the pickup, (which included 1 lb of green tomatoes per person) he noticed a lb of green tomatoes in the swap box. so he bagged up our pac choi (there's a reason it was my example) and took the tomatoes. He then proceeded to have a conversation with a fellow CSAer and found out that they didnt want their green tomatoes either. so he bagged up our mixed greens (not babies - more like chard & kale. i like neither of those) and took a what was now our 3rd lb of green tomatoes. and he calls me, all excited about said tomatoes.
and all i can think is, what in the hell are we going to do with 3lbs of green tomatoes?
and i thought that all week - every time i saw them in the fridge.
and then this week? the share included ANOTHER lb of green tomatoes. thats 4lbs of green tomatoes in our fridge, just in case you are keeping track.
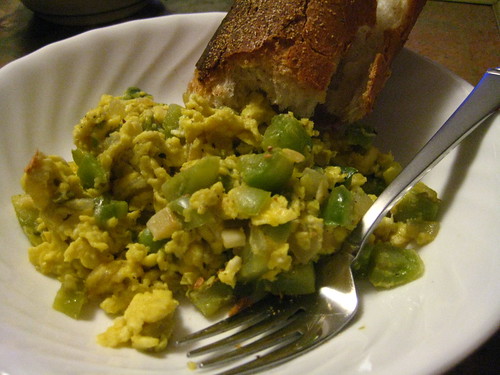
thank god for carrie from our CSA mailing list... she sent out a recipe of sorts for green tomatoes with eggs. and i wanted breakfast-for-dinner anyway, so this appeared to fit the bill AND used some of those tomatoes! (not to mention the csa eggs that have been stockpiling in the fridge)
Frankly, my hopes were not super-high - it just sounded like a tomato scramble which is solid, but not earth shattering, you know? But i was tired. and wanted quick and easy. and breakfast-y.
The boy thought to add a baguette to the mix (confession: we add baguettes to just about every mix... also, wine.) and it made ALL of the difference. The eggs are pretty good on their own but a forkful of eggs piled high on a tiny bit of baguette? TO DIE FOR.
interestingly enough, this is not a breakfast meal. the green tomatoes have some sort of bite to them that really takes the eggs from breakfast staple and transforms them into satisfying dinner.
a dinner so satisfying that we made it two nights in a row.
Green Tomatoes & Eggs
courtesy of the Merchants' Gate CSA Mailing list, adapted by me
serves 2
1 tbsp butter
1/3 of a sweet onion (i suspect any kind of onion would work), diced
3 cloves of garlic, smashed and minced
3 medium/large green tomatoes, cut into small pieces
salt & pepper
5 eggs
splash of milk
Heat the butter in a large skillet over medium-low until melted.
Throw in the onions & garlic and stir around with a wooden spoon to coat.
Allow to fry for a minute or two.
Throw in green tomatoes, some salt & some pepper (based on your typical tastes). stir around to integrate with the onions & garlic and allow to cook for ~ 6 - 8 minutes, stirring occasionally.
In the meantime, in a seperate bowl, scramble your 5 eggs and pour in that splash of milk
Once the onions, garlic and tomatoes have started to get a little crispy at the edges and even brown up a little, pour the eggs over them and allow it to sit for 30 seconds before stirring.
continue to cook eggs in a scrambled egg style (i've tried to go with a slow scramble while making this meal - it seems to work best with the ingredients) to the consistency you like best and then turn off the heat.
Spoon egg mixture onto plates & serve with fresh baguette.
8.12.2009
my version of a mashup
therefore, in an effort to be better, i've started keeping a little post-it with the share contents on my desktop at work... hoping that it will inspire me... and it finally worked...
last night, before i left work i called the meat-eater to ask what we'd be doing for dinner... we knew there was guacamole in the cards but what else? leftovers? bah. salad? bah. i finally suggested stuffed zucchini and while the meat-eater was less than enthused, he agreed...
so i scoured the internet for some options... many included beef which just wasnt happening. others included boring, which just wasnt happening either... so i did what i like to do best - found a couple recipes that sounded good and mash them all up into one... and cross my fingers...
the night was almost derailed by the distinct lack of onions in the house but thankfully the M-E was willing to run out and procure one and thus, dinner was saved! i guess thats why i'm marrying him - cause he always saves the day!
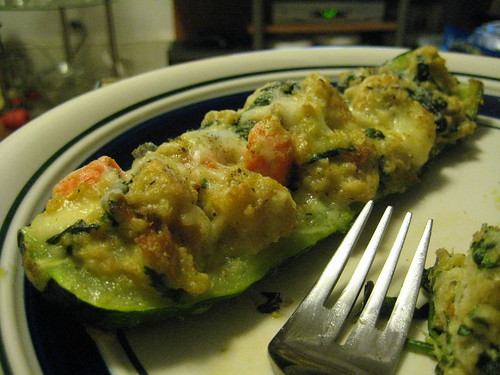
Stuffed Zucchini
courtesy of me
1/3 of a baguette
1 tbsp butter
3/4 c couscous
1 1/8 c vegetable broth (or water + bouillon)
2 medium/large zucchini, halved
2 small zucchini, cut into pieces
1/2 of a medium sized red onion
3 small carrots, cut into dice-sided pieces
4 c loosely packed spinach
1 egg, lightly beaten
4-6 oz medium cheddar, half shredded and half diced
Preheat oven to 325°
Prepare baguettes to be used in stuffing:
- Slice baguette into rounds, no bigger than 1" thick.
- Arrange on cookie sheet and place in the oven ~ 15 minutes, or until dried/crisp (but not browned).
- Set aside & raise oven temp to 400°
- heat 1 tbsp butter over med heat.
- when butter is melted, add couscous, stir, and 'toast' for ~ 1-2 minutes, until fragrant.
- Add broth and bring to a boil.
- Once broth is boiling, remove from heat and cover and let sit for ~6 minutes or more.
- Fluff with fork & set aside.
- Slice large zucchini in half, brush cut side with olive oil & place, cut side down, on cookie sheet (line with aluminum or parchment for easier cleanup)
- Place in oven ~15 minutes or until zucchini is soft
- When zucchini is done, remove from oven and scoop out the insides - including juices - (just leave little 'shells') and set aside.
- Reduce oven temp to 350°
- Heat 2 tbsp olive oil in a large frying pan over med heat.
- Add onions & carrots, stirring and cooking until onions are transparent ~ 5 mins
- Add cut up zucchini & keep cooking.
- Add the zucchini that was scooped out of the shells
- Tear the crispy baguette into stuffing sized pieces and add 1 c to the pan.
- Add spinach, in batches, and wilt.
- Add ~ 1/3 to 1/2 c of cooked couscous
- Remove from heat.
- Add diced cheese + 1/2 of the shredded cheese and stir until the shredded cheese has melted.
- Allow to cool a bit and then add the egg, stirring to ensure that egg does not 'cook' in the pan.
Place back in the oven for ~20 minutes, or until cheese is melty and stuffing is firm. Serve warm.
8.05.2009
Mexi-night done right
and for 9 months, he's mostly been cooking for me... there have been a few exceptions, but most of them not particularly exciting - i mean a salad is a salad - knife skills and cooking skills, while related, arent exactly the same...
anyway, on monday we were up in the poconos (10 pts if you know why) and on our way back, stopped at this awesome little farm stand... you know, because the produce from CSA isnt going bad fast enough as it is - and picked up some stuff, among it, corn. and i swore, up and down, left and right that i'd make my kickass corn & guac when we got home...
and then it was late. and i was tired. and no produce was prepared or put away and no dinner was made or even eaten...
thankfully corn can stand a night or two sitting on the counter... so last night, before i even got undressed from work, i went straight to the kitchen to begin the mexican flavor fiesta...
there would be corn & guac and there would be quesadillas...
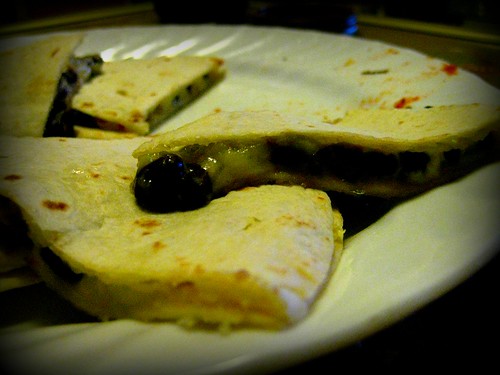
since i've already told you about the corn and guac and how amazing it is, let me tell you about the super easy, super quick, baked quesadillias... (did i ever mention the time i was reading a menu and asked a friend what 'qway - C - delias' were? true story...) we'd gotten some jalepeno cheddar from the CSA a while back and really just werent sure what to do with it... i kept saying we should put it in something mexican cause we didnt think we'd like it plain, but the chance just kept passing us by... however, last night we FINALLY got our opportunity...
Note: so after months of not knowing what to do with that cheddar - turns out that it ROCKS all on its own. so much so that if its available at today's pickup, there's a good chance we're claiming it...
Baked Black Bean Quesadillias
courtesy of me
2 large flour tortillias
1/3 of a can of black beans - rinsed
3 oz of jalepeno cheddar, either shredded or cut into small slivers/pieces
Preheat oven @ 350°
cover cookie sheet with aluminum foil
spray aluminum foil with non-stick spray
place one tortillia on greased foil
spread beans out to within about 1/2 inch of the outside edge
cover with cheese
place second tortillia on top of cheese and lightly press down
place in the oven for ~ 12 minutes or until cheese is melty
remove from the oven and, with the back of a clean plate, gently press on the top tortillia for ~ 20-30 seconds
let sit for another minute or two and then cut into segments
serve with salsa & sour cream (optional) and your favorite mexican beer.
7.23.2009
Food Porn
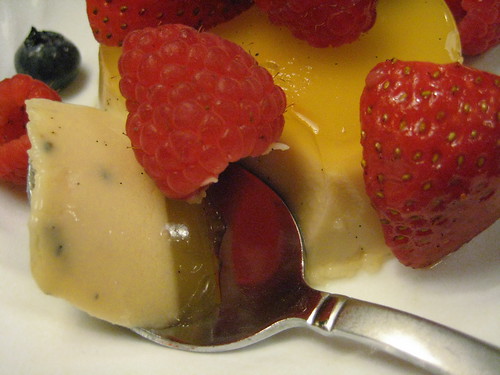
I cant find the recipe that goes with this picture, but I do remember that it was a honey-vanilla panna cotta that I made using a vanilla bean, farm fresh milk (a CSA bonus one week last year) and some local honey. Wildflower honey, I think...
The fact that there is no recipe to go with it is irrelevant - I found something online and adapted poorly - I used too much honey... But isnt that about the prettiest food picture you've ever seen???
6.23.2009
even the best vegetarians dream of bacon
it smells good. it looks good (except for when there's too much undercooked fat on it - ick!) and the fake stuff doesnt even begin to come close - which is surprising, given that bacos are meat-free...
anyway, given my bad experience with fake-bacon (save for the bacos), i dont have a lot of faith in bacon-flavored stuff... so when the meat-eater (his blog name forever now...) ordered two kinds of bacon salt off of woot not too long ago, i had my doubts...
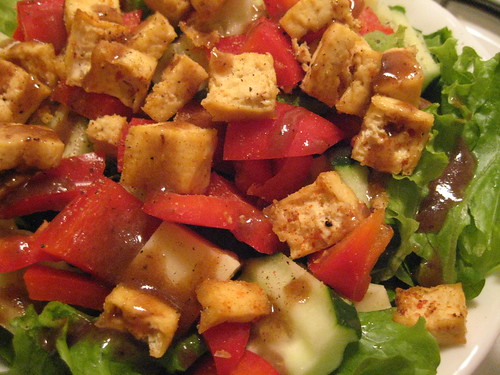
However, last night I decided to be good and eat some salad for dinner - using some lettuce & cheese from last week's CSA pickup (score! on the not-wasting-food front) - and wanted to add a little healthy protein. So i decided to experiment and make the tofu crispies that i'd seen on nutritionista... however, much like that bacon salt, my expectations were not high...
at the last minute, i thought i'd throw some of the bacon salt on some of the tofu... (because as a result of my laziness, i didnt realize that the tofu should have olive oil & seasoning with it and that just sounded BLAH. oh, and was really fun to clean off of the cookie sheet, as you may expect) what the hell? i expected that i'd be throwing away most of the tofu anyway - so might as well use the bacon salt so that i could tell the meat-eater that i was right and it was gross...
imagine my surprise when not only was bacon salted tofu good, but when the meat-eater and i ended up snacking on, like, half of it, before the salad was even made...
Simple Salad with Bacon-Tofu Crispies
courtesy of me w/ Bacon-Tofu Crispies inspiried by nutritionista
Salad:
1/2 head romaine or similar lettuce, washed and torn
1/2 cucumber, sliced
1/3 red pepper, diced
2 oz horseradish cheddar, cut into small squares
1/2 c bacon tofu crispies (below)
2 tbsp balsamic vinaigrette
salt & pepper to taste
Mix all together and serve
Bacon-Tofu Crispies
1 block firm tofu, pressed to remove excess water and cut into pieces the size of dice
olive oil (i forgot that part...)
bacon salt
Preheat oven to 400°
lightly grease cookie sheet with olive oil
spread tofu cubes all over sheet
sprinkle liberally with bacon salt
bake 40 mins at 400, turning once or twice if desired
6.16.2009
he said, she said
of course, i'm one of those weird 'vegetarians' who thinks that boy vegetarians are a bit... well, not for me. i dont know why - i dont subscribe to traditional gender roles, i dont think, but somehow i truly think that there's a whole 'me man, me eat meat' thing that should be going on with a guy... therefore, as antiquated as my otherwise evolved brain may be, while its not always the easiest way to eat, it is pretty much been the standard in my life... and i'm fairly sure the current meat-eater is sticking around for, well, forever, so its going to stay the standard.
there should be some sort of guide as to how to exist in this kind of relationship without it being a case of one person eats meat and a side and the other just eats a big portion of side... (oh, sure, steal my idea...) because really, as the potential sides-only eater? not so appealing to me... so i'm always looking for another way - a way to take a meal and turn one into something that satisfies the meat eater without leaving the vegetarian with something bland...
so, changing topics, CSA started again this week... summer shares began a week earlier than expected due to the abundance of crops ready for harvesting, but, as is usual, the first week was still fairly greens-heavy while being overall light... bok choi, cooking greens, baby turnips, radishes, spring garlic and scallions. all cool, but save for the garlic and scallions (which, due to a mixup were all but gone by the time i arrived for pickup) not things i use all that much... however, i am bound and determined to not let so much go to waste this season (winter was kindof a bust for me) and wanted to get started on my reformed, non-wasting ways right away...
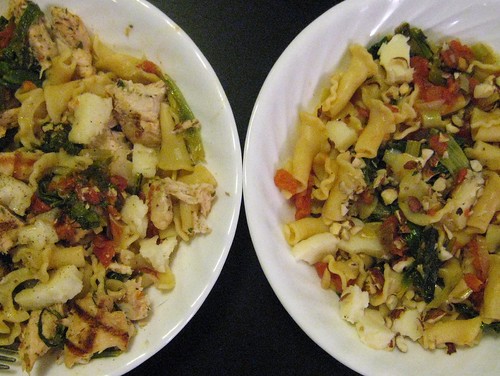
a number of people posted recipes for the greens and all had a similar take. the meat-eater and i discussed those recipies and modified and came up with our own idea of how to cook the greens into something we'd both like and even went so far as to figure out how to make one meat-eater-friendly while maintaing the fact that the vegetarian version was not lacking. I hope you'll find one or both versions to work for you.
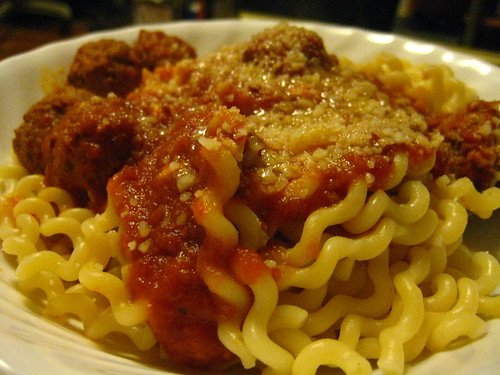
Garlic Greens & Pasta
recipe courtesy of me & the meat-eater
3/4 lb pasta, any kind
1/2 lb mixed cooking greens, leaves torn into small pieces and stems seperated and chopped into 1-inch segments
4 spring garlics - bulbs and 2 inches of stems - diced
1 scallion - bulb and 2 inches of stem - diced
3 tbsp olive oil
3/4 c vegetable broth
1 16 oz can diced tomatoes
salt & pepper
3 oz asiago cheese, cubed
veg:
2 tbsp hazelnuts, chopped
meat eater:
1 pre-grilled chicken breast, cut up into pieces
Prepare pasta according to directions
meanwhile, heat olive oil in frying pan over med heat
add garlic & scallions and cook ~ 5 minutes, until soft
add greens stems and a splash of the broth and cook until stems have softened a bit
add the remainder of the broth and all of the greens
cover and allow to cook ~ 5 minutes
remove cover, stir greens and check for doneness. If you would like them wiltier, cook longer.
drain excess liquid & add tomatoes
stir ~ 1 minute to heat & combine
add drained pasta to the mixture and stir to combine (& reheat the pasta if it had finished too quickly)
***
seperate into 4 serving bowls
add 1/4 of the asiago to each bowl
add 1/2 of the hazelnuts to the vegetarian bowls (above amount assumes 2)
add 1/2 of the cut up chicken breast to each of the meat-eater bowls (above amount assumes 2)
3.10.2009
because quiche is totally easier than grilled cheese
hilarity ensued, as my family in no way believed that quiche was easier than grilled cheese... my take? sure, it may take longer to cook but i honestly believe that, if made using the simple ingredients found in the quiche they had ordered, it was less hands-on time-intensive... their take? "you think everything is easy..."
of course i was HELL BENT on proving them wrong and proving just how easy quiche could be... and i did. sure, we went the easy route - premade pie crust & pre-shredded cheese, but my claim of no more than 10 minutes hands on time proved to be pretty much on target - i think i had it in the oven in 7...
all that said? this isnt that quiche... this is typical 'me' food - meaning i take what starts off as an easy dinner and complicate it slightly... but i still maintain that quiche is easy to make - and hard to mess up...
I invented this combination last night due to the fact that, as a result of an insane schedule, the boyfriend (soon to be guest blogger) has been cooking for me nearly every single night and i really wanted to cook something good for him for once... but needed it to be fairly quick as that insane schedule will be raging on for at least another few weeks...
given that i had no idea what i was really putting together, i was pleasantly surprised by the results... and glad that i have this blog as a place to record the process as otherwise i never would be able to replicate it again...
Confetti Quiche
Courtesy of me
1 par baked pie crust (~10 mins on 350° should suffice)
2 c shredded emmenthaler, divided
2 tbsp butter
2 shallots, diced
3 c loosely packed baby spinach
1 tbsp flour
2 plum tomatoes, insides removed and diced
1 small can no-salt corn (drained)
4 eggs
1 c half & half
salt, pepper, nutmeg
***
Preheat oven to 350°
Line pie crust with 1 c of the shredded emmenthaler and set aside
over medium heat, saute shallots in butter for about 4 minutes
add spinach and continue cooking until wilted.
turn off heat and stir in flour, tomatoes & corn
Spread mixture onto the emmentaler-lined pie crust. Sprinkle with nutmeg, if desired
In a separate bowl, mix eggs and half & half with a couple dashes of salt & pepper
Pour egg mixture into the pie crust (over the vegetable mixture)
top with remaining emmenthaler
top that with a couple dashes of salt, pepper and nutmeg, if desired
Bake at 350° for ~35 minutes
Allow to sit for 5 minutes and then serve
11.24.2008
Dear Martha Stewart,
You know, I've always been a Martha fan. own the cookie book. subscribe to some of the daily emails. even almost went to work for your company (albeit while you were *ahem* away...)
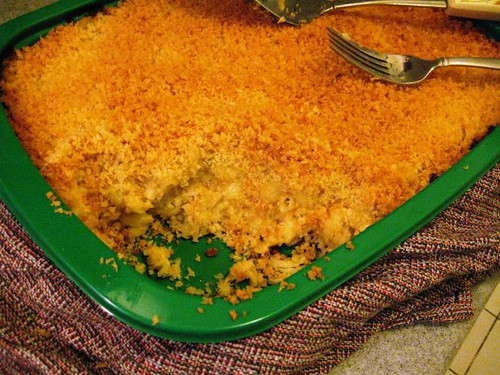
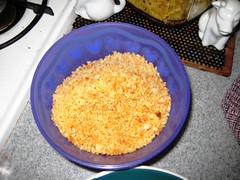
So the other day when yet another martha stewart mac & cheese recipe landed in my inbox, i thought to myself, 'self... you know all that CSA cheese you got? how you thought it was totally neccessary to order 24 oz of cheese at one time? well, self, this recipe will totally use up some of that! 12 oz of that! do it! make it!' and since i always listen to the voices in my head (when they are suggesting that i eat bad-for-me food) i printed out that recipe and headed to the grocery store to pick up a few things i didnt have. namely macaroni and panko... 3 cups of panko. even though that sounded like an awful lot of panko... but martha, you are an empire unto yourself. who am i to question?
so even as i worked - cooking the mac & making the cheese sauce - i just kept thinking - 3 cups? i must be reading that wrong... but no, i'd look at it time and again and sure enough, 3 cups. and then i'd think to myself... well she said 3 c of fresh breadcrumbs... is it possible that panko is THAT MUCH DENSER? and i'm all like, nah. just a different taste...
so anyway, i motored on and put it all together and poured that panko/butter mix over the top. over and over and over. it felt like i was my dog burying my bone in the backyard. or a kid in a sandbox. yeah, kid in a sandbox - lets stick with that one...
but martha, i had faith. faith in you and your copywriters and your commenters... it would be good. it would be fine.
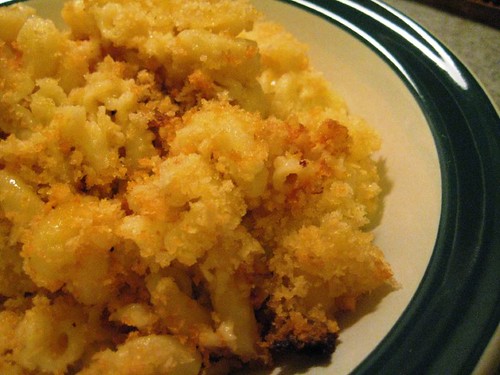
and then i took it out. and lady, you need to hire new editors... because there aint NO WAY IN HELL that there should have been 3 cups of breadcrumbs - fresh, panko or otherwise - on top of that mac & cheese. NO WAY IN HELL.
i scraped off about 2 cups

and honestly, the mac & cheese was still fairly dry.
therefore martha, consider this my PSA... because now when people google 'martha stewart macaroni and cheese recipe correction' they'll end up here. instead of writing you letters telling you that you owe them $2.49 for all that wasted panko...
Sincerely,
Kristen at kitchenhell
Macaroni & Cheese
slightly adjusted and corrected courtesy of me with original mistake from Martha Stewart
1 pound elbo macaroni
Coarse sea salt
6 tablespoons butter
1/4 cup all-purpose flour
4 cups milk
1/8 teaspoon cayenne pepper
1/8 teaspoon ground nutmeg
3 cups shredded (12 ounces) sharp white cheddar cheese
1/3 cup finely grated Parmesan cheese
3/4 cup panko
Preheat oven to 375 degrees.
Cook pasta in a large pot of boiling salted water 1 to 2 minutes less than package instructions.
Drain, rinse with cool water, and place into baking dish (I used an 8x12. You can use something bigger or make individual portions - cooking times are listed at the end).
Meanwhile, heat 4 tablespoons butter in a medium saucepan over medium-high heat.
Add flour; cook, whisking, 1 minute.
Add milk, cayenne, nutmeg, and 2 teaspoons salt; bring to a simmer.
Cook, whisking, until mixture is thick enough to coat the back of a spoon, 2 to 3 minutes.
Whisk in cheeses until smooth.
Pour over pasta; toss to coat.
Melt remaining 2 tablespoons butter; toss with breadcrumbs.
Sprinkle over pasta.
Cover baking dish with foil. Bake until bubbling, 60 to 70 minutes for large dishes, 40 to 50 minutes for small. (check after 35 mins for individual sized dishes)
Remove foil; continue baking until golden, 5 to 10 minutes more.
11.18.2008
i *heart* fall
because honestly, summer food is BO-RING. i mean, i can only saute so many squash. make so many salads. eat so many pots of yogurt and granola.
its not rocket science - its nothing you need me to remind you or tell you how to do. its totally pointless to post about it. (yes, i am WELL aware that most of this blog isnt rocket science but at least the non-tongue-in-cheek posts are mostly things you wouldnt necessarily think of...) of course, my mom & sister seem to disagree - they think that my answer for everything is "oh, its really eaasy... you just........"
in fact, we had an argument - nearly came to blows - over the fact that i said that quiche is no more difficult to make - perhaps even easier (provided that you are using premade crust) than grilled cheese. longer to cook? yes. harder? not really.
i'll have you know - i won. My mom has made quiche like 3 times since i left NC.
ANYWAY - that all has absolutely 200% nothing to do with the recipe i want to share...
so, remember that whole CSA thing? i'm ashamed to say that LOTS of food went bad. a frighteningly huge amount. so much so that i wasnt even sure that i was going to rejoin for the winter share until i found myself in the core group... and figured the winter is only once per month anyway, so...
thats a long way to tell you that i'm glad that i did, because i *heart* root vegetables. (and wintertime should be full of them) nothing better. love them to death. so while you can all have your fresh peppers and tomatoes and all of that? give me some beets. or some turnips. or or or...
the final CSA pickup for the year included more of the usual - green tomatoes, garlic, greens... but it also had some big-ass carrots and some white turnips. and i dont know where the wild hair up my ass came from, but last night, i just HAD TO HAVE carrots and turnips...
lucky for me, i stumbled upon this page and immediately knew what i'd be making... a few tweaks but wow - one of the best things i've made in a while...
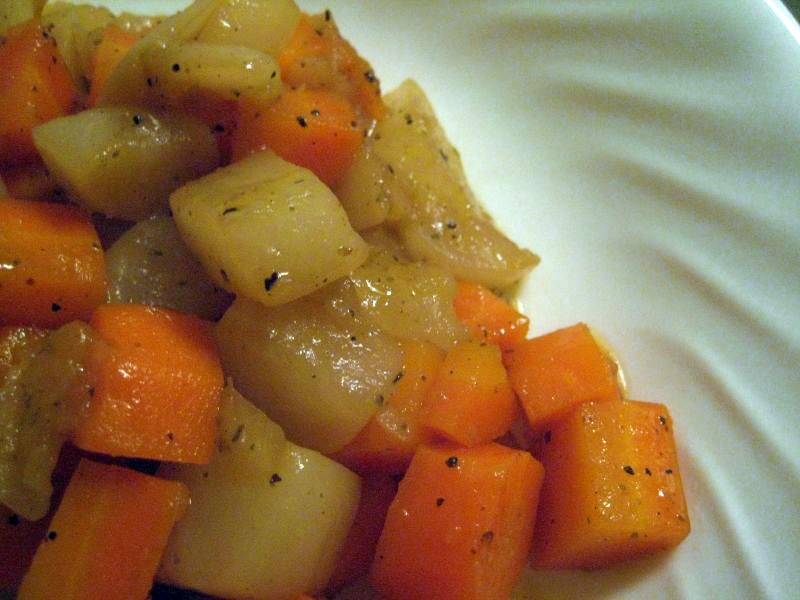
Honey glazed turnips & carrots
inspired by the above link, but courtesy of me
1 lb white turnips, peeled and cut into just larger than dice-sized cubes
1 lb carrots, peeled and cut into dice sized cubes
1 1/2 tablespoons butter
2/3 cup vegetable broth
1 1/2 tablespoons brown sugar
1/2 teaspoon lemon-pepper
1 1/2 teaspoon lemon juice
1 1/2 tablespoons wildflower honey (or can use any kind you have)
In a large nonstick skillet with a cover, melt the butter on medium
Add the turnips and carrots, stirring to coat, then let cook undisturbed for 4 minutes.
Stir again, let cook another 4 minutes.
Meanwhile, mix the broth, the brown sugar, the lemon-pepper and the lemon juice together.
Add the broth mixture and cover, reduce heat to medium low and simmer about 8 minutes.
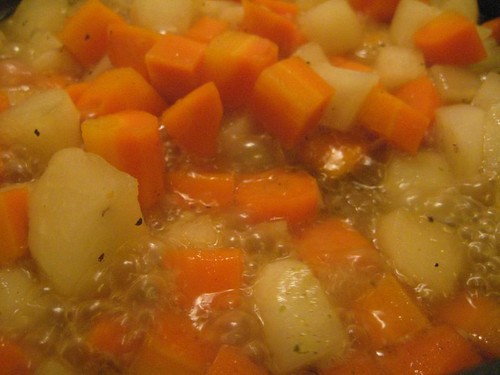
Uncover, add the honey, stir to incorporate and then increase heat to high, allowing liquid to cook down while stirring frequently to avoid burning. The liquid will finally get to a point where, if pulled away from a section of the pan, it doesnt immediate return there... That is when you know you've cooked it down far enough. (took nearly 10 minutes for me!?!)
Spoon out and serve immediately, pouring any remaining liquid over top.