Showing posts with label vegetarian. Show all posts

9.11.2012

Spaghetti with Herbs and Chilis

I wish I had a clever name for this because it really was clever, you see...

Last Saturday night, Jordan and I decided to head out for dinner...  We had a destination and a plan in mind but when we got there, we found out they were closed for a private party...  

BOO...

One of the problems with having a specific plan in mind is that when things dont go right, its harder to rebound...  so we wandered around for a little while looking for alternatives and eventually ended up at Franny's.

The original plan was based on Jordan's desire to sit at a restaurant bar and eat a bowl of pasta (he has strange cravings, that one...)  So when we got to Franny's, there was little question - we were sitting at the bar and splitting a pizza and a pasta...

It worked out so well that we're frightened for our bank account when Franny's moves even closer to our apartment...  

but i digress...

The next night was our traditional pasta night, so we thought 'why not try to re-create last night's pasta???'  I'm never good at this game, but I figured why not?

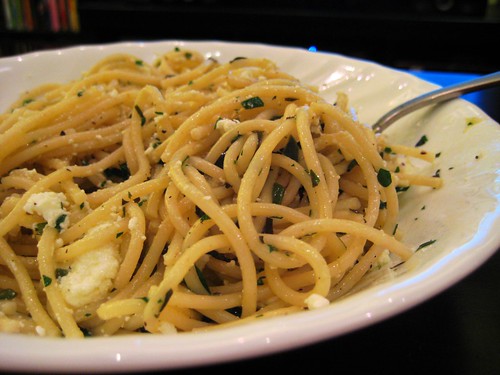
IMG_0114

Turns out we hit the nail on the head...  Squarely on the head.  I have no idea if our ingredients or methods were the same, but i can tell you this - the similarity in taste was remarkable...  Another light and easy pasta, in the books.

Don't worry Franny's - we still fear for our bank account :)


Spaghetti with Herbs and Chilis
courtesy of us, inspired by Franny's


1/2 lb good quality spaghetti
2 tbsp butter
2 tbsp olive oil
3/4 of a small poblano pepper, minced
3 - 4 cloves of garlic, smashed and roughly chopped
~ 1 tbsp minced basil
~ 1.5 tbsp minced mint
~ 2 tbsp minced flat leaf parsley
generous 1/2 c fresh ricotta
salt & pepper (optional)

***

Cook spaghetti in accordance with directions on package for al dente spaghetti

While spaghetti is cooking, melt butter & heat olive oil in a large frying pan over low heat.

When butter is fully melted, stir in poblanos and garlic.

Saute for 2 - 3 minutes, stirring once or twice.

Add ~ 1/4 c pasta water to the pan and stir

Allow to saute another couple of minutes, again stirring once or twice.  

Add another ~ 1/4 of pasta water if desired.

Drain pasta and add to frying pan.

Toss together until spaghetti is well-coated with the oil/butter mixture.

Remove from heat.

Stir in herbs.  Toss again to combine.

Separate onto two plates and top each with half of the ricotta.  

Stir ricotta into pasta.

Salt & pepper to taste.

Serve with a baguette and a couple glasses of wine.

8.27.2012

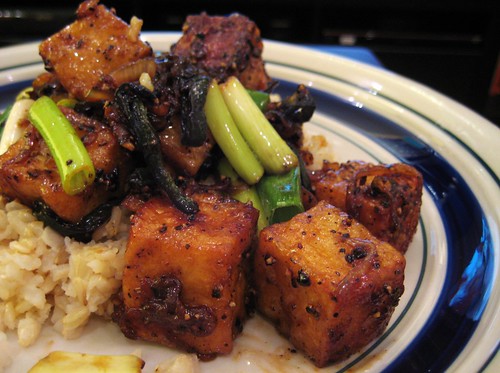
Black Pepper Tofu

A few weeks ago, a friend and I were having what could only be described as a riveting conversation about tofu.

What?  You don't find conversations about tofu riveting?  Pssshhh......

Anyway, during this riveting conversation, she mentioned that she no longer buys the widely available, pre-packaged processed stuff and that I should stop too... And I'm all like, 'and buy what instead? are you suggesting i make tofu now?  please...'

But no...  It turns out, you can buy fresh tofu... and apparently its better... so on my next coop visit, i looked into this fresh tofu thing and when i found some, i bought it. right away.

Now, the truth is, despite having eaten said tofu last night, i have no idea if it was actually any better... because isnt the point of tofu that it doesnt taste like anything?  but i digress...

So, we have this block of life-altering tofu in our fridge but no plans... I considered making my standby but, really, wanted something different... so, to really shake things up, we pulled out a real-life cookbook.  not a pinterest recipe... not a google search... a real life, hard cover cookbook... and that cookbook was Plenty. We've had Plenty for over a year now, (it was a birthday - or was it christmas? - present to me from Jordan), but we'd never made anything from it...

But this was our time... We found Black Pepper Tofu... Looked good, sounded interesting... contained ingredients we'd never heard of... so why not? And while it did take us over a week to getting around to finally making it, we did it. we finally used the cookbook! (there are even oil splatters all over the pages to prove it, too...)

related: do you have any idea how hard it is to find kecap manis (sweet soy sauce)? turns out, it's about a week's worth of hard... I suspect you could leave it out or just use a little molasses instead but we're nothing if not perfectionists... or ingredient-hoarders... eh, let's stick with perfectionists - it makes me feel better...

IMG_0092 


I'm thankful to all those who came before us - all of the reviews, etc we found online allowed us to tweak this recipe a bit and turn it into something we really, really enjoyed...

Oh, and a bonus? We FINALLY used our rice cooker... we've only had the silly thing for a year and 10 months now... Banner day in our household, huh?


Black Pepper Tofu
adapted by us from Plenty - Yotam Ottolenghi
Click here to import directly into Pepperplate

3 to 4 tbsp canola oil

15 oz. firm tofu, cut into 1″ cubes
cornstarch

4 tbsp (1/2 stick) unsalted butter
1.5 tbsp finely chopped ginger
4 shallots, thinly sliced
6 to 7 cloves garlic, smashed
1 poblano pepper, stemmed, deseeded and thinly sliced

2 tbsp coarsely ground black pepper
1.5 tbsp kecap manis (sweet soy sauce)
1.5 tbsp light soy sauce
2 tsp dark soy sauce
1 tbsp sugar

6 to 8 small scallions, cut into 1″ pieces

2 c cooked brown basmati rice

***

Heat vegetable oil in a large skillet over medium to medium-high heat. (no need to use non-stick, this doesn't stick anyway)

Toss tofu cubes in a bowl with cornstarch to coat.
Pan-fry tofu all over, until golden on all sides. (This will require turning frequently and you'll want to use a tong to avoid burns).
Place fried tofu on a paper towel to drain, cover with another paper towel and set aside.

Pour out excess oil and carefully wipe skillet with a paper towel.
Return skillet to medium heat and add butter. Allow butter to melt and then add ginger, shallots, garlic, and poblano. Cook until soft and shallots are beginning to caramelize, about 15-20 minutes.

Stir in black pepper, soy sauces, and sugar.
Return tofu to skillet and toss to coat.
Cook, stirring, until fully combined and warmed, 2 - 3 minutes.

Stir in scallions & serve over brown basmati rice.

7.31.2012

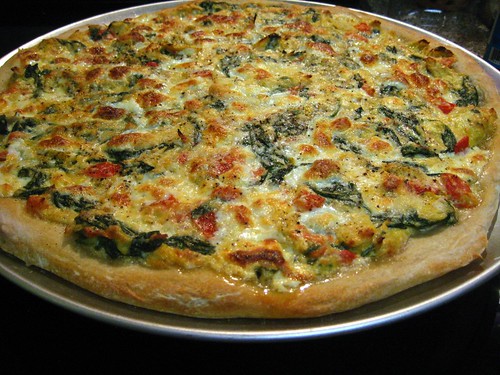
Spin Dip Pizza

Aaannnddd, I'm back!

Did you miss me???

Wanna hear a funny story?

About 3 months ago, we moved...  and I had this whole big blog dilemma - my blog's name is Kitchen Hell because cooking in my tiny kitchen was hell!  But the new apartment?  we pretty much bought it 50% for the kitchen, 30% for its proximity to the Greenmarket and 20% for the view...  Notice that means that 70% of why we bought this particular apartment is food related...  which means hell no more, right?

Yeah, that's what i thought...  Turns out, I was a bit too optimistic in that full elimination of hell...
because now we have a whole host of new problems to deal with...  Cabinet shelves that fall down, cabinet hinges that all need to be replaced (unless we enjoy having our cabinets held closed by packing tape), cabinets that were poorly designed...  (I mean, I love my huge pantry, but, um, if i put a box of pasta 21" back, i'm never seeing that pasta again...  why would someone build something that deep without roll-out shelves???)

And then there's the one that makes me want to smack myself in the face for even thinking it, but...  I've learned that i really, really liked having all of my pots & pans hanging on the wall behind me...  it was SO easy!!!  now with all of this cabinet space, things are buried and getting to that frying pan requires that i disassemble the entire cabinet...  which will need to be done again when we want to put it away...

first world problems, i know...

but those first world problems combined with a longer commute (and therefore a later getting-home-time) and not having the greatest grocery store on the planet just a block away (oh fairway, how i miss you!) means my motivation has been lacking, to say the least...

However, in the past week or two, the entirety of tumblr has been talking about this spinach artichoke pizza from How Sweet Eats...  And since last night was my shift at the co-op (oh yes, we ARE those people, thankyouverymuch!) I knew that i'd be motivated after seeing everyone else's purchases, plus I'd be right there at the best grocery option around and could pick up everything I needed...

And it didnt require too many pots & pans...

IMG_0063

Finally, the perfect storm of possibility...


Spin Dip Pizza
courtesy of me, as adapted from How Sweet Eats
Click here to import directly into Pepperplate

1 whole wheat pizza crust

1 (14 oz, pre-draining) can of artichoke hearts
2/3 c ricotta cheese
8 oz fresh mozzarella, chopped/crumbled, divided
4 oz grated parmesan cheese, divided

2 tbsp olive oil, divided
2 shallots, minced
3 to 4 plum tomatoes, diced
5 oz baby spinach

salt & pepper

***

Preheat oven to 450°.
Prepare pizza tray and set aside.
Toss/stretch crust to desired size/shape and place on pizza tray.

Place ricotta, 1/4 c parmesan and 1/2 c mozzarella in a medium mixing bowl.

Drain artichokes and roughly chop. Wrap in paper towels and squeeze to eliminate moisture.
Add artichokes to cheeses and stir to combine. Set aside.

Heat a large skillet w/ 1 tbsp olive oil over med-low heat.
Add in shallots with a pinch of salt and cook until soft and translucent, about 5 minutes.

Add in tomatoes and allow to cook for another minute or two.

Add spinach, tossing to coat and cook until spinach is wilted.

Remove from heat and add spinach mixture to the bowl with the cheese/artichoke mixture. Season with salt and pepper and stir to combine.

Drizzle pizza dough with 1 tbsp olive oil.

Spread cheese/spinach/artichoke mixture evenly over top.

Cover with remaining mozzarella and parmesan.

Bake for 25-30 minutes, or until cheese is golden and bubbly and crust is a bit crispy.

Allow to sit 5 mins before serving.

3.07.2012

Croque-Végétarien & Croque-Monsieur

So, you know how there really wasn't much winter this year?

Its been like, November (but without the rain), all winter long.

We're so spoiled by it...  Because this year, any time it goes below 35 or is rainy, we're all 'ew, gross!  couch!  comfort food!'

Since our honeymoon in Paris was quite rainy and chilly, one of the newer additions to our 'ew, gross! couch! comfort food!' repertoire is the Croque Monsieur.  While in Paris there was more than one night where the sightseeing got in the way of the marathon dinner events that we planned for many of the nights and, as a result, we ended up at Cafe Le Depart-St. Michel more than once...  While it wasnt much more than our equivalent of a 24 hour diner, it was open 24 hours (important to NYers who are used to such things) and close to our hotel(s) to boot, so it worked.  And this cafe's croque végétarien was one of the best I had while we were there...


This version is my favorite of all of the ones I've had since leaving paris (admittedly, there havent been that many, but this one is good, i promise!) and will probably become my new standard, not to mention a regular part of the 'ew, gross! couch! comfort food!' rotation.


Croque Végétarien & Croque-Monsieur
courtesy of me, as adapted from Ina Garten

6 slices good white bread

1 tablespoons unsalted butter
1.5 tablespoons all-purpose flour

1 c warm milk

1/2 tsp salt
1/4 tsp freshly ground black pepper
Pinch nutmeg

3 oz Gruyere, grated
3 oz Emmentaler, grated
1/4 c freshly grated Parmesan

Dijon mustard

2 plum tomatoes, sliced

For Croque-Monsieur:
1/4 lb jambon de Paris

***

Preheat the oven to 400°.

Toast your bread in the oven on a cookie sheet - 5 minutes on the first side, then 2 minutes on the opposite side. Set aside.

In a small saucepan set over low heat, melt the butter and then add the flour, stirring constantly with a wooden spoon for ~2 minutes.

Slowly pour the warm milk into the pan with the butter/flour mixture and cook, whisking constantly, until the sauce is thickened, about 3 - 5 minutes.

Remove from heat and add the salt, pepper, nutmeg and stir.

Add in 1/4 c of the Gruyere, 1/4 c of the Emmentaler and all of the Parmesan and stir until cheese has all melted. Set aside.

Spread dijon mustard on all of the bread.
On half of the bread, lay out tomatoes on a single layer.
If desired, add a couple of slices of ham on top of the tomatoes. (croque monsieur)
Top the same slices with the remaining Gruyere and Emmentaler, about 1/3 of the total cheese on each.
Top each 'loaded' slice with one of the dijon-only pieces of bread.

Top each sandwich with about 1/3 of the bechamel (cheese sauce)

Bake the sandwiches for 5 minutes.

Switch your oven to broiler and broil for 3 to 5 minutes (depending on how close your heating element is to your sandwiches) or until the topping is bubbly and lightly browned.

Serve hot.

2.27.2012

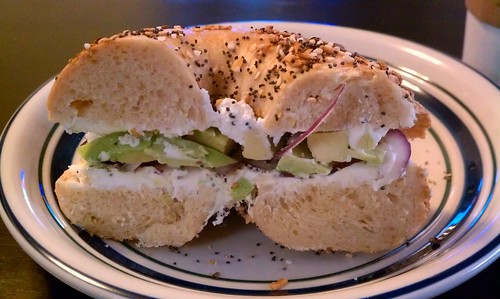
Sunday Morning Bagels

Long time, no post...

Its been a whirlwind, to say the least...  but it looks like Kitchen Hell will be moving up in the world!  No, not the blog-world, but the real world...  Let's just say that teeny tiny kitchen?  We'll be upgrading.  and the 2nd biggest greenmarket in NYC?  Right outside of our front door.  Cooking won't be the hell that it is today and we can't wait...

As a result of the impending move (to an apartment we chose 50% based on its kitchen alone), we've been hard-pressed to do much of anything in our current tiny, cramped, half-sized-appliance kitchen and as a result, there's been a lot of eating out, ordering in, frozen dinners and pasta (boxed) with red sauce (from a jar)...

Quite frankly, frozen Amy's dinners, while yummy in their own right, don't make for the best blog fodder...

Our weekend morning rituals haven't been much better than the dinners - pretty dependent on our local diner and bagel shop and when you can be served really good, still-warm-from-the-oven bagels by walking about  2 blocks from home (and barely beyond the store where you would have to fight your way through the crowds to buy anything to make at home) it's really hard to motivate to do anything different...

However, this past week, someone posted a bagel sandwich that looked so good that it was just the motivation I needed...  I needed that bagel sandwich...

IMAG1287

This isn't earth shattering, it's not life changing, so why am I posting it?  Because, frankly, it was so good that we've already talked about how we should really be sure to keep these ingredients in the house from now on...  Even when cooking isn't the hell it is today.

With this one, the tiny smidgen of motivation it took paid dividends...


Sunday Morning Bagels

2 everything bagels

~1/2 c whipped cream cheese
1/2 of a ripe avocado, sliced
a few paper-thin slices of red onion

lemon pepper

***
Slice bagels in half

Spread half of the cream cheese onto each bagel - covering both sides of the bagel (i like a lot of cream cheese, 1/2 c might be more than most people need...)

put half of your avocado slices onto one side of each bagel

sprinkle a few slices of the red onion over the avocado (this is optional - Jordan doesnt like raw onion, so he skipped this...)

Sprinkle the avocado and onion with a generous shake of lemon pepper

Close bagels up, slice in half and enjoy

10.12.2011

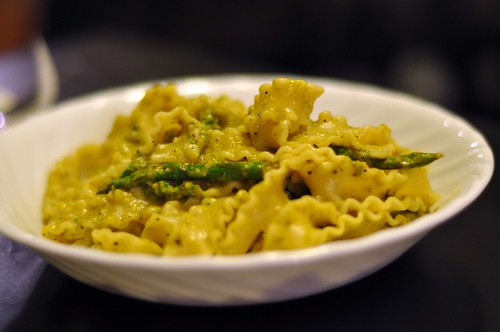
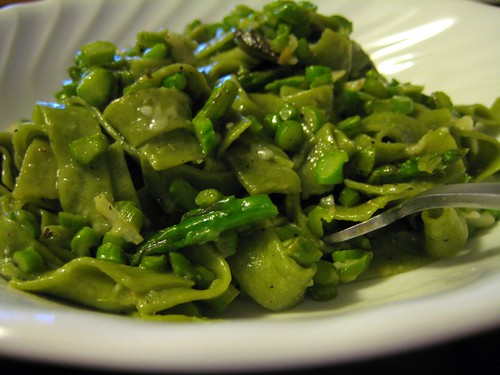
Malfadine with Lemon-Asparagus Sauce

When i started this blog - about 4 years ago - it was to not only share recipes, but also to share the stories behind them. I lost that somewhere along the way. i lost some of the story.

Keeping that in mind, you have to forgive me for posting this recipe at the absolute wrong time of the year. This is a spring dish if i ever tasted one. but i made it this week. When yes, it was warm, but its still october...

However. If you know me in real life, you know that i've seen more than my fair share of Better Than Ezra shows. You know that i have friends - real life friends - that i wouldnt even know if not for my hours on their messageboard and my travels to their shows. You know that when i start talking about someone you dont know, you have to ask 'is that a BTE person?' and you know that quite often, the answer will be yes.

So why is that relevant?  because a funny thing happened along the way. all of us BTE people? we grew up. some became real adults and had kids. some bought houses. some moved - many times. some got married. some broke up. but through the miracle of the internet, so many of us have stayed in touch. held eachothers hands through breakups. been to eachothers weddings. sent presents to those kids. and among it all, theres a number of us who emerged as being almost as obsessed with food as we were with that band - at least 3 of us have food blogs. so now, instead of trading live show tapes, we trade recipes. We send treats to those having a hard time. and not so long ago, i sent 1.5lbs of pasta all the way to california, because one of those friends mentioned that she couldnt find malfadine near her.

now, of course, if someone wants a specific shape pasta for a specific recipe that badly, you know i have to try it too, right?

So that 1.5lbs of malfadine has been sitting in my cabinet waiting for me to get around to this...

DSC_0778

I ended up altering the original recipe a bunch, some based on reviewers suggestions, some pulled from other recipes we've known and loved (Cacio e Pepe, i'm looking at you), but the gist is the same... these long skinny lasagna-style noodles finished in an asparagus lemon sauce that just screams SPRING! (even if its October) when you bite into it...

and if you cant find malfadine near you? drop me a line - i'm an expert at shipping it ;)


Malfadine with Lemon-Asparagus Sauce
courtesy of me, loosely adapted from Epicurious

1/2 lb fresh asparagus, tough ends discarded, tips and remaining stems separated
1/2 tbsp salt

1 tbsp extra-virgin olive oil
1 tbsp softened butter
1 tbsp minced garlic
1/2 tbsp dried parsley
1/2 tbsp lemon zest
Juice of 1/2 of a lemon
1 tsp fresh ground black pepper

1/2 lb malfadine or other pasta of choice

1/3 cup grated Parmigiano-Reggiano

***

Boil a generous amount of water (you will use this water 3 times). Once boiling, add the salt to the water. Watch the volcanic eruption. its fun.

Chop asparagus stems into 1-2" segments. Cook the segments in the boiling water for 6-7 minutes or until very tender. Transfer segments to a colander, reserving cooking water in pot (a slotted spoon or small strainer works well), and rinse under cold water. Set aside.

Cook asparagus tips in same boiling water until just tender, about 3 minutes. Transfer tips to a colander, again reserving cooking water in pot and rinse under cold water and set aside,

Purée asparagus stems with oil, butter, garlic, parsley, zest, lemon juice, black pepper and 1/4 cup asparagus cooking water. (be careful, that water is hot)

Cook pasta in boiling asparagus cooking water for about 3/4 the amount of time suggested for al dente pasta. Reserve 1 cup of the cooking water, drain pasta and remaining water out of the pan.

Return pasta to the dry pan. Add in the asparagus tips, the pureed sauce and the reserved water and cook over high heat, stirring frequently to prevent burning and to ensure the ingredients are combining well. Allow to cook ~ 3 minutes, or until pasta is al dente, and the sauce has thickened and coats pasta well. (it will still be too 'loose' at this point - thats ok, the cheese will help...)

Remove from the heat and stir in Parmigiano-Reggiano. Stir until cheese is meltedand well combined.

Serve immediately, adding salt to taste.

10.07.2011

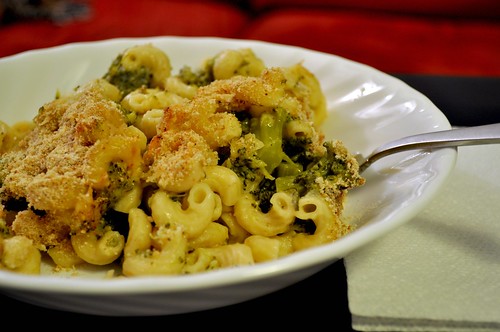
Broccoli Mac & Cheese

When the weather starts to cool off, everyone's thoughts (mine included) turn to apples and pumpkin and maple syrup. However, when mother nature decided to skip the whole cooling off period a week or so ago and go straight to RAINY & COLD, I couldn't help but skip the normal cravings and move straight to comfort food.

Most people will agree that there really is no better comfort food than mac & cheese but for those who arent looking to fatten up for their winter hibernation, the comfort we seek in mac & cheese can quickly turn to distress when trying to get dressed in the morning and finding out that none of your clothes fit anymore because you've been eating a little too much comfort...

This leaves you with a dilemma - stop eating the warm comforting hug that is mac & cheese and keep that slammin' body or eat all the comfort and embrace the fatness?

I'm here to give you a 3rd option - do both.  and do it without sacrificing the stuff that makes mac & cheese the yummy goodness that it is...

Now, this recipe makes me feel a little bit like a mom who's trying to sneak vegetables into her kid's meal but really, the broccoli is a bonus, not a secret we're hiding under a layer of cheese (though that's how my mom got me to eat it as a kid...) and actually adds to the dish.

And you don't have to be on a diet to like it.  It doesn't taste like diet food!  I promise you, this mac and cheese tastes just as good as many other versions out there.  The bonus is that the vegetables are already built in, so you don't feel like you have to make a side in order to have a complete meal.

DSC_0774

It's a pretty versatile dish.  While the recipe below uses high-fiber pasta and reduced fat cheese, that's not really the calorie-cutting key - its much more about the fact that there is equal weight of pasta and vegetable soaking up all of that cheesiness.  I highly recommend playing around with it and coming up with the version you like best.  I'm already planning its successor as we speak ;)


Broccoli Mac & Cheese
courtesy of skinnytaste.com, with modifications by me
Click here to import to Pepperplate.com

12 oz high fiber pasta (we used Barilla Plus elbows)
12 oz fresh broccoli florets, any large pieces roughly chopped

2 tbsp butter
1/4 cup diced onion
1 tbsp minced garlic (about 2 cloves if you aren't cheating and using the pre-minced stuff)

1/4 cup flour

1 cup vegetable broth
2 cups 1% milk
1 tbsp garlic chili cholula sauce

8 oz (2 cups) shredded reduced fat mexican cheese blend
salt and fresh pepper to taste

1/8 cup grated parmesan
1/4 cup bread crumbs

***

Lightly grease a large casserole dish and set aside

Preheat oven to 375°

Prepare pasta in accordance with package directions for al dente pasta.  Include the broccoli in the water with the pasta for about 7 minutes  (this was al dente cooking time for our pasta, so everything went in together.  If you are using a pasta with a longer cooking time, just throw the broccoli in when there is 7 minutes left...)

While pasta & broccoli are cooking, heat 2 tbsp of butter over medium heat.  Add onion & garlic and cook for about 2 minutes to soften.

Lower heat to medium-low and whisk in flour.  It will clump and get dry - dont panic.  Keep whisking for a minute or two until it is all incorporated and the mess looks golden.

Add broth, milk and cholula, whisking to incorporate.  Raise heat to medium-high and heat, whisking often, until mixture is bubbling and gets thick.  (This will take anywhere from about 5 - 10 minutes, depending on your definition of medium-high)

Remove from heat and stir in cheese, in batches, until it has melted and is well-incorporated.  Season with salt and pepper to taste.

Add the pasta & broccoli into the cheese sauce and mix well to combine.

Pour the whole thing into your prepared baking dish.  Top with parmesan and then breadcrumbs.

Bake ~ 20 minutes and then turn oven up to 500° and bake for an additional 3 minutes to get the top a bit golden and crispy.

Allow to sit for at least 5 minutes before serving.

8.04.2011

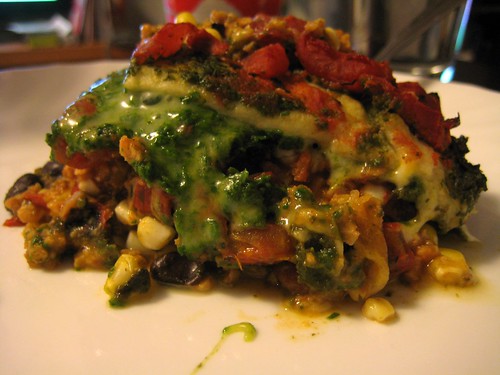
Vegetarian Mexican Lasagna

what a shock, more mexican...

actually, please be impressed...  the glut of mexican food means we are, gasp, using up ingredients!!!  the idea for mexican lasagna came from a random comment on another blog regarding some sort of mexican casserole that her husband was going to eat while she juice fasted...  i read that one morning and thought - ooh - we have like, 3/4 of a bag of tortillas!  i can use them up!  woo hoo!

of course i had to complicate things - combining 3 recipes into one which, in the end, didnt resemble any one of them all that closely - but in the end, worth it...

also?  my first time working with TVP.  super easy, super cheap.  If you are sitting there going 'what the hell is TVP?', its ok, you could certainly make this with ground meat or more beans instead...

However, there is one MAJOR problem with this recipe...

its UGLY.

IMG_4626

I know there is nothing appetizing about this picture - i'm fairly embarrassed to even be posting it because its SO ugly...  but it was either deal with the ugliness or not post it at all, and i liked this enough that my need to share outweighed said embarrassment.  So, ignore the picture and take my word for it...  its good.  it was actually so good that we ate the leftovers too (2.5 mins in the microwave was perfect) - which is something we so very rarely do - and honestly, the reheated version may have even surpassed the just-out-of-the-oven experience...

and, wait for it, this means we actually got 3 meals out of that one bag of tortillas.
watch out world, first using up tortillas, next extreme couponing!  woo!


Vegetarian Mexican Lasagna
courtesy of me - inspired by Funkinutt McFly's Vegan Food blogSee Jen Cook, and Rachel Ray

for the seasoned TVP: courtesy of Funkinutt with minor modifications:
(note:  we only used about 2/3 of this in our lasagna)
1.5 c textured vegetable protein
2 dried new mexico chilis
4-5 cloves garlic
1/4 of a vidallia onion
1 3/4 c water, divided

1 tbsp olive oil

2 tsp ground cumin
1/2 tsp dried oregano
1/2 tsp salt
1/4 tsp Tabasco
juice of 1 lime
1 tbsp tomato paste
1 3/4 c water, divided

Heat olive oil in sauce pan over medium-high heat.

Remove stems from chili peppers and then put peppers, garlic, onion and 1/4 c water into food processor and process until finely chopped.

Add chopped chili mixture to hot oil and mix around.  Add remaining ingredients to pan and cook over high heat for 2 minutes.

Reduce heat to medium and cook for another 8 minutes, stirring occasionally.

Set aside.


For remaining layers:
1 c cilantro
4 scallions, light green parts only
~5 c fresh baby spinach

corn kernels from 2 ears of corn
1 can black beans, drained and rinsed

6-7 6-in flour tortillas

1.5 cans diced fire roasted tomatoes

2 c shredded mexican cheese blend

salt & pepper to taste

***

Preheat oven to 425°
lightly grease bottom of casserole dish with olive oil and set aside

combine cilantro, scallions & spinach in a food processor and process until almost pesto-like (you will probably have to add the spinach in batches). Add a bit of salt & pepper if desired and set aside.

combine corn and black beans and set aside.

cut tortillas into strips.

layer tortilla strips in the bottom of the casserole, just slightly overlapping.
layer some of the seasoned TVP in
toss on some of the black beans & corn
add a layer of tomatoes, with their juices
add a layer of cilantro/spinach mix
add a layer of shredded cheese
place another layer of tortilla strips on top & push down slightly.

Starting with seasoned TVP, repeat all layers, being sure to leave a little bit of the spinach mixture and cheese for the top.

At this point, you should have a top layer of tortilla strips.  Spoon remaining spinach mixture over top and spread so that all tortilla is 'wet'.  Sprinkle remaining cheese over the top.

Cover and bake for 25 mins.

After 25 mins, remove cover and bake additional 20 minutes.

Allow to cool 5 or so minutes.  Cut into 6 pieces and serve with sour cream and hot sauce (both optional)

7.15.2011

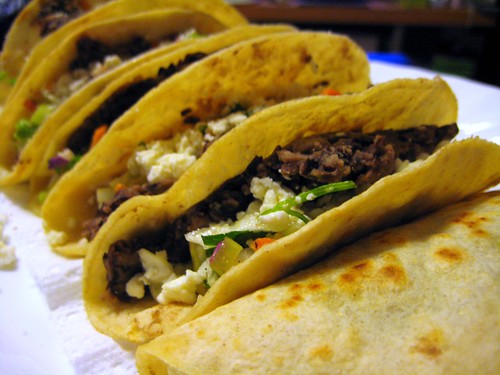
Crispy Black Bean Tacos

I swear, i was born in the wrong country...  i think canadians are far more interesting than americans and all i eat is mexican food...

maybe its good that i was born half-way in between the two?

Regardless, its summer and for me, summer means a lot of things...  but for purposes of this blog?  it means mexican food.  it means how many different ways can i make tacos...

I saw this recipe posted over on tumblr (its like twitter, but bigger...)  and thought it looked interesting, and then someone else i follow on tumblr went ahead and made it like, 4 hours later...  and a girl can only take so much peer pressure before she gives in, you know...

IMG_4624

We served it with some kicked up rice and some cold beer.  i recommend you do the same...


Crispy Black Bean Tacos
courtesy of Bon Appetit with modifications by me

1 15-ounce can reduced sodium black beans, drained & rinsed
1/2 tsp ground cumin

2 tsp olive oil
juice from one lime
1/2 serrano pepper, minced
2 c coleslaw mix (no dressing, just the cabbage/carrots/etc.  You can buy it bagged...)
2 green onions, very bottom and dark green portions discarded, center sliced into small discs
1/3 c chopped fresh cilantro
1/2 avocado, diced
salt & pepper (to taste)

1 tbsp olive oil
6 corn tortillas

1/3 cup crumbled cotija cheese

hot sauce of your choice (chipotle works quite well)

***

In a small bowl, mash beans and cumin until beans are mostly mashed but still have some definable beans

In a medium bowl, mix 2 tsp olive oil, lime juice and serrano pepper together.  Then add coleslaw mix, green onion, cilantro and avocado and toss to coat.  Salt & pepper to taste.

Heat 1 tbsp olive oil on a large skillet over medium-high heat.
Fit as many tortillas as you can on.  Spoon approximately 1/6 of the bean mixture onto each, keeping it to one side and not too close to the edges.  (it won't seem like enough, but this allows for more room for the slaw & cheese...) Allow to cook for a minute.  

While they are still on the skillet, carefully fold tortillas in half.  Do not press down too hard, but make sure they are folded enough to stay folded.  Allow to cook on each side for a minute or two, until golden brown.

Remove from skillet and place on a paper towel to soak up any excess oil.

Top each with a generous amount of slaw and cotija - more than you see in the picture - after taking a few bites we realized we'd been skimpy on both - and top with hot sauce before serving...

6.10.2011

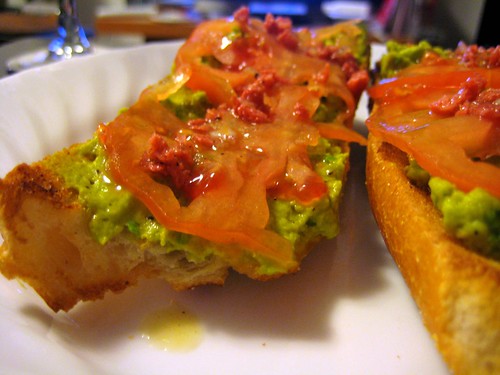
Open-Faced Goat Cheese & Avocado Sandwich

so, i'm totally obsessed with top chef masters this go around...  (season 3).  as much as i like to cook, i've never been a huge fan of any of the cooking shows until this one, but when they announced that Floyd Cardoz, former chef of Tabla - one of my all time favorite restaurants - would be a contestant, i decided to tune in.

As we've watched this season (because dont think i've allowed jordan to escape this one), one of our favorite topics is who's restaurants we want to visit...  I've been to Suvir's restaurant, Devi, but Jordan hasnt, so that's high on our list for this summer...  Floyd is set to open a new restaurant in the coming months and, of course, we'll be vying for reservations the minute it opens...

In addition to my New York Indians, Traci & Mary Sue were always high on my list.  Given that they round out the top 3 with Floyd, i decided to go looking and see just how long of a flight we'd need to take to get to their restaurants...  turns out its a pretty long one since they are both in CA...  however, my search for more info on their whereabouts landed me one of the most useful pieces of information ever...

all of the top chef recipes are available on the website.

now, i'm sure this isnt news to you, but like i said, i havent been watching this show!  I had NO IDEA!  Amazing!!!

so, just as i was learning this, it was about 98° outside...  and the thought of cooking dinner was pretty awful because, oven, EW...  however, i quickly remembered the avocado/goat cheese sandwich Mary Sue had made during the quickfire challenge just a couple of episodes ago and thought - ooh...  that.

So i went on my search and lo and behold, there it was...  just begging for me to recreate it... given my recent obsession with avocado (seriously, for the past 2 months, i've craved avocado every single day...) i was powerless to resist.

IMG_4562

we did have to make one obvious tweak to it, given that i dont eat bacon, and i do suspect that real bacon would make it even better for those so inclined to eating that particular product, but even without it, this open-faced sandwich is a winner in my book - even if the microwaved version of it was a big loser on the show...


Open-Faced Goat Cheese & Avocado Sandwich
courtesy of Mary Sue Milliken, via Top Chef Masters with minor modifications by me


Note: I've listed the sandwich ingredients first, but i would suggest making the dressing first so it has some time to sit so the flavors can meld

For the sandwich:
2 pieces of baguette, approximately 6 to 8 inches long each, sliced in half

1 avocado, seed and peel removed
2 oz soft goat cheese
1/4th of a lemon, juiced (prob about 1 tbsp?)
4-5 dashes garlic chili cholula
~ 1/4 tsp black pepper (freshly ground is best)

sea salt

1/2 of an heirloom tomato, sliced paper-thin


For the dressing:
(this makes way more than you will probably use on the sandwiches - dont feel compelled to use it all or you'll drown your other ingredients and end up with soggy bread...)


1 tbsp minced shallot
3 tbsp olive oil
2 tbsp red wine vinegar
2 tbsp bacos (meat eaters, feel free to use real bacon instead...)
salt & pepper (a few turns of the grinder of each seemed to work for us)


***

Prepare the dressing - mix all dressing ingredients together in a bowl, jar, emulsifier - whatever you want - and mix well/shake/whatever to combine.  Set aside.

Turn oven on to broil

Toast baguettes, cut side up, for 1 - 2 minutes under the broiler, so the edges get a bit golden and the bread itself is a little toasty.

Mash the avocado, goat cheese, lemon juice, cholula, and pepper together in a bowl.  The goal is to get a cohesive mixture that is fairly smooth with a few lumps remaining  (i had to use a wooden spoon to really break my avocado apart as it was just slightly under-ripe and then mashed the rest up with a fork)

Taste and season with additional black pepper and a little sea salt, if desired.  (note - it will taste a little bland at this point.  dont worry.  have faith.)

Spread mixture on the toasted baguette pieces and place back in the broiler for a minute or so to warm it up.

Remove from the broiler and top with thin slices of tomato

drizzle each piece with some dressing and serve immediately.

5.20.2011

"Real" Fettuccine Alfredo

According to Mario Batali, us americans have totally bastardized Fettuccine Alfredo...

On May 17, he was on the Today Show - at 8:39am to be exact - making what he calls the real, original version of fettuccine alfredo.  Live, on TV, with no 'so this is what it will look like in 10 minutes' or any of that - this whole thing could be made live on tv in real time, save for the prepping of ingredients and the boiling of water...

(incidentally, if i was a good kid, i would have already been out the front door on my way to work and would have missed this.  bonuses like this dont do much to discourage my bad-kid behaviour...)

Now, as someone who really, really likes that bastardized american version of fettuccine alfredo, i wasnt so sure what i thought of this - but both Jordan and I thought it was as least worth a shot...  as we always say, whats the worst? - we order Big Nicks...

We did decide that it might be better with some garlic - most things are - but aside from that, pretty much followed mario's recipe exactly (well, the one he did on the show - the written recipe leaves a step or two out...)

IMG_4494

Serve it with a salad, crusty bread and a little white wine and you've got a perfect low on time/high on taste midweek meal...


"Real" Fettuccine Alfredo
courtesy of Mario Batali on the Today Show with minor modifications by us

1/2 pound fresh spinach fettuccine (boxed would be fine as well)
3.5 tablespoons (scant ½ stick) unsalted butter, cut into small pieces
3 cloves garlic, minced
1/2 pound medium asparagus, tough ends snapped off (yields about 1/3 lb of usable asparagus)
¼ c freshly grated Parmigiano-Reggiano
Salt and freshly ground black pepper

***

Using a mandoline (or other vegetable slicer, or a vegetable peeler), thinly shave the stalk of your asparagus into little discs.  Leave the 'trees' whole.

Bring 2-3 quarts of water to a boil in a large pot, and add 1 tablespoons salt.

Cook the fettuccine in the boiling water, just slightly shorter than the package directions, as it will cook a little bit with the sauce. Drain, reserving about 1/8 cup of the pasta water, and set aside.

In a large saute pan, heat the butter over medium heat until melted. Add the garlic and allow to sauté for a minute or so, then add the asparagus. Toss to coat & allow to cook a couple of minutes.

Add the reserved pasta water & stir to combine.

Add pasta to the saute pan & toss until the pasta is coated with the butter mix.

Allow to cook about 30 seconds, then add the cheese and toss well.

Once cheese has mostly melted in, remove from the heat, season with salt and pepper (to taste) and serve immediately.

4.01.2011

Avocado-Pistachio Wrap

This time of year, things get a little hectic...  its stupid, really...  I gave up my busy Jan-April job a couple of years ago, so this should be my slow time.  However, that rational thinking has caused me to overextend myself in so many ways that Jan-April is nearly as bad as it used to be.

before someone throws something at me, i did say NEARLY...

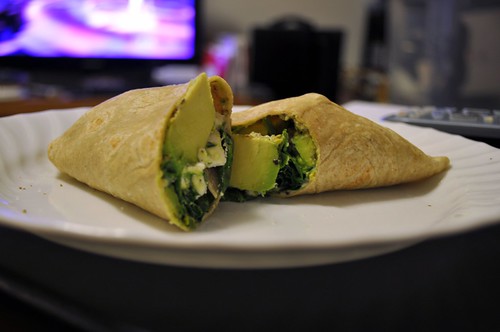
Anyway, (tangent - google tells me i use the word AGO more than any other word on this blog.  I'm completely and 100% shocked that its not ANYWAY...) busy nights lead to quick dinners thrown together...  After the quesedillias, there were a few random things kicking around and i'm still trying really hard to cut down on my food waste, so i was all 'what can i make with that bit of goat cheese and those tortillas?' and i thought back to the little card that was floating around in my bottomless pit bag from my local Pret...  It had instructions on how to construct their avocado-pine nut wrap and it was enough to get me started on my own avocado wrap.

DSC_0287

Dont tell them, but i might like my version better...


Avocado-Pistachio Wrap
Inspired by Pret A Manger, courtesy of me

2 tbsp plain yogurt
2 tbsp low-fat mayo

2 whole grain tortillas

1 avocado, cut into slices
1/4 - 1/3 c goat cheese crumbles
1 c arugula
15 - 20 pistachios, shelled & chopped (yes, we have a slap chop.  2 in fact.  we > you)

salt & pepper

***

mix the yogurt & mayo together and set aside

lay out the tortillas

place 1/2 of the avocado, then 1/2 of the goat cheese, then 1/2 of the arugula & you guessed it, 1/2 of the pistachios in each, mostly towards the center and one end...  kind of like from the center of the clock down to 6 o'clock, if that makes sense...

salt & pepper to suit your personal tastes
(the average person enjoys 3 cranks of a pepper grinder.  true story.  learned it from a real-live bonafied professional chef)


Carefully fold both sides in and roll from the bottom*.  Slice in half** and enjoy.

* If you are as talented as me, your sides wont stay rolled so tight, but i assure you, your wrap will taste just as good, regardless...
**slicing on an angle makes the first bite easier to take...  

3.23.2011

Spinach & Goat Cheese Quesadillas

Remember those quesadillas from, oh, yesterday?

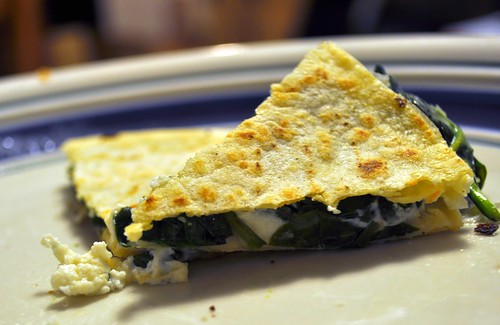
Well, Jordan's version of non-mexican quesadillas varied significantly from mine - the only thing they shared was goat cheese...

Sadly, this is a common occurrance in our apartment - two people who have strong opinions about pretty much everything means that we both want what we want...  and while i am exploring all things mushrooms, he's pretty much the king of spinach...

DSC_0266

The irony of this is that i'm pretty sure that, had we put some of the mushrooms and the spinach together, we would have ended up with our best version of non-mexican quesadillas...

Metaphor for marriage, people...  metaphor for marriage.

thank god we have more tortillas ;)


Spinach & Goat Cheese Quesadillas
courtesy of the new york times with minor modifications by Jordan

~3 cups baby spinach, cleaned and still damp
1 tbsp olive oil
1 tbsp minced garlic

1 package small corn tortillas

½ c goat cheese crumbles
Salt, black pepper & crushed red pepper, optional

***

Prepare spinach:
Heat up 1 tbsp olive oil over med heat and put minced garlic in.  Cook for 2 – 3 minutes until garlic is fragrant.
Add spinach and cook 2 – 3 minutes until just wilted.  Remove from heat and set aside.

Prepare quesadillas:
Lightly oil a large, flat skillet, place it over medium-low heat and place two tortillas on it.

Add toppings to each, starting with spinach, then topping with goat cheese.  
Add salt, black pepper or crushed red pepper, if desired.

Allow to heat up until goat cheese starts to get soft and maybe even a bit melty.  Once it is, place another tortilla on top of each and lightly press down.  
Allow to cook another minute or so and then carefully flip.  Let the other side cook for a minute or two and then remove from skillet.  
Allow to sit for a minute and then cut with a pizza cutter.

(makes 2 or 3 depending on the size of your shells)

3.22.2011

Black Bean, Mushroom & Goat Cheese Quesadillas

I once asked my friend Katie what kway-se-delia-s were.

I was about 23 at the time.

True story.

I might have been drunk. Or hungover. At least I hope I was one of the two because who the hell claims Mexican among their favorite cuisines and doesn’t know what a quesadilla is when they read the word on a menu? Despite having eaten them many, many times…

(why do I share these things???)


Anyway, ever since I had huevos rancheros at Almond last weekend, we’ve been talking Mexican food. And then Jordan saw some quesadilla recipes in the NY Times and who are we to ignore the universe when it points us to Mexican food?

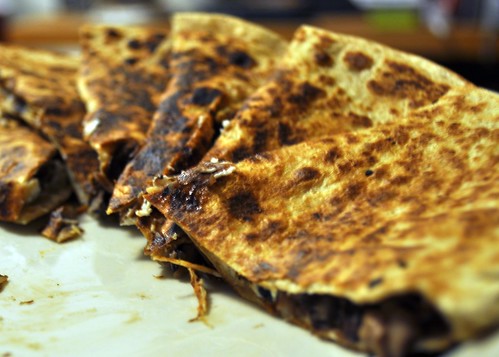
Apparently, we’re someone, because our quesadillas were anything but Mexican. There are no jalepenos, no salsa, no avocado, no sour cream. Not even jack or cheddar… Nope. These quesadillas are in name only, simply because they are sandwiched between two tortillas… However, with less than 3 months to re-lose all of our post wedding weight gain (as we’ll be heading to the islands for someone else’s wedding and islands = beach = bathing suits = ‘oh crap maybe I shouldn’t have allowed myself to regain all the weight I’d lost’) they managed to satisfy the need for something vaguely mexican and do it in the healthiest way possible.

DSC_0261

The version you see below also allowed me to experiment a little with one of my new favorite things, mushrooms. Because, oh, did you know? It turns out that I like mushrooms now. Hated them for about 34 years until some time in the last few months, and now, I’m somewhat obsessed. Turns out I really just don’t like button mushrooms… who knew? I’m still experimenting with the types I like best and how to prepare and use them and this was a great chance to do just that…


Black Bean, Mushroom & Goat Cheese Quesadillas
Courtesy of me

½ tbsp butter
½ tbsp olive oil

½ of a shallot, somewhere between diced and minced
1 c maitake mushrooms, roughly chopped
1/3 c red wine, divided

1 package whole grain tortilla shells 

¼ c black beans, drained & rinsed
½ c goat cheese crumbles
Salt & black pepper, optional

***

Prepare mushrooms:
Heat olive oil & butter over medium heat. Add shallots and mushrooms. Stir to coat all with butter/oil. Add half of the red wine and allow to simmer until nearly all of the wine is cooked into the mushrooms. Add remaining wine and cook down more until mushrooms begin to crisp just a bit. When they do, remove from heat and set aside.

Prepare quesadillas:
Lightly oil a large, flat skillet, place it over medium-low heat and place one tortilla on it.

Add toppings, starting with black beans (lightly mash them down to help them ‘stick’) then mushrooms, then topped with goat cheese. Add salt & black pepper, if desired.

Allow to heat up until goat cheese starts to get soft and maybe even a bit melty. Once it is, place another tortillia on top and lightly press down. 

Allow to cook another minute or so and then carefully flip. Let the other side cook for a minute or two and then remove from skillet. 

Allow to sit for a minute and then cut with a pizza cutter.

(makes 1-2 depending on the size of your shells)

3.15.2011

Lazy Lasagna

This is one of those times where i'm going to go on record saying that its really easy to make something that other people find difficult...

That thing is lasagna.  it seriously takes no brain power - just a bit of time.  and one day, i'll even get around to blogging about how easy it is...

but today is not that day.  because, ravioli lasagna?  its even easier...  like, i'm going to out on a limb and say that i think that, with a little help, even my 2.5 year old nephew could put this one together. (If i was in NC right now, i'd test it out, but i'm not so, um, sister, mom, dad?  someone get on that.  take pictures and video please because its going to be a legendary mess but i bet it will still taste good in the end...)  which is why i've dubbed it lazy - because the amount of effort required is so minimal that even the least motivated version of yourself can pull this one off.

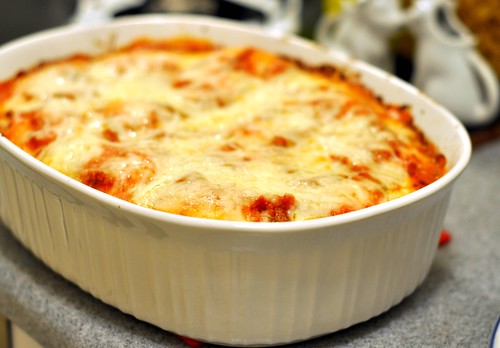
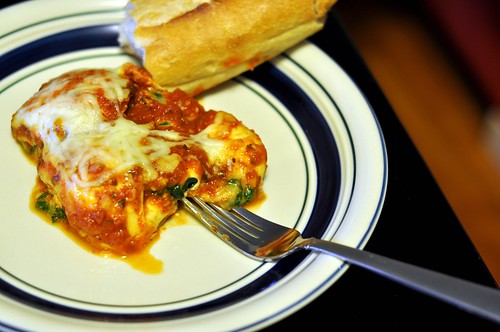
DSC_0245

In fact, I'm pretty sure this is one of those dinners where preheating the oven takes longer than actually assembling the dish - perfect for a weeknight, a sunday night or really any other time you can think of...

DSC_0256


Lazy Lasagna
courtesy of Real Simple - modified by me

1 tbsp olive oil
5 - 6 c fresh baby spinach*

~20 oz roasted garlic spaghetti sauce
2 packages large fresh ravioli - uncooked - (13 to 15 oz each package)
1.5 c shredded mozzarella
1/3 c of your favorite grated cheese - we used a combo of pecorino romano & parmesan

crushed red pepper, salt, black pepper (all optional depending on your taste and how spiced up your sauce already is)

***

Preheat oven to 350°

lightly grease 2.5 qt casserole dish if you are afraid of stickage.  Set aside.

Heat olive oil in a non-stick pan over medium heat and add the spinach in.  Stir around until just wilted and remove from heat. *

place ~ 1/3 of your tomato sauce in the bottom of the casserole dish

layer in half of your ravioli - make sure the bottoms of all of the ravioli are touching plenty of sauce (this is what allows them to cook in the oven)

top with all of your spinach

sprinkle with 1/2 of your grated cheese

sprinkle with 1/2 of your shredded mozzarella

place a few spoonfuls of sauce over the cheeses and spread as best as you can without making a mess of the cheese

sprinkle with crushed red pepper, salt & black pepper, if desired

layer in the rest of your ravioli

top with remaining tomato sauce.  Again, make sure that all ravioli are well-coated with sauce and that there are no naked edges showing.

top with remaining grated cheese

top with remaining shredded cheese

cover (either with your fancy casserole cover or with tin foil) and bake ~ 25 minutes.

Remove cover and bake for another 10 - 15 minutes until the cheese gets a little bit bubbly and maybe even a bit brown around the edges

Allow to cool for 5 minutes & then cut as you would normal lasagna and serve.

Serves 3 - 4 for dinner, depending on what you serve it with ;)

*note: for the 2.5 year old making it version, feel free to use frozen spinach, thawed and squeezed out

2.09.2011

Rosemary-Spiced Nuts

A number of years back, my friend Katie was having a few of us over for something - I cant remember if there was a reason or what, but I do remember that we were headed out to the burbs...  This was before my days of all things food, so when she announced that she was going to make us spiced nuts and other assorted appetizer-type foods, i was all 'who is this adult who has taken over katie's body???'

While i dont remember the details of the weekend, i distinctly remembered those nuts as they blew my mind...  something that never would have occurred to me - doctoring up a can of mixed nuts - was SO good!  its probably one of the moments i can pinpoint which led me to being the food-obsessed person i am now.  (the other would be the first time Roopa cooked me dinner way back when we were still crazy single party girls...)

Katie's original recipe came from a Nigella Lawson cookbook and was Nigella's take on the Union Square Cafe bar nuts.  Over the past 4 or 5 years, i've made rosemary-spiced nuts in varying ways - sometimes following Nigella, sometimes following any of the assorted other recipes you find when googling for spiced nuts or rosemary nuts.

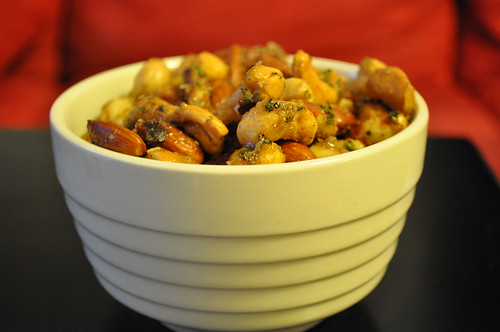
DSC_0011

After years of making so many variations, this version will be the one i stick to as this was the first time i didnt feel that i was missing something or had used too much of something..  They have enough heat without being over-powering.  Enough rosemary without tasting like a bush. Enough sweet to satisfy my need for all things sweet.  and enough butter to hold it all together but not so much that they make your hands greasy...   


Rosemary-Spiced Nuts
courtesy of google searches everywhere, as adapted by me
Click here to import recipe directly into Pepperplate


~1 lb assorted mixed nuts, roasted but not salted (we used almonds, cashews, brazil nuts, pecans & hazelnuts, i think...)

2 tbsp unsalted butter
2 tbsp light brown sugar
1 tbsp white sugar
1.5 tbsp fresh rosemary, chopped finely - a mezzaluna works wonders for this (note:  dried rosemary will not work well in this recipe.  If you cannot find fresh rosemary, my parents have a big bush of it in their backyard.  They'll never notice if you steal some...)
1/2 tsp cayenne
2 tsp fleur de sel (or other sea salt)
1/3 tsp ground white pepper (i'm sure you could use black)

***

Preheat oven to 350°
Spread nuts on a baking sheet and toast ~ 7 minutes until just fragrant.  (do not turn off the oven yet and dont put the baking sheet in the sink yet either)

while nuts are toasting, mix the butter & all of the sugar & spice in a saucepan.  Heat all over medium heat, stirring, until the butter melts and all of the sugar & spice is well combined.

when nuts are done toasting, throw them in the sauce pan & mix to coat the nuts.  continue mixing and 'cooking' for about 3 minutes.

Remove nuts from heat and spread back on the baking sheet.  Put them back in the oven for 3 - 4 minutes to bake the butter into the nuts.

Serve warm or room temperature.

2.05.2011

Eggs in Tomato Sauce

Yesterday, NYC issued yet-another winter storm warning... Ice all morning turning to rain in the afternoon. In an unusual moment of forethought, i turned to Jordan and suggested that we go shopping to ensure we had breakfast in the house because there was no way I was going to want to go out in ice and rain... that led to the inevitable "so what do you want for breakfast" conversation that, in most houses goes something like this:

What do you want for breakfast?
I dont know, what do you want?
Maybe XXX?
Nah, i dont want that
Ok, so what do you want?
I dont know - anything is fine.
Well, anything except XXX, right?
Yeah, whatever - anything...

etc etc etc.

(dont lie - you've had that conversation too...)

But this time, i was ready.  Ready to skip the conversation and move straight from "what do you want for breakfast?" to a decision.

I wanted eggs in tomato sauce.  and thankfully, he didnt say no.

A couple years back, I saw a recipe on Smitten Kitchen. She'd been at the Martha Stewart show and watched one of the producers make poached eggs in tomato sauce and had gone home and replicated the recipe... and i looked at it and though, 'thats a bit odd'...

then, sometime later, i was elsewhere on the internet and i saw something similar to it and thought 'maybe thats not so odd'...

and then one day, i was bored of everything else and made it. and it turns out, its not odd at all... since then, have adapted it into something way quicker/easier (read: jarred sauce, FTW!) Its something i've been making for so long that i actually had to look back and make sure i hadnt blogged it already...

So, imagine my amusement when we were flipping through that book that i've raved about time and time again - Mad Hungry - Feeding Men & Boys and found out that the recipe Smitten Kitchen posted - its in there... and it makes sense - she is/was a producer on the Martha Stewart Show, and that probably means that woman who made it that morning she was there? Probably Lucinda...

This recipe is so simple and the way i've adapted it, you probably already have everything you need in your kitchen...  It can be made to feed one or it can be made to feed 7.  Can be breakfast, can be dinner.  Could be served vegetarian benedict-style over an english muffin with spinach in the middle or eaten alone.  the eggs can be left super-runny (poached, if you will) or cooked more for those who are runny-yoke-adverse...  If your family is split on preferences, everyone can have their own version with just a little more work...

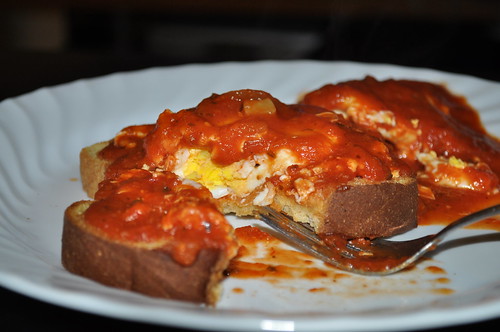
DSC_0845

it feels like so much more than just eggs and toast, but its not much more difficult.  not at all.  
and the possibilities are endless.  


Eggs in Tomato Sauce
courtesy of me, inspired, as it turns out, by Lucinda Scala Quinn

1/2 jar tomato sauce (i like Newman's Own Roasted Garlic for this)
~ 1/4 c water
pinch of crushed red pepper (optional)

5 eggs

5 slices bread

salt & pepper (optional)
parmesan cheese (optional)

***

Pour tomato sauce, water and crushed red pepper into a heavy frying pan over medium heat. Stir to combine.

Allow to heat up and sauce to thicken just a bit, stirring once or twice.

Once sauce has thickened every so slightly and is bubbling a little bit, lower heat a smidge to medium-low and carefully break eggs into the sauce.  Hold the eggs close to the sauce as you break them (this isnt the time to show off your 1-handed egg breaking skills) to minimize the fall so that the yolk stays together and the white doesnt spread out very far.

Cover the pan and set your timer for about 5 minutes.

Throw your bread in the toaster.

After 5 minutes, your whites should be pretty much cooked.  If you are interested in having runny yolks, you'll probably want to pull them out at this time.  If you are like me and are very runny-white adverse and therefore, paranoid, allow to simmer another minute or two.

Spoon each egg over once piece of toast and divide the remaining sauce among the eggs.

Sprinkle with salt, pepper & parmesan, if desired.

2.02.2011

Gougères

Have you had gougères?  I bet you think they're hard to make, what with all the puffy, cheesy, yumminess...

you are so wrong.

(if you havent had them, puffy, cheesy, yumminess pretty much sums it up...  and now you know you want them...)

Jordan and I were both, separately, first introduced to gougères at Artisanal...  (i'm pretty sure our marriage is based on a joint love of that place...)  But Jordan was the one who decided that he wanted to make them at home...  and i was all, 'knock yourself out, dude, but leave me out of it!'.

and so, one day, i came home to gougères.

That was a good day.

They were supposed to make more appearances but we never seemed to get it together at the right time, etc, so it wasnt until we went to Miette Culinary Studio and took the gnocchi class (a birthday present from him to me that we put off until after the wedding diets were over...) that they reappeared.  and i got to see, first-hand, just how not-hard they really were...

Fast forward another month when, for Christmas, i recieved the book that the entire food-blogging world had been talking about for 3 months - Around My French Table by Dorie Greenspan.  Despite it being far from vegetarian-friendly and our over-abundance of cook books, it was one of the only things i actually asked for this christmas...  between the gorgeous pictures i'd seen while flipping through it, the glowing reviews of all things Dorie and especially this book, and our 2 week culinary adventure in Paris, i REALLY couldnt wait to get my hands on this book...

So imagine our amusement when the very first recipe in the book was for the one french thing we actually knew how to make!  Gougères!  ha!  we were thrilled to see that Dorie's recipe mirrored all the recipes we'd used prior (it made us feel smart & capable!!!) and it was just the motivation we needed to make them again.

gougeres-edit
IMG_4316

Dorie gives great instructions at the end for how to pre-make gougères and freeze them for later consumption...  We havent gotten that far yet (though i've included the instructions for you below) but it really is pretty much the greatest thing ever to consider that you could make a big batch of these, store them in the freezer and then pop a few in any time you wanted the puffy, cheesy, yumminess that is gougères...


Gougères
courtesy of Dorie Greenspan - Around my French Table with teeny modification based on instructions at Miette Culinary Stuido

1/2 cup whole milk
1/2 cup water
8 tablespoons (1 stick) unsalted butter, cut into 4 pieces
1/2 teaspoon salt

1 cup all-purpose flour

5 large eggs, at room temperature

1 1/2 cups coarsely grated Gruyère, divided

***

Preheat the oven to 425°.  Make sure rack is in the center.

Line a baking sheets with parchment

Bring the milk, water, butter, and salt to a boil in a heavy-bottomed  saucepan over high heat.

Add the flour all at once, lower the heat to medium-low, and immediately start stirring energetically with a wooden spoon or heavy whisk. The dough will come together and a light crust will form on the bottom of the pan. Keep stirring—with vigor—for another minute or two to dry the dough. The dough should now be very smooth.

Turn the dough into the bowl of a mixer fitted with the paddle attachment or into a bowl that you can use for mixing with a hand mixer or a wooden spoon and elbow grease. (we went with a hand mixer & wooden spoon combo at home but had done them with the mixer at Miette)

Let the dough sit for a minute, then add the eggs one by one and beat until the dough is thick and shiny. Make sure that each egg is completely incorporated before you add the next, and don't be concerned if the dough separates—by the time the last egg goes in, the dough will come together again.

Beat in 1 1/4 c of the grated gruyère.

Place the dough in a pastry bag (or, if you dont have one, in a gallon-sized ziplock with the bottom corner cut off just a bit).  Squeeze about 1 tablespoon of dough for each gougère, leaving about 2 inches of space between the mounds.  Sprinkle each mound with a couple shreds of gruyère.

Slide the baking sheet into the oven and immediately turn the oven temperature down to 375°.

Bake for 12 minutes, rotate the pan front-to-back to ensure even cooking.

Continue baking until the gougères are golden, firm, and puffed - another 12 to 15 minutes or so.

Serve warm, or transfer the pans to racks to cool.  (note:  yeah right - has anyone actually had them last long enough to cool???)


Storing (straight from Dorie)
The best way to store gougères is to shape the dough, freeze the mounds on a baking sheet, and then, when they're solid, lift them off the sheet and pack them airtight in plastic bags. Bake them straight from the freezer—no need to defrost—just give them a minute or two more in the oven. Leftover puffs can be kept at room temperature over night and reheated in a 350-degree-F oven, or they can be frozen and reheated before serving.

1.29.2011

Pasta e Fagioli

growing up, the italian side of my family was pretty influential...  a few generations removed from italy, i was quite american, as my my dad married a non-italian girl making him pretty american (and obviously, that girl he married wasnt italian), but then there were my grandparents...  neither was born in italy, but i believe their parents were, so they'd grown up pretty italian.  and marrying eachother, they carried some of that into their own household.  which means once i was old enough to spell, they would speak italian around me so that i didnt understand...  (in hindsight, this excluded my mom as well...  hmmm...)

anyway, despite my lack of any semblance of fluency in italian, there are certain words that i learned quite differently than you probably did...

we all know what mut-za-rell (mozzarella) is, but do you know what a ri-gut is?  how about mana-gut?  how about Jordan's favorite - gan-ool?

No?  well, thats how my italian grandmother says ricotta (though, actually, we mostly called it pot cheese, which is apparently a cousin of ricotta...), manicotti and, jordan's favorite - cannoli...

and thats how i said all of those things until probably some time in high school when i discovered the Olive Garden or something...

anyway, whats my point?  Oh, i'm getting there - i promise...  anyway, when i was in high school, my father used to make us pastavazool...  and just like manicotti and canolli before it, i had no earthly idea that it was not spelled the way it sounded.  in fact, i dont think that i knew that it was something that anyone other than my family ate.  i mean, it was called pastavazool for chrissake - my dad must have made that up, right?  that word cant be real, can it?

So imagine my non-italian high-school boyfriends amusement when we were at his house one day, raiding the pantry, and i pulled out a can and asked him what 'pasta E fag-e-oli' was...  he's all - 'are you kidding?  your dad makes it all the time!'  and i'm all like, 'HUH?  thats how you spell that???  for real???  how in the world is pasta e fagioli possibly pastavazool???'

anyway, i dont know that i'd had pasta e fagioli since high school but during this past week, when it was snowing - YET AGAIN - i wanted something warm and hearty...  and i got pasta e fagioli in my head and went recipe searching...  yet nothing i found was really right.  pasta e fagioli translates to 'pasta with beans', so why was i finding so many recipes with MEAT in them?  or weird spices?  or no tomatoes?  or - the weirdest one of all - pureed beans?  wha-?  none of them lived up to my memory, so i set out to create my own...  a little from here, a little from there and a lot from my memory...

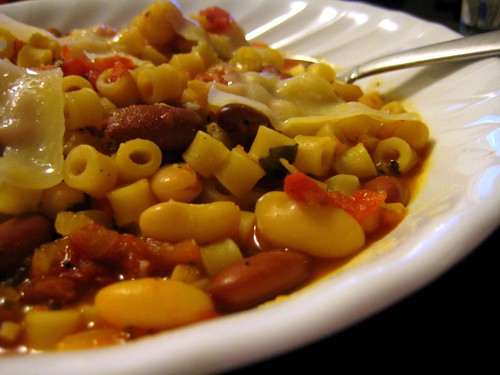
IMG_4387

In the end, i dont know how close i was to what my dad used to make, but what i came up with is definitely "pasta with beans", heartier than a soup, 100% vegetarian (and would be vegan if you skip the parmesan on top) and exactly what a cold, snowy night calls for.


Pasta e Fagioli
courtesy of me
click here to import recipe directly into Pepperplate

~ 2/3 of a box of ditalini pasta

1 - 2 tbsp olive oil
3/4 of a vidalia onion, diced
1 small carrot, diced
1 small celery heart, diced
4 cloves garlic, smashed & roughly chopped

1.5 tsp minced fresh sage (or .5 tsp dried sage)
1.5 tsp minced fresh oregano (or .5 tsp dried oregano)
1 tbsp minced fresh rosemary (or 1 tsp dried thyme.  dried rosemary isnt so great...)
1 tsp dried basil (or 1 tbsp fresh basil)

1 can stewed tomatoes (not drained)
2 c vegetable broth, divided (feel free to use chicken or beef broth if you are not vegetarian)
1 can diced tomatoes, drained
1 can cannelini beans
1 can red kidney beans

~ 12 turns of a pepper grinder - probably about 1/2 tsp if you do not have freshly ground pepper
1/2 tsp crushed red pepper (optional)
2 - 3 dashes tabasco (optional)

***

These directions are incredibly flexible.  Below i'm giving you approximate cooking times, but all were determined by how long it took me to get to the next step...

Prepare pasta - cooking ~ 3 minutes less than the time indicated on the box for al dente pasta.  Set aside.

In a large, heavy pot (i used this one) heat oil over medium - medium-high heat until it shimmers

dump in the onion, stir briefly to coat all with oil and let it cook while you chop up your carrot, celery and garlic.  (for me, this was about 5 minutes...)

Add the carrots, celery and garlic & stir to combine.  let it cook while you start chopping herbs - again, probably about 5 minutes.  The veggies will be soft and might start to brown every so slightly.

Add the chopped herbs.  I used the fresh/dried combination shown above because its what i had on hand...  see my notes above about exchanges you can do between fresh & dried herbs...

mix and cook ~ 1 minute

Add the stewed tomatoes & their juices along with 1 c of the broth.  Break up the tomatoes with a wooden spoon and allow to cook ~ 5 minutes.

Briefly remove from heat and puree ~ 1/3 - 1/2 of what is in the pot.  You want to break up any large chunks of anything but not reduce it to mush...  You can do this in a blender, food processor, with an immersion blender - whatever works for you - just be careful as the liquid is hot!

return the entire thing to the pot and return the pot to medium heat...

simmer 2 - 3 minutes.

add the drained diced tomatoes, the remaining cup of broth & both cans of beans (dont forget to rinse them)
along with ~ 12 turns of the pepper grinder (in a cooking class we took at Miette Culinary Studio we learned that fresh pepper should be used in a ratio of 3 turns of the grinder per serving as this is what most people will ask for in a restaurant.  I always like to leave a little room, so i dialed it back to the equivalent of 4 servings worth of pepper because you can always add more later...  and jordan did...)

add the crushed red pepper & tabasco, if desired.  stir to combine and allow to simmer another few minutes.

Add the not-quite-cooked pasta, stir to combine and allow to simmer ~ 5 more minutes.  Taste the pasta to ensure that it is cooked through and once it is, remove from heat.

Serve with freshly shaved parmigiano reggiano (if you have it or any other grated cheese if you dont) and crusty bread.

reheating note:  this reheats fantastically.  I packed some up for lunch - added a generous amount of parmesan cheese to it while it was still cold - and reheated it in the microwave at work for about 2 minutes, stirring once.

7.13.2010

Garlic Soba Noodles

backstory:
I hate chard. i hate kale. i hate these items so much that i've become legendary among some of the CSA members (ok, the core group cause we all talk. a lot.) in my hatred.
Last season, i even had a standing deal with another girl - i'd always leave behind my greens and she could always have them.


this, my friends, is the best example i can give you to show how dedicated we are to using as much of the CSA produce as possible...

DED-I-CAT-ED.

this is the year i'm going to learn to like kale, chard and all that other crap that i cannot stand...

(and yes, i've tried to make kale chips and no, i dont like them. and yes, i've tried to saute with butter, oil, garlic, whatever and no, i dont like it...)

Its kind of amazing, this 'we're using it ALL, dammit' initiative... i mean, our fridge is only 3/4 of the way full today. and CSA isnt even until tomorrow... i cant tell you the last time that happened...

anyway, moving on...

someone posted this to our google distribution list (i think...) and i figured well, no time like the present...

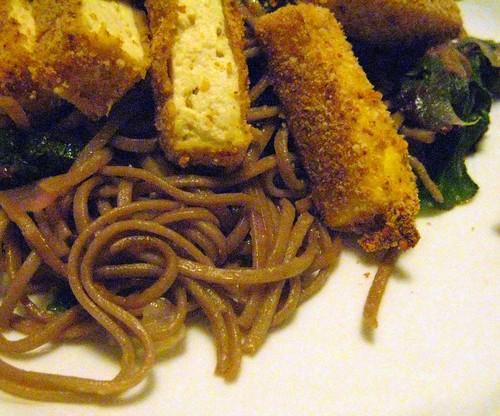
IMG_3693
(sorry for this picture - clearly i forgot how to use my camera when photographing this one!)

the miracle of it? i actually liked it. as in, 'would make it again, i'm sorry that we didnt get chard last week'... as in, my only complaint about the dish wasnt "ick, chard!" rather was - 'hmm, i think that tofu needs some more flavor next time...' (suggestions welcome, by the way...)


Garlic Soba Noodles
courtesy of 101 Cookbooks, minor mods by me

8 ounces dried soba noodles

3/4 cup bread crumbs
1/4 cup grated Parmesan
big pinch of salt
pepper
12 ounces extra firm organic tofu, cut into 6 rectangular slabs
2 eggs, lightly beaten

a generous splash of olive oil
a few spring onions, greens trimmed, thinly sliced
1 head spring garlic, minced
4 big handfuls of swiss chard - destemmed and cut into bite-sized pieces

1/2 cup grated Parmesan, divided

a few baby radishes, sliced thin

***

Preheat oven to 375°

Combine the bread crumbs, 1/3 c of the parmesan, salt & some pepper in a shallow dish.
Dunk pieces of tofu in the egg and then press into the bread crumb mixture, making sure each piece is thoroughly coated with crumbs.

Place pieces on parchment-lined baking sheet.

Bake in oven, flipping once. Baking will take 30 - 45 minutes, depending on the thickness of your tofu and your personal tofu texture issues. At a minimum, breading should be golden. (I like mine cooked longer than some others as i cannot stand mushy tofu...)
Slice into strips and set aside.

Cook soba noodles according to instructions or until just tender. Drain and set aside.

Add the olive oil and bit of salt (if desired) to a large skillet over med-high heat.
Stir in the green onions, chard and garlic and cook for a minute until the chard begins to wilt.

Stir in the cooked soba noodles. Stir in the remaining parmesan. Remove from heat.

Sprinkle with sliced radishes.

Serve noodles with slices of tofu over top.
Related Posts Plugin for WordPress, Blogger...